ShapeSync
Chapter 10: Document Storage and Outfit Tag / Priority (Outfit Conflict Control and State Storage/Restoration)
← Back to Tutorial Index | ← Chapter 9: Advanced VRM Integration (Expression and Physics Configuration and Verification)
This chapter explains how to configure Outfit Tags and Priority to control wearing regions and precedence among multiple outfits, as well as the procedure for Document storage and loading to save and restore a character’s current wearing and deformation state (Shapes and Outfits) entirely as an asset.
- First Half (VRoid Studio / ShapeSync Editor): Prepare and register separate outfit VRMs for the upper-body top (
Tops1) and lower-body skirt (Skirt1), and configure Tags (upperchest,lowerchest) and Priority. - Second Half (Unity / ShapeDirector): Verify outfit conflict and exclusive display in Play Mode, save current wearing states as Document A (
ShapeSyncDocumentA) and Document B (ShapeSyncDocumentB), and confirm that they can be loaded and restored in one click from an empty Template List state.
1. Introduction (Outfit Conflict Control and Role of Document)
1.1 Priority and Tag Exclusive Control for Outfits
When having a character wear multiple outfits simultaneously (tops, bottoms, dresses, etc.), it is necessary to control “which body regions conflict” and “which outfit is displayed when a conflict occurs.”
- Tag (Conflict Region): An identifier defining “which region conflicts” (e.g., upper body
upperchest, lower bodylowerchest). Outfits sharing the same Tag become subjects of conflict. - Priority (Precedence): A numerical value determining “which outfit takes precedence” when a conflict occurs. The outfit with the higher numerical value takes precedence, and outfits with lower values are automatically hidden (excluded).
- Separation of Logical Registration and Visual Display: Even if multiple Templates are registered simultaneously in ShapeDirector, visual display on screen is automatically organized through Tag and Priority exclusive evaluation.
1.2 Role of Document
- What is Document: A data format that records the current outfit, body proportions (Morph / FBM / PBM), materials, and other states of a character collectively into a single file (
.asset). - Saving and Loading: By saving a Document, you can instantly switch to a desired coordinate or body proportion simply by loading the Document, without needing to swap individual Templates manually.
2. VRM Preparation for Tops1 and Skirt1 and Mesh Outfit Registration
2.1 VRM Preparation in VRoid Studio
Prepare the upper-body Tops1 and lower-body Skirt1 as separate outfits.
Tops1(4 types in total): Because it is affected by chest deformation (BreastSizePBM), export a total of 4 types including Base / FBM and PBM follow versions:- Equip Tops on
BasicFemale.vroidand export asTops1BasicFemale.vrm(Figure 10-1, Figure 10-2). - Equip Tops on
SampleI.vroidand export asTops1SampleI.vrm(Figure 10-3). - Equip Tops on
BreastSizeBasicFemale.vroidand export asTops1BreastSizeBasicFemale.vrm(Figure 10-4). - Equip Tops on
BreastSizeSampleI.vroidand export asTops1BreastSizeSampleI.vrm(Figure 10-5).
- Equip Tops on
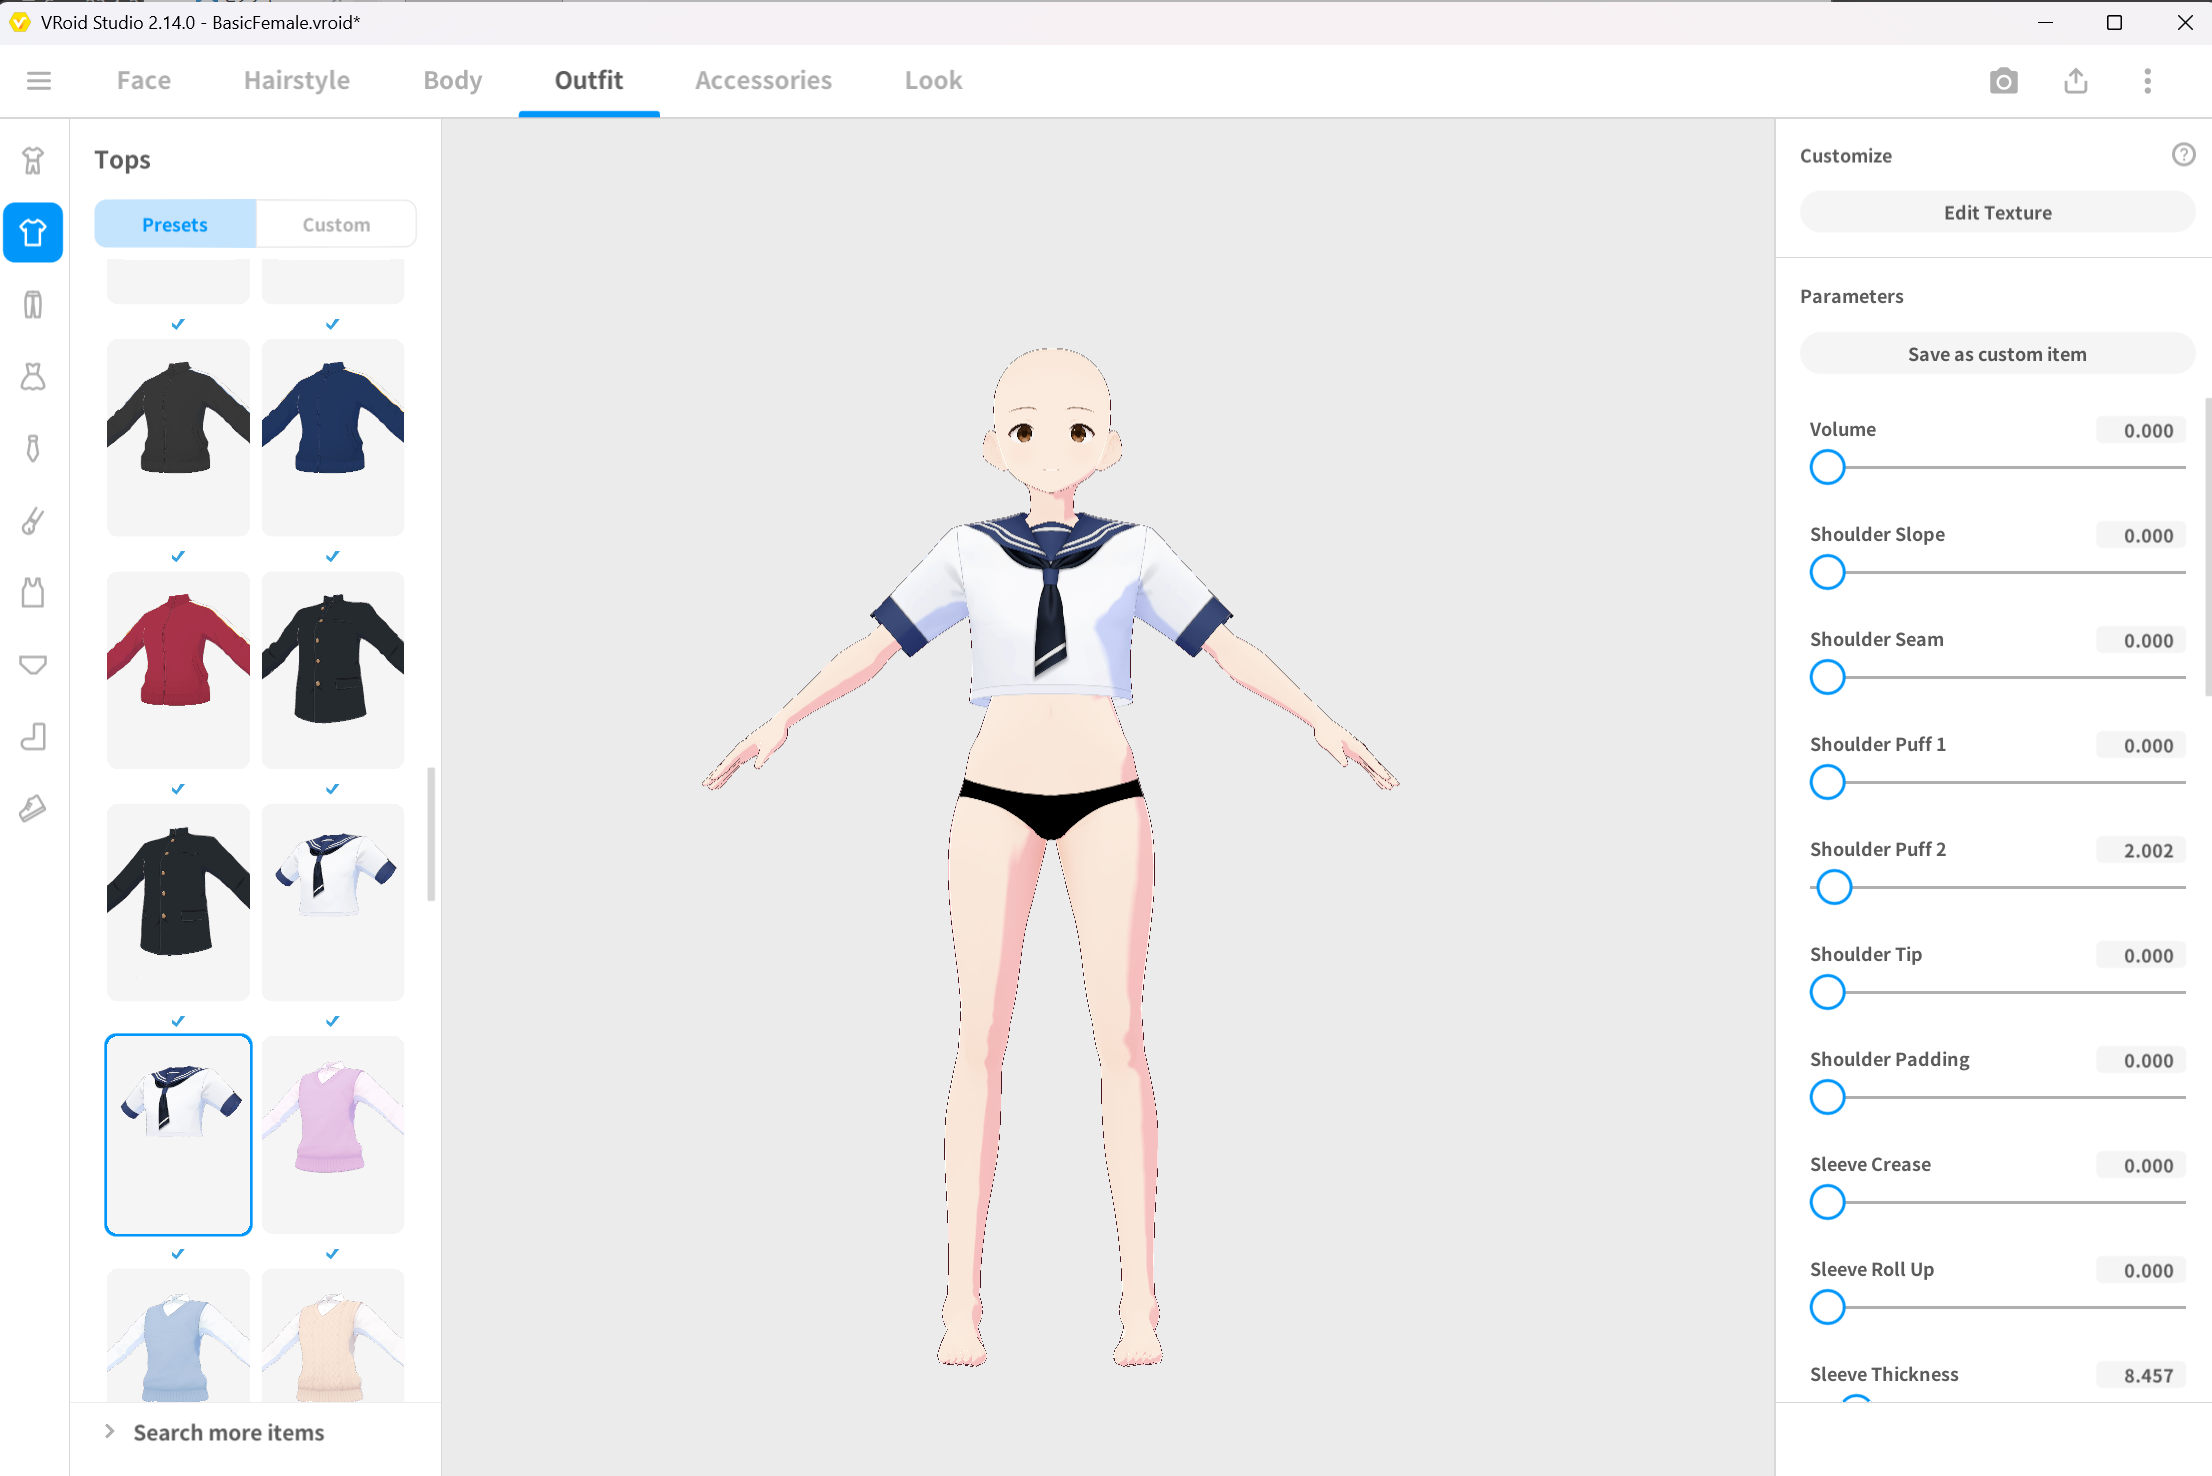 ▲Figure 10-1: Equipping Tops on BasicFemale
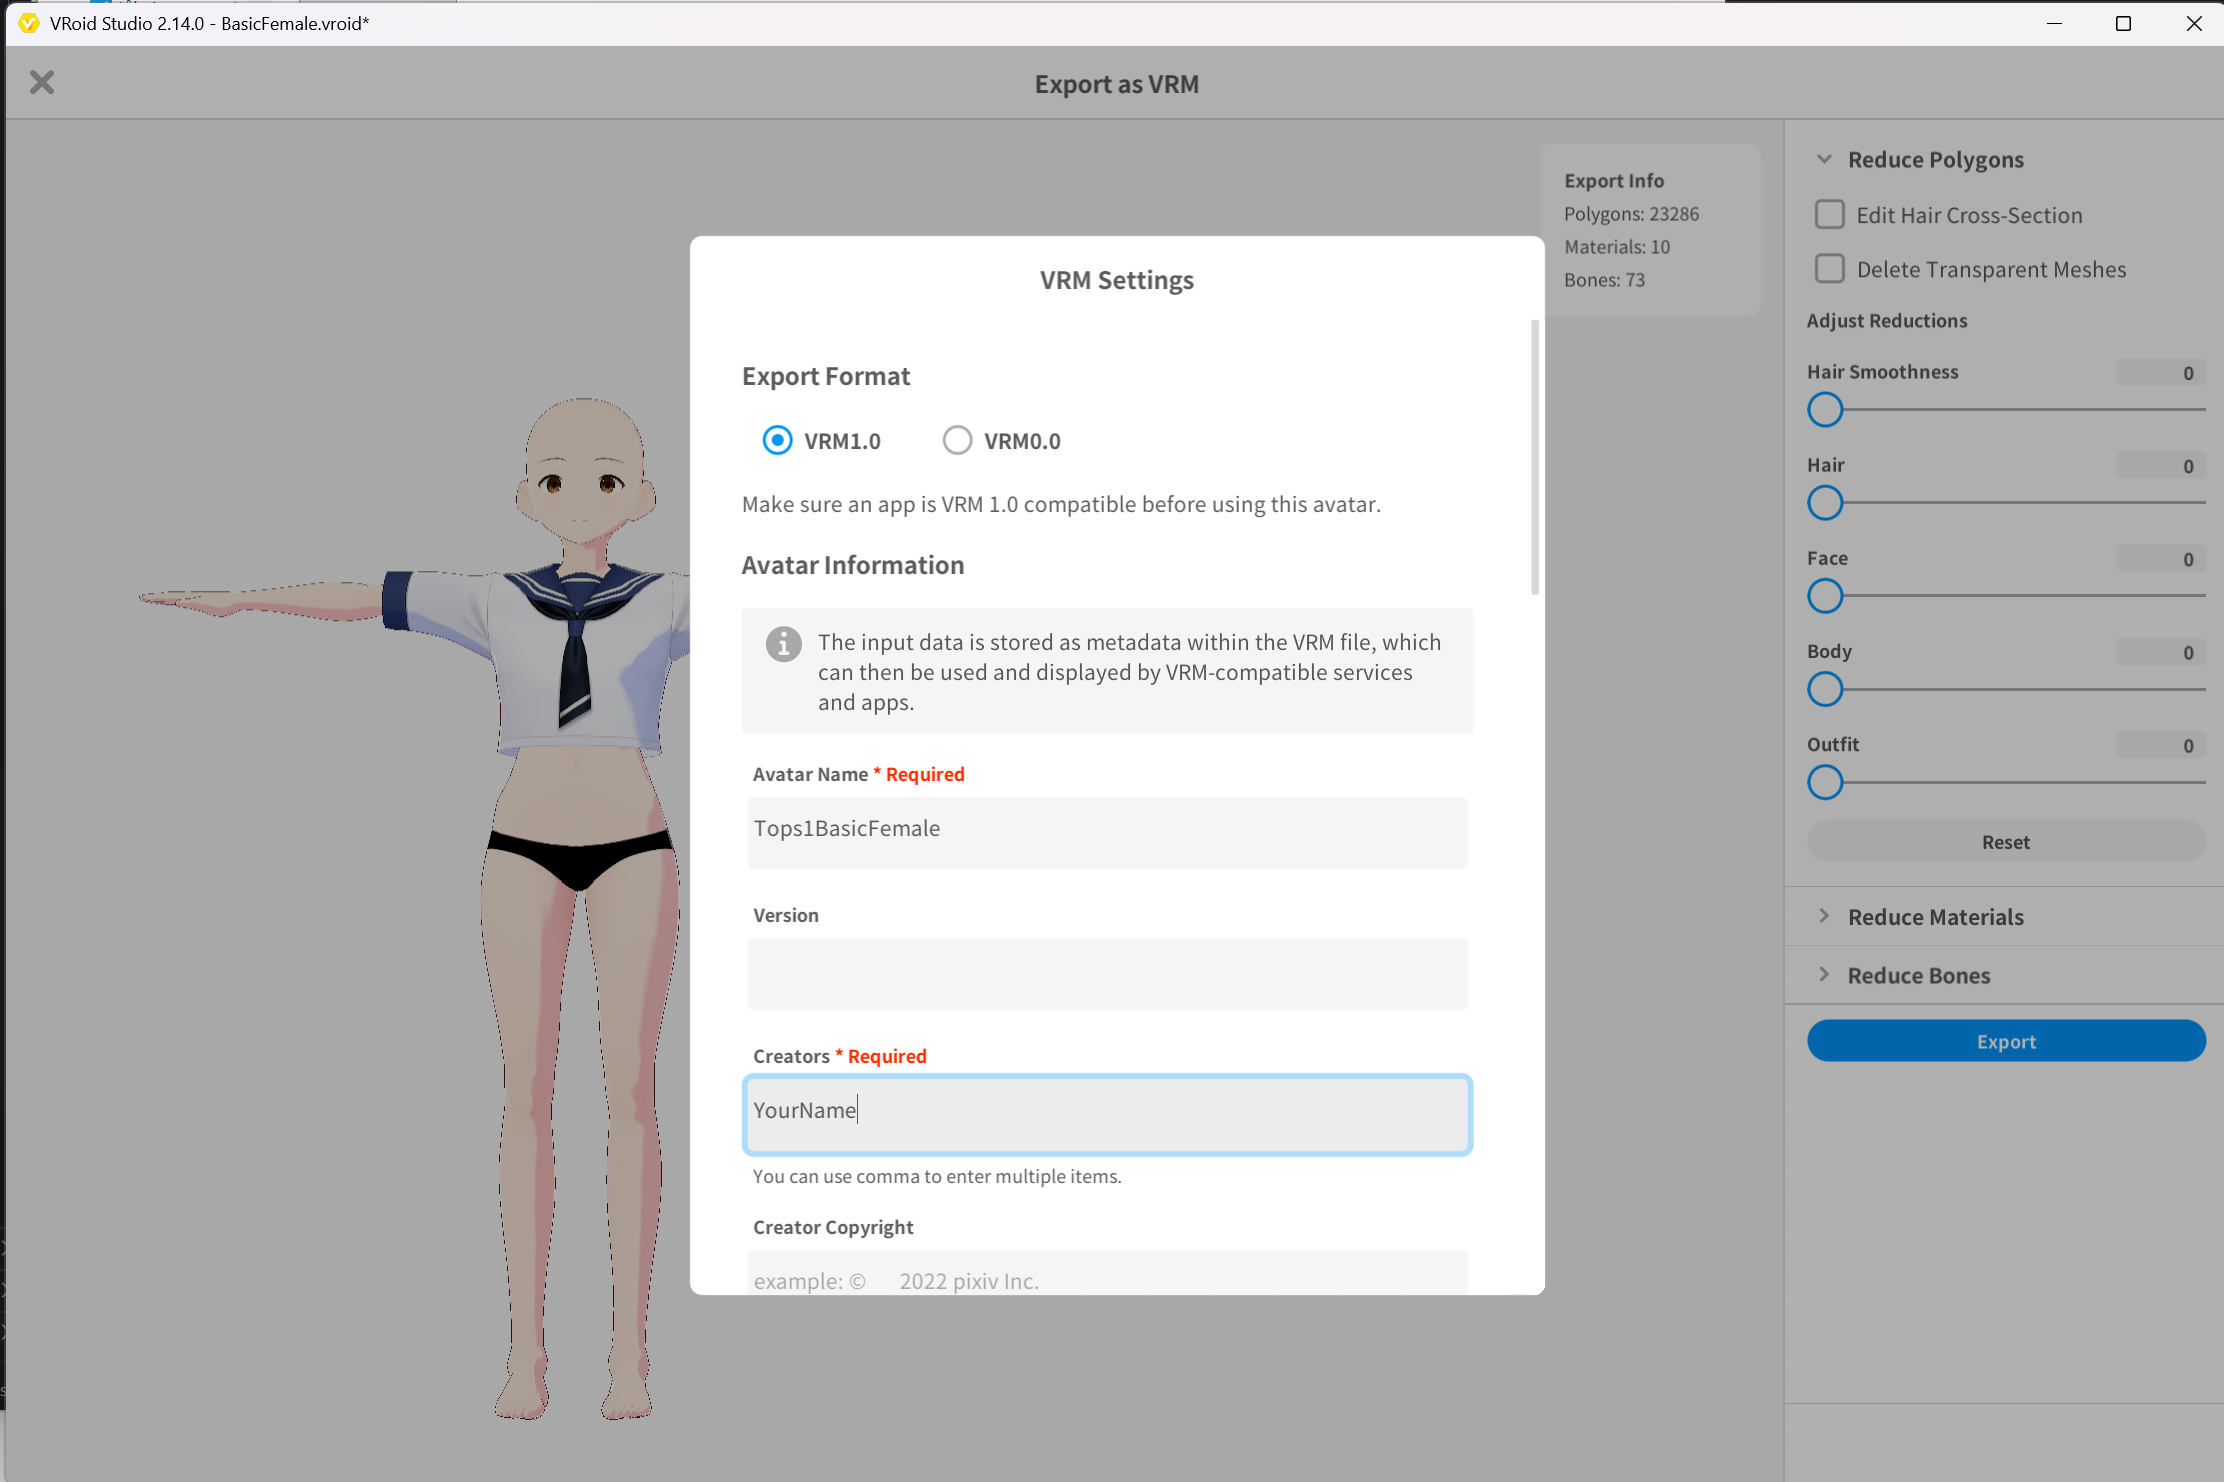 ▲Figure 10-2: Saving Tops1BasicFemale.vrm
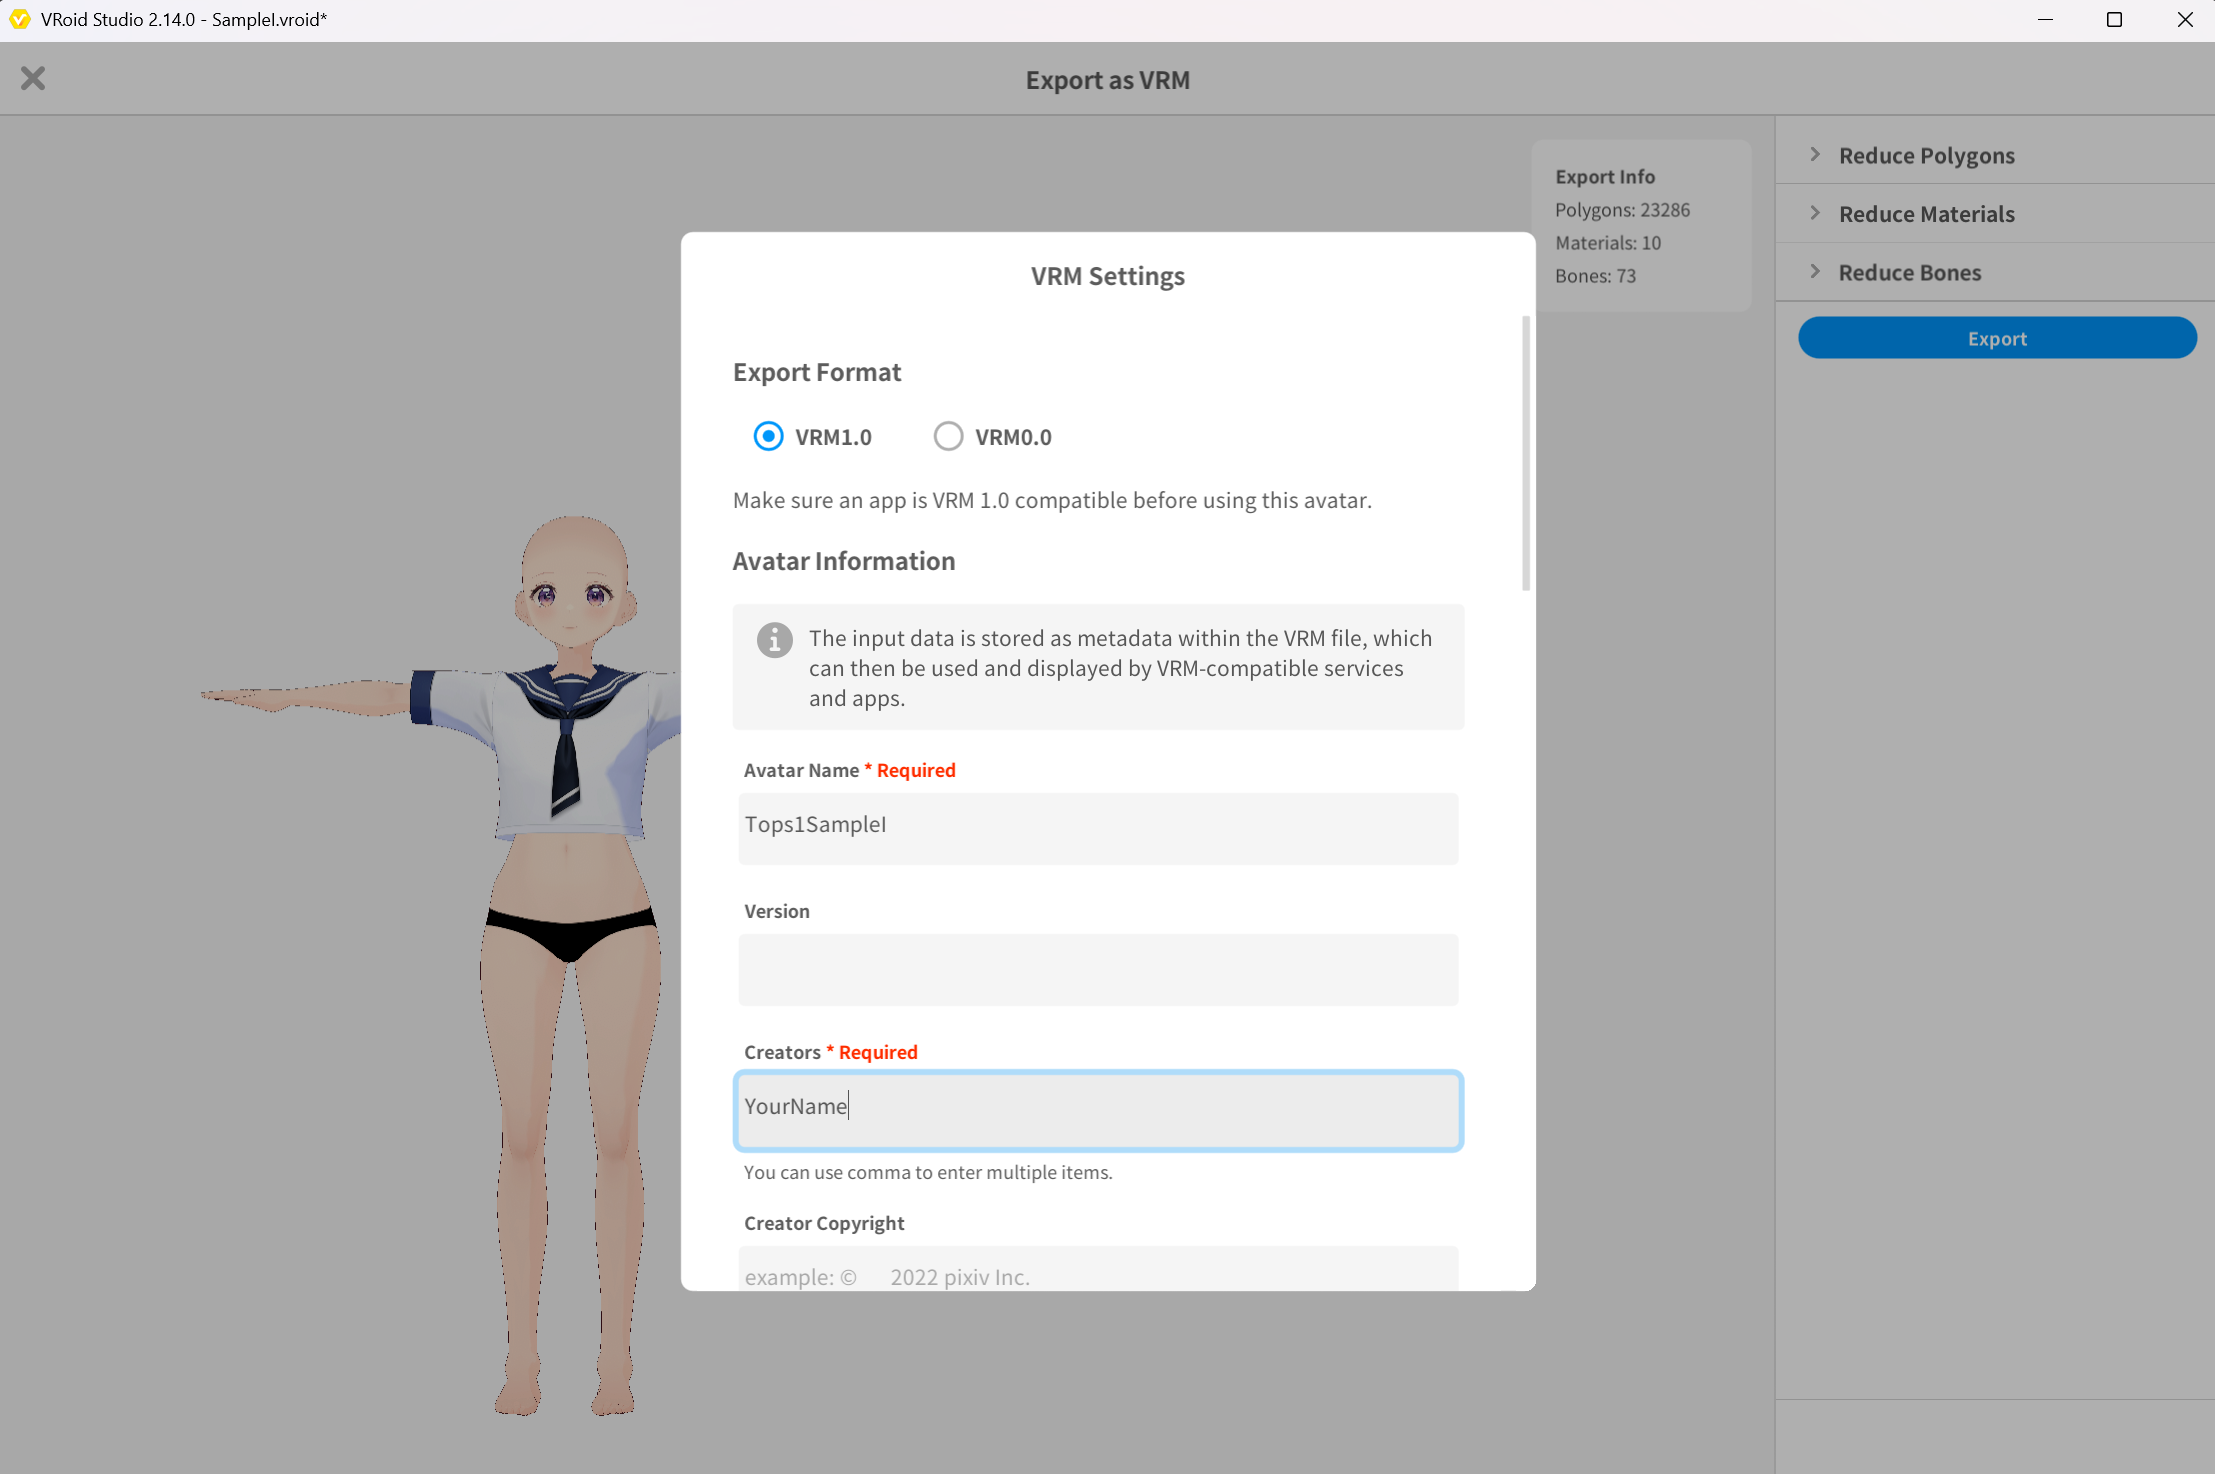 ▲Figure 10-3: Saving Tops1SampleI.vrm
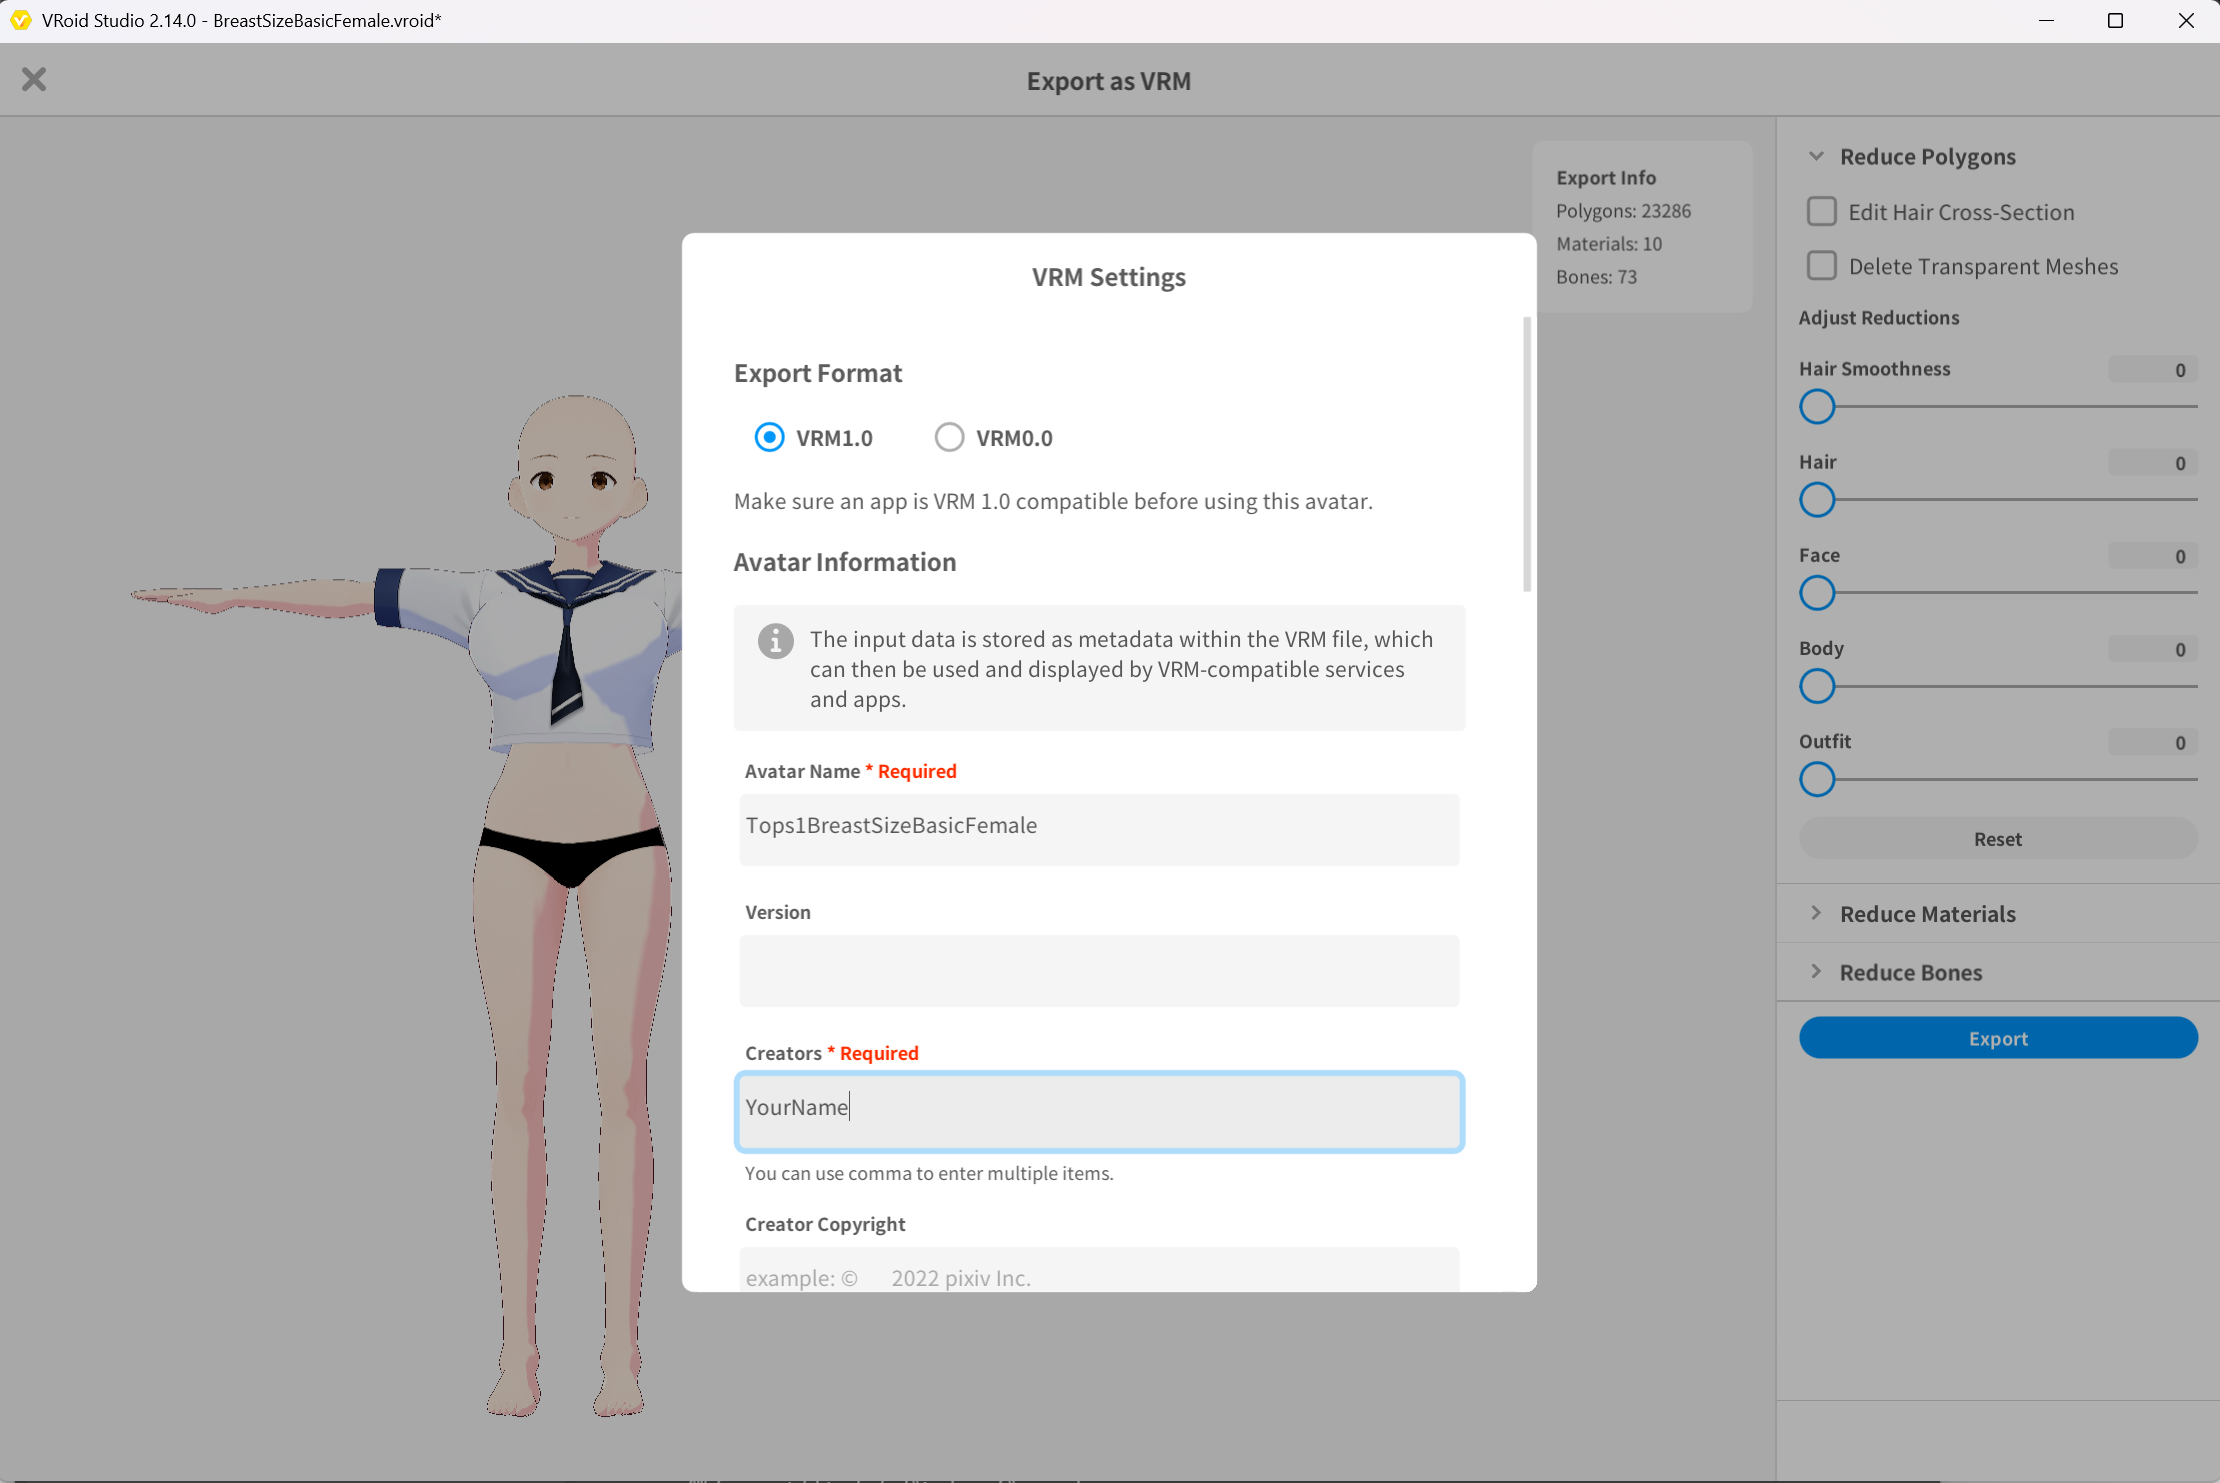 ▲Figure 10-4: Saving Tops1BreastSizeBasicFemale.vrm
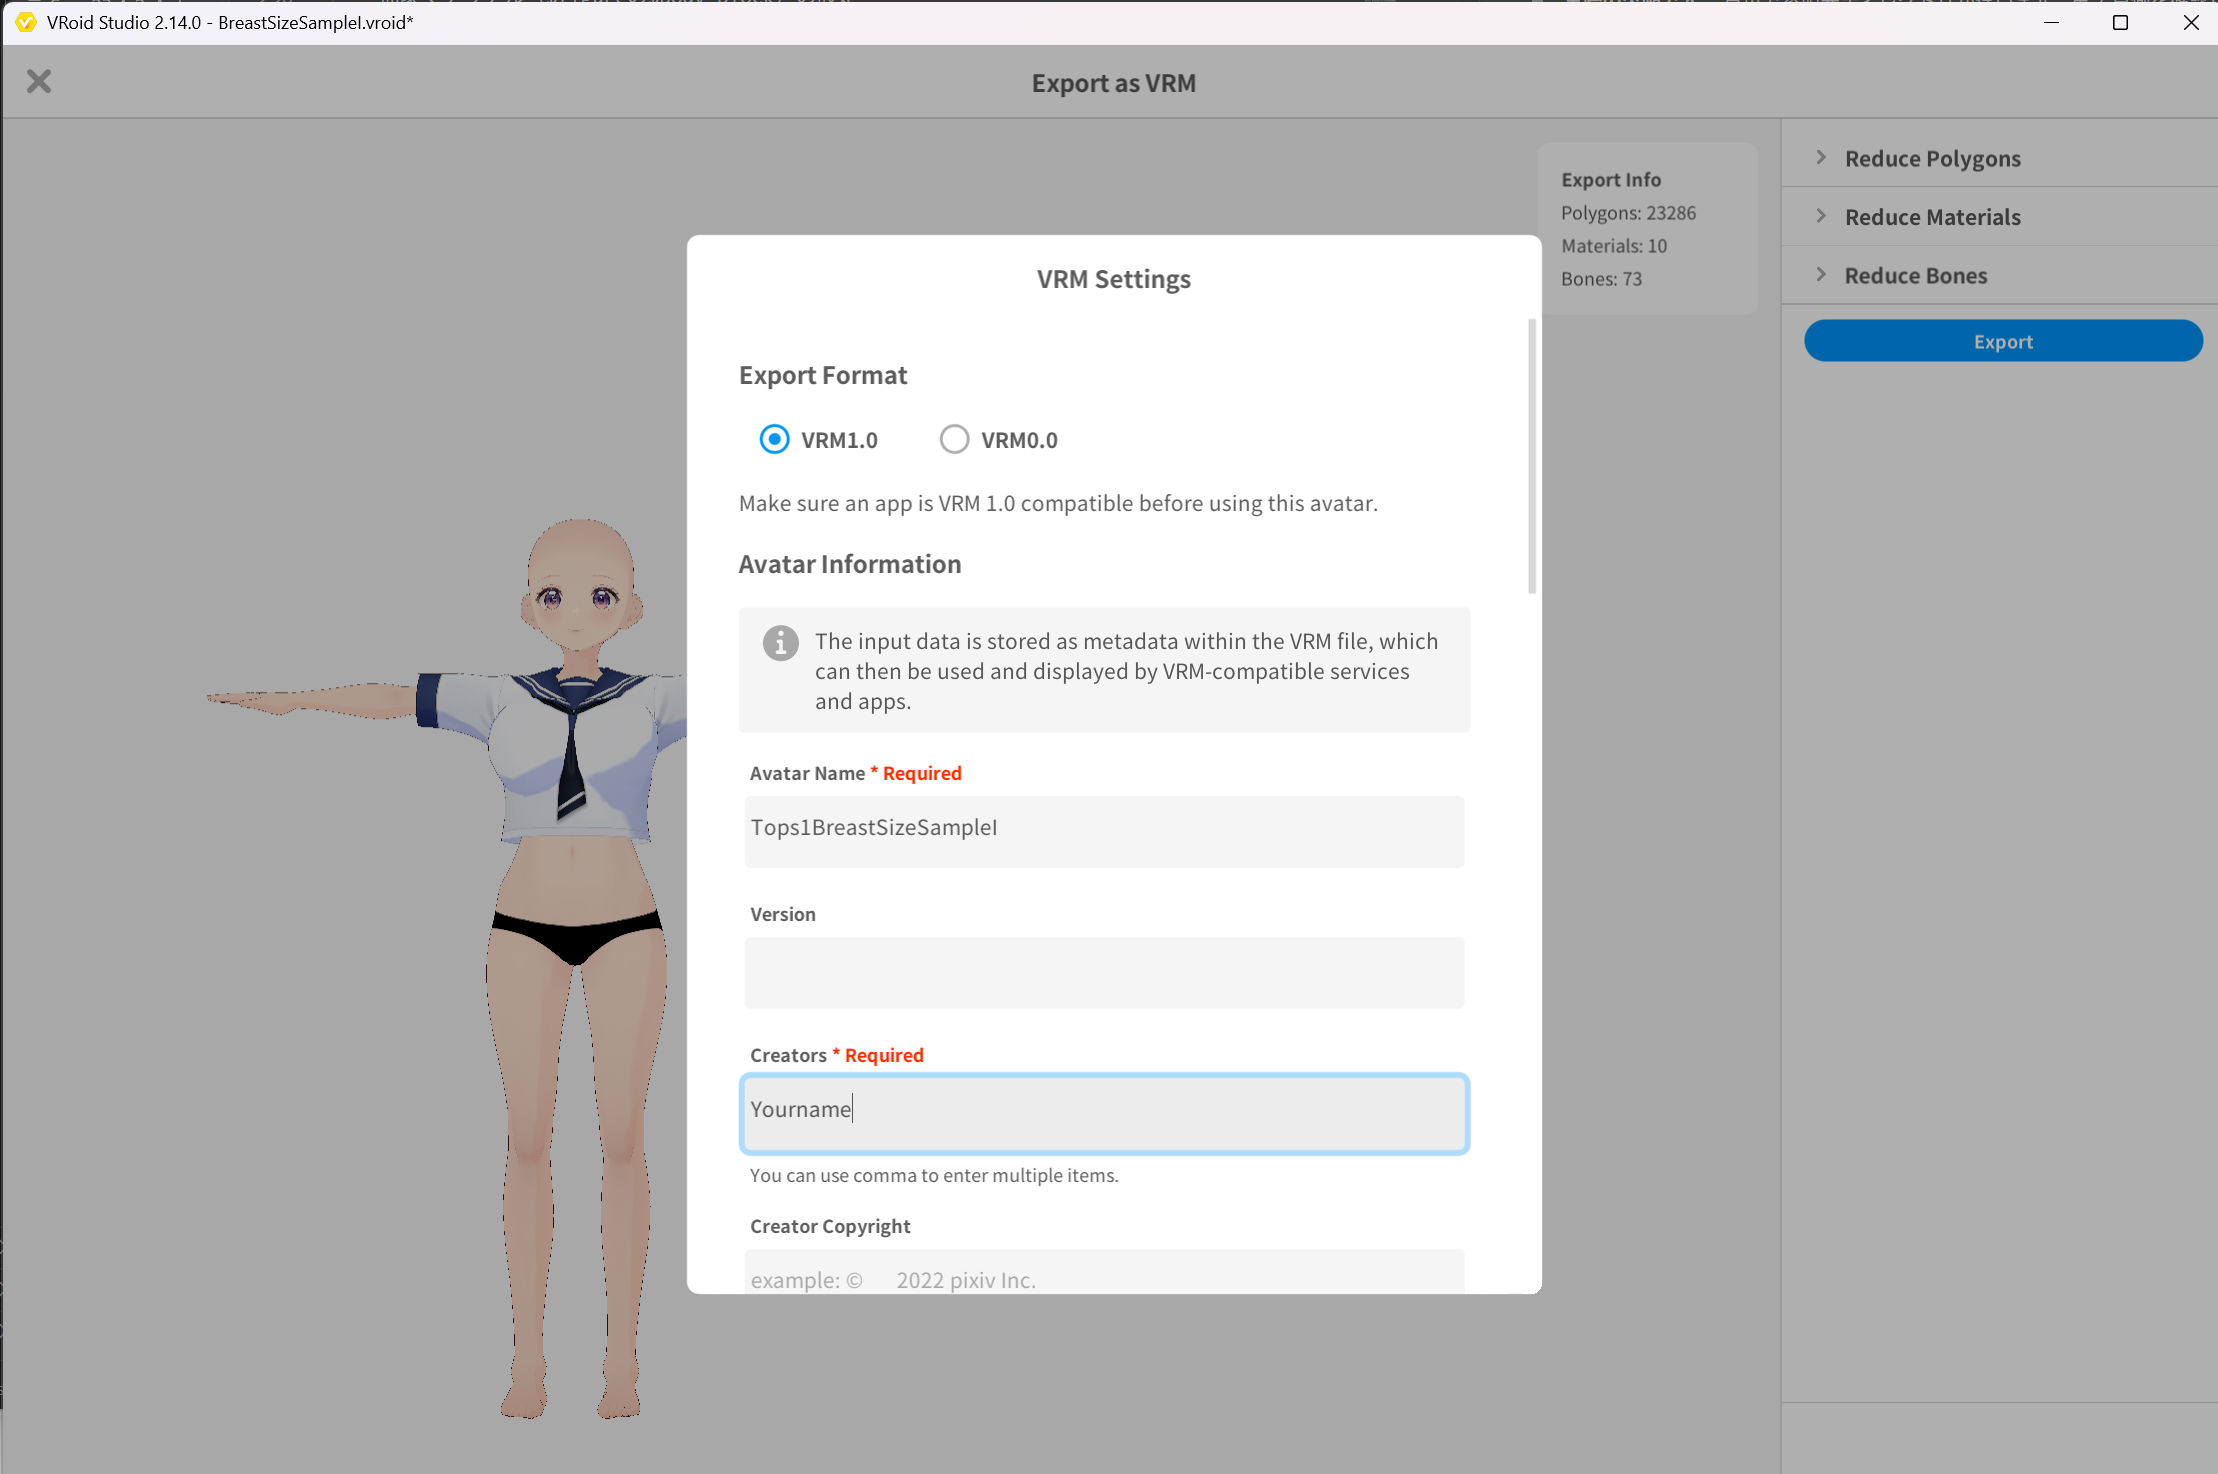 ▲Figure 10-5: Saving Tops1BreastSizeSampleI.vrm
Skirt1(2 types in total): Because it is not affected by chest deformation (BreastSize), export a total of 2 types for Base / FBM:- Equip Skirt on
BasicFemale.vroidand export asSkirt1BasicFemale.vrm(Figure 10-6, Figure 10-7). - Equip Skirt on
SampleI.vroidand export asSkirt1SampleI.vrm(Figure 10-8).
- Equip Skirt on
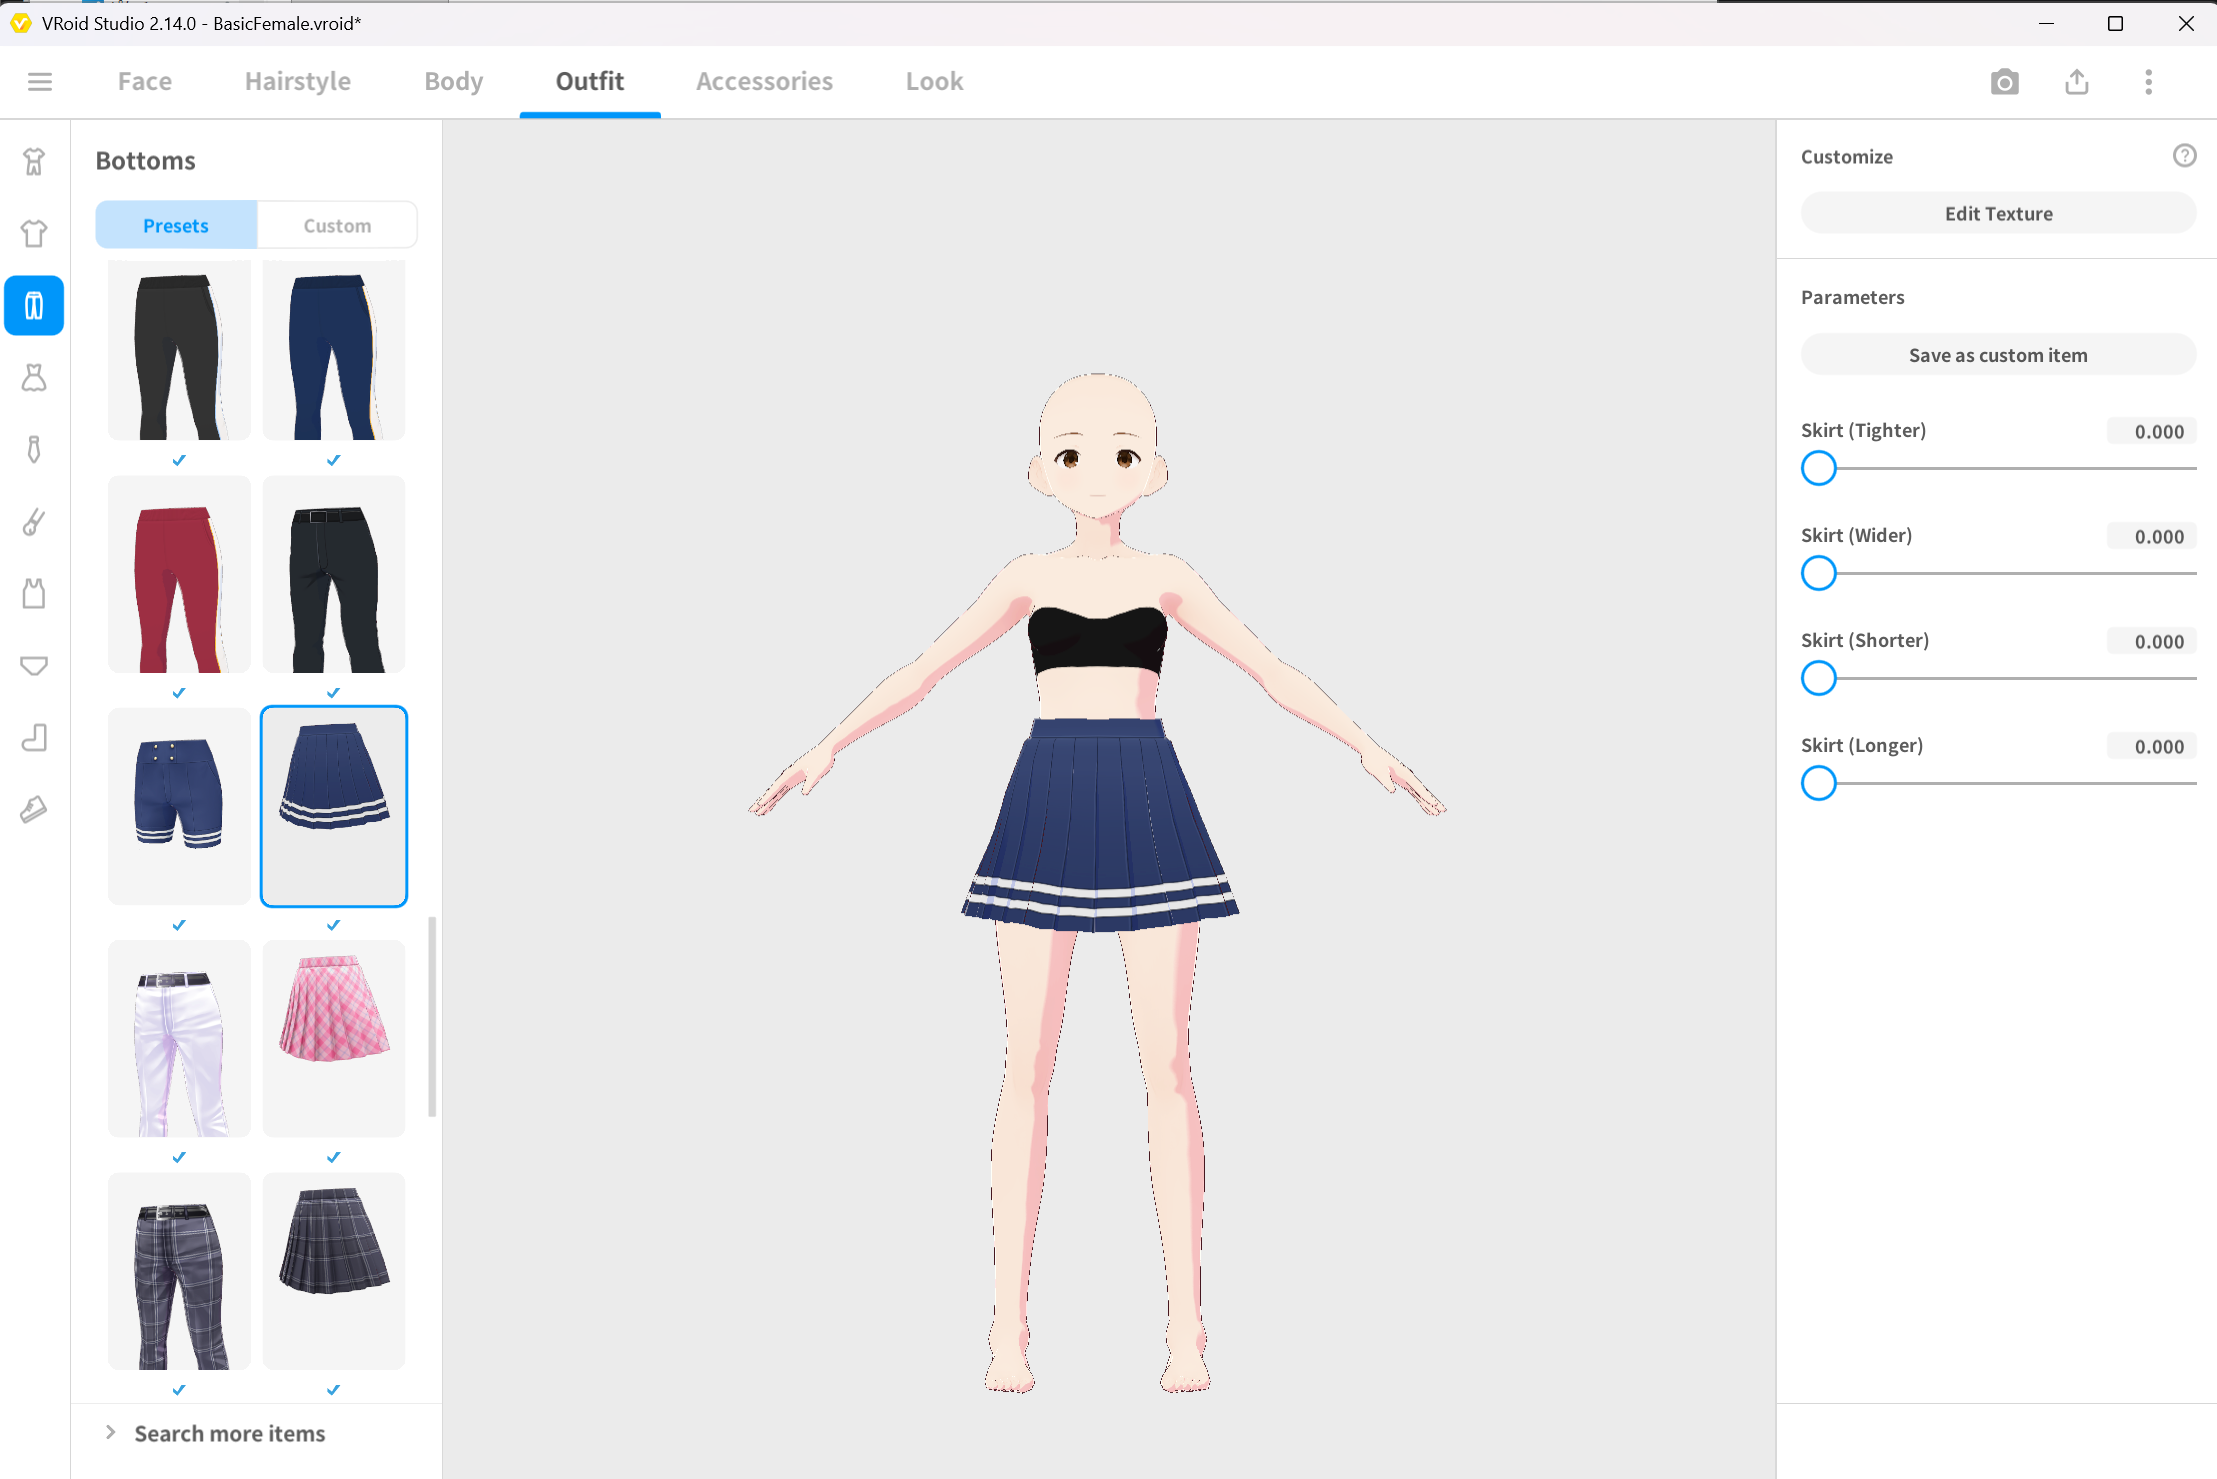 ▲Figure 10-6: Equipping Skirt on BasicFemale
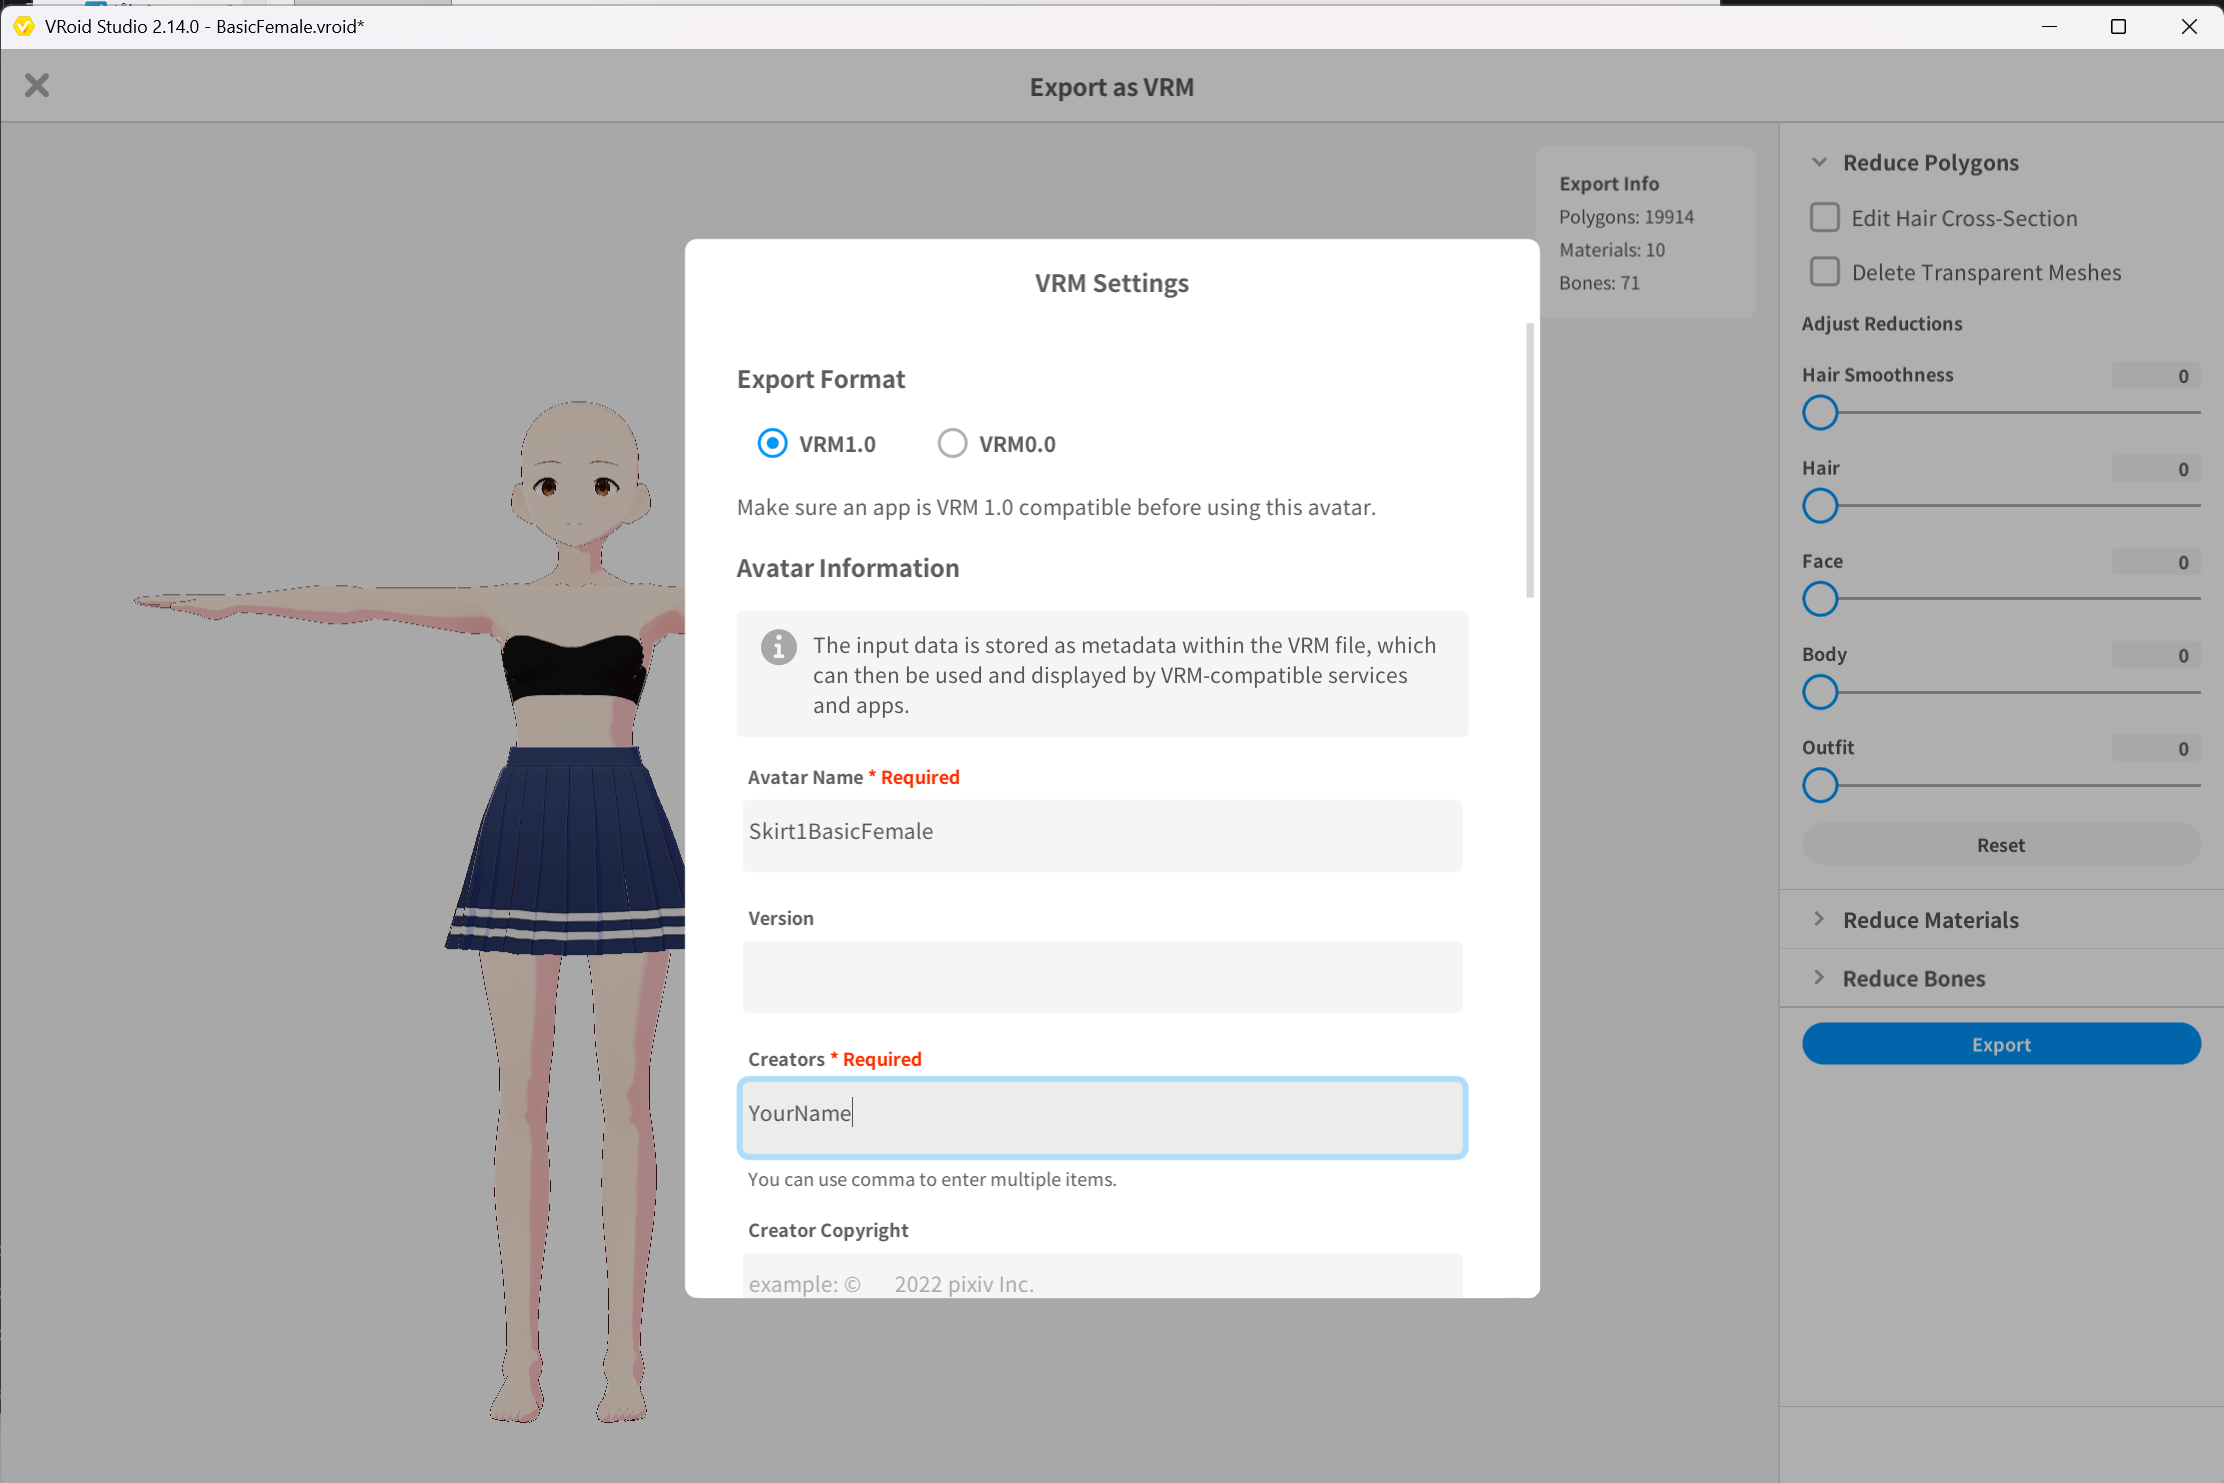 ▲Figure 10-7: Saving Skirt1BasicFemale.vrm
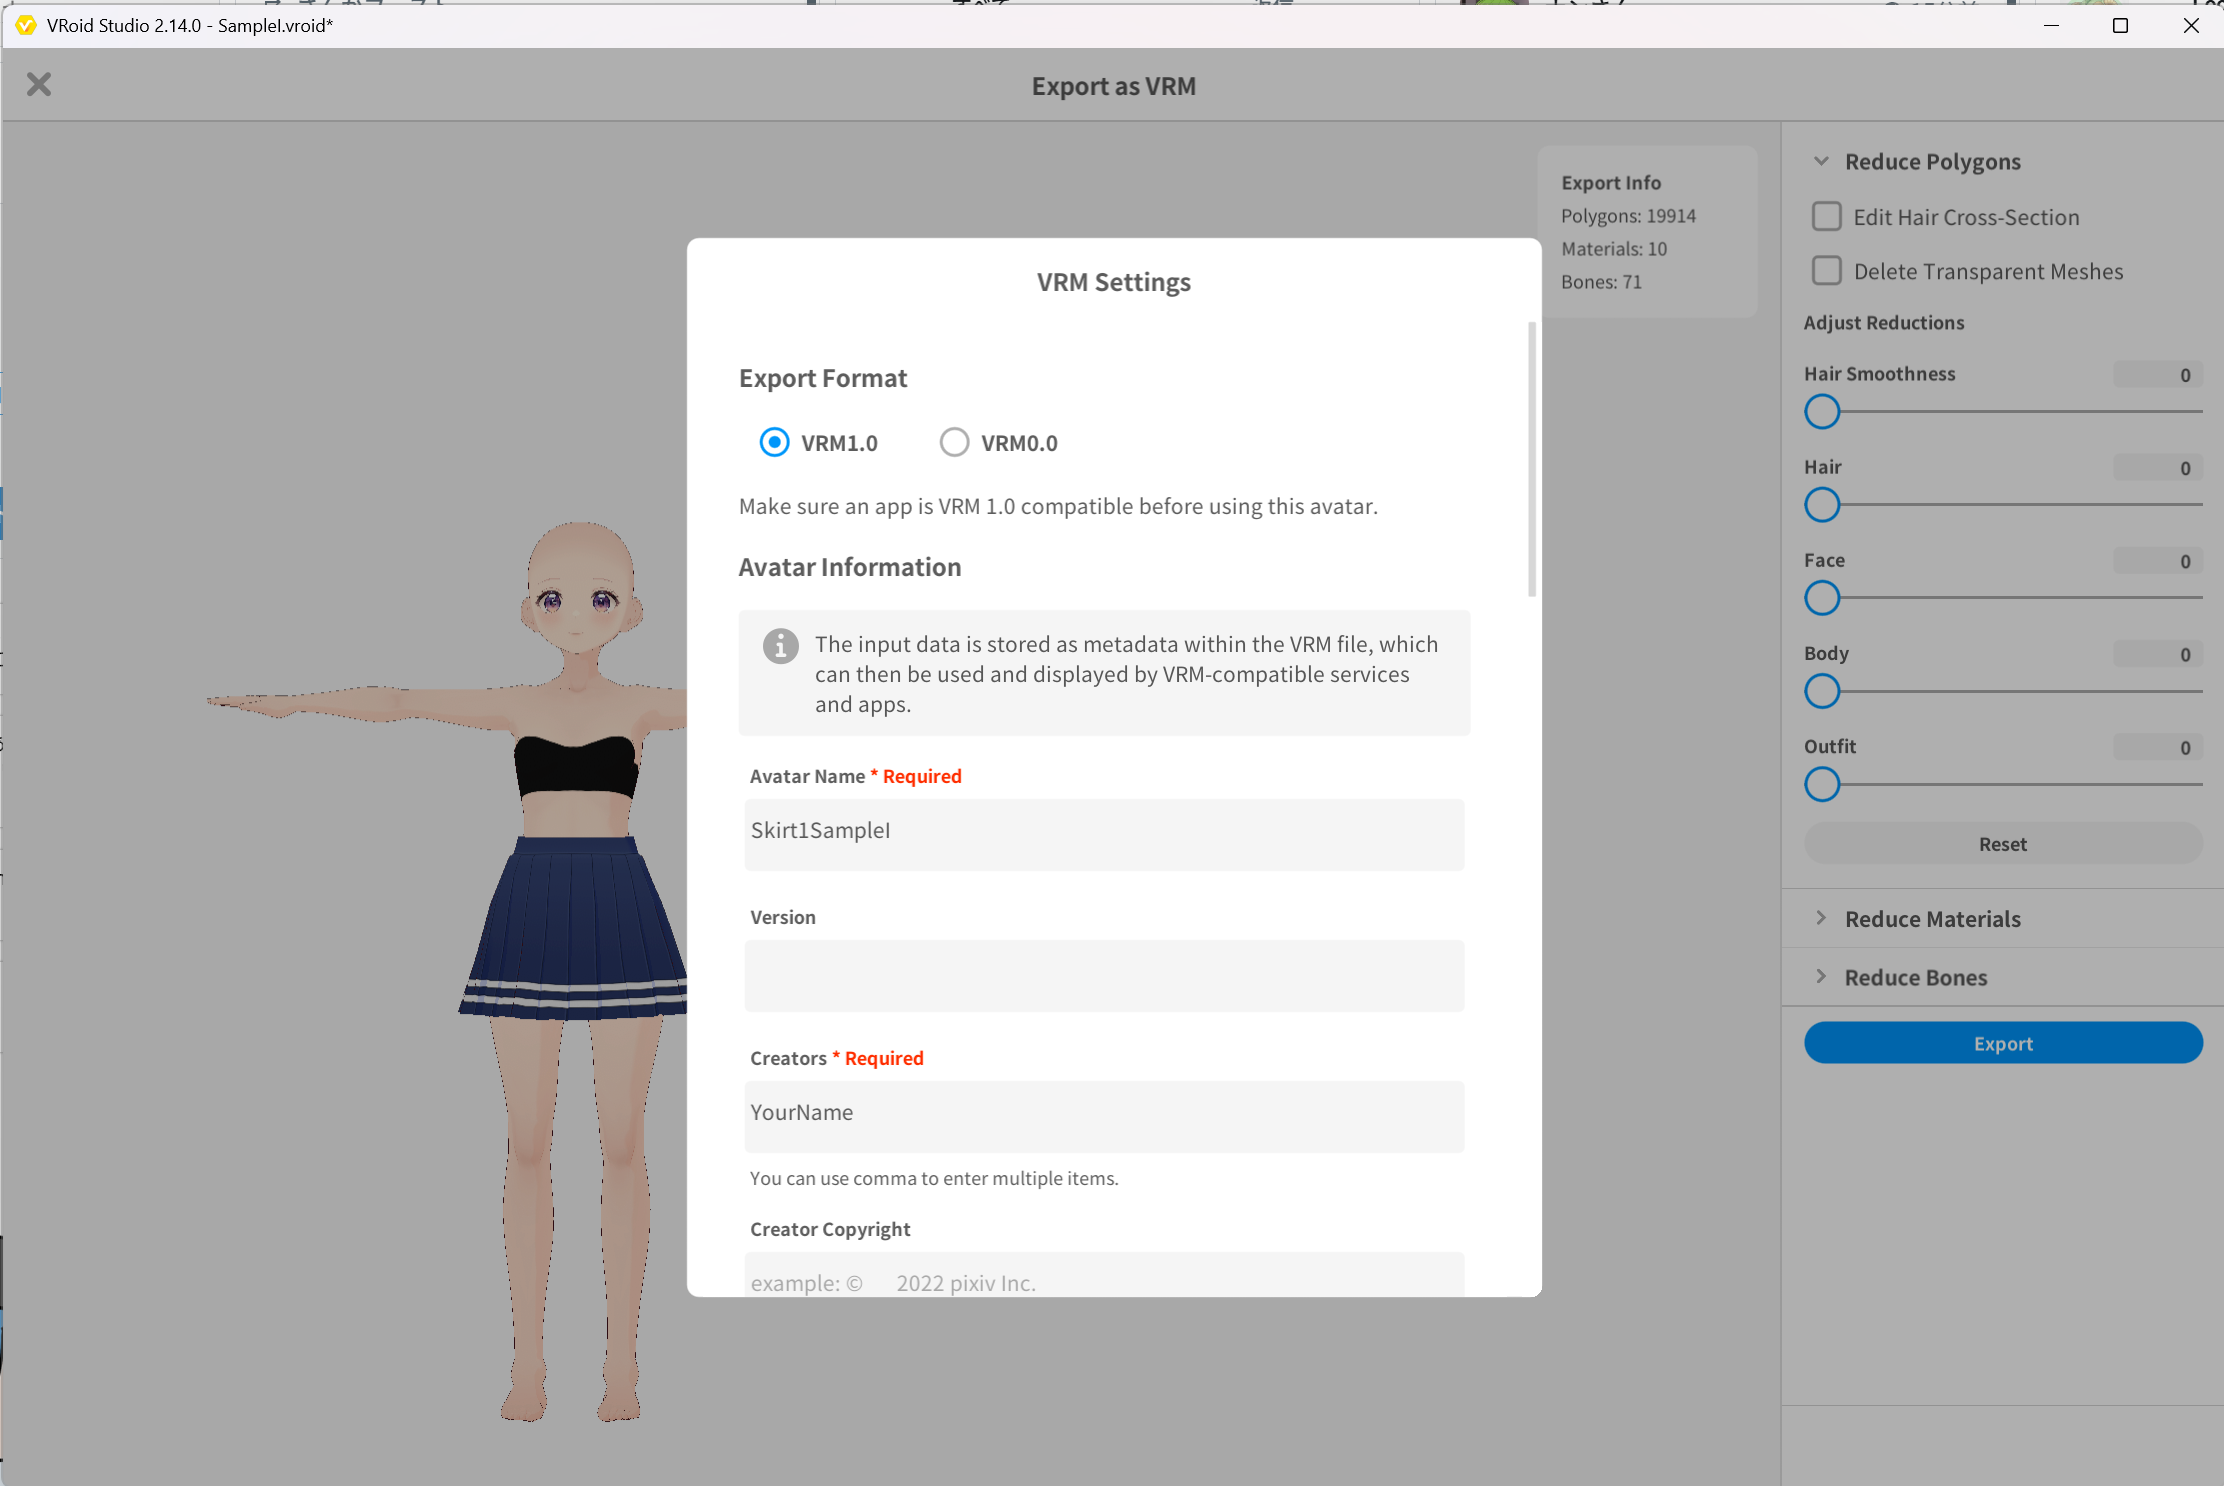 ▲Figure 10-8: Saving Skirt1SampleI.vrm
2.2 Tops1 Registration in ShapeSync Editor
- Open ShapeSync Editor (Tools > zgock > ShapeSync > ShapeSync Editor) in the Unity Editor.
- In
Outfits > Mesh Outfitson the left TreeView, createTops1, specifyingOutfit Id: Tops1,Outfit Name: Tops1, andOutfit Prefab: Tops1BasicFemale.
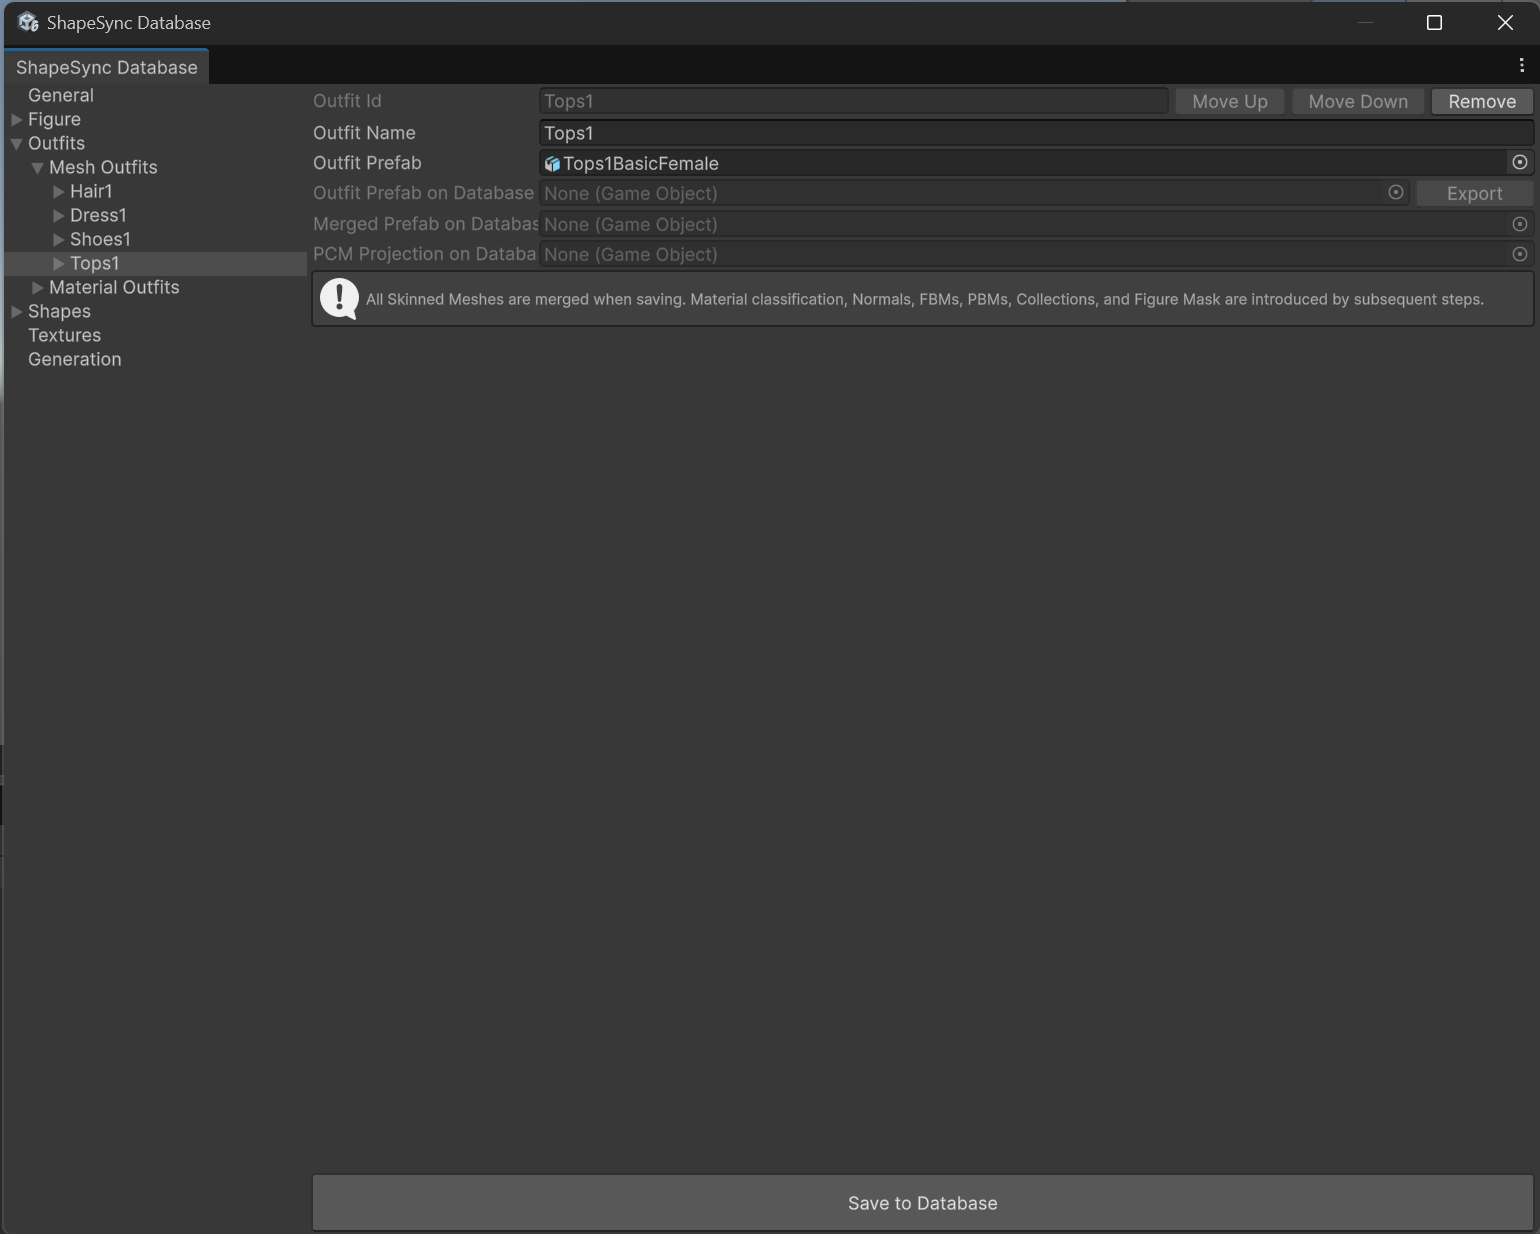 ▲Figure 10-9-1: Outfits > Mesh Outfits > Tops1 basic info registration (Outfit Prefab: Tops1BasicFemale)
- On the
Materialsscreen, classify base body materials such as face, eyes, and skin asExclude.
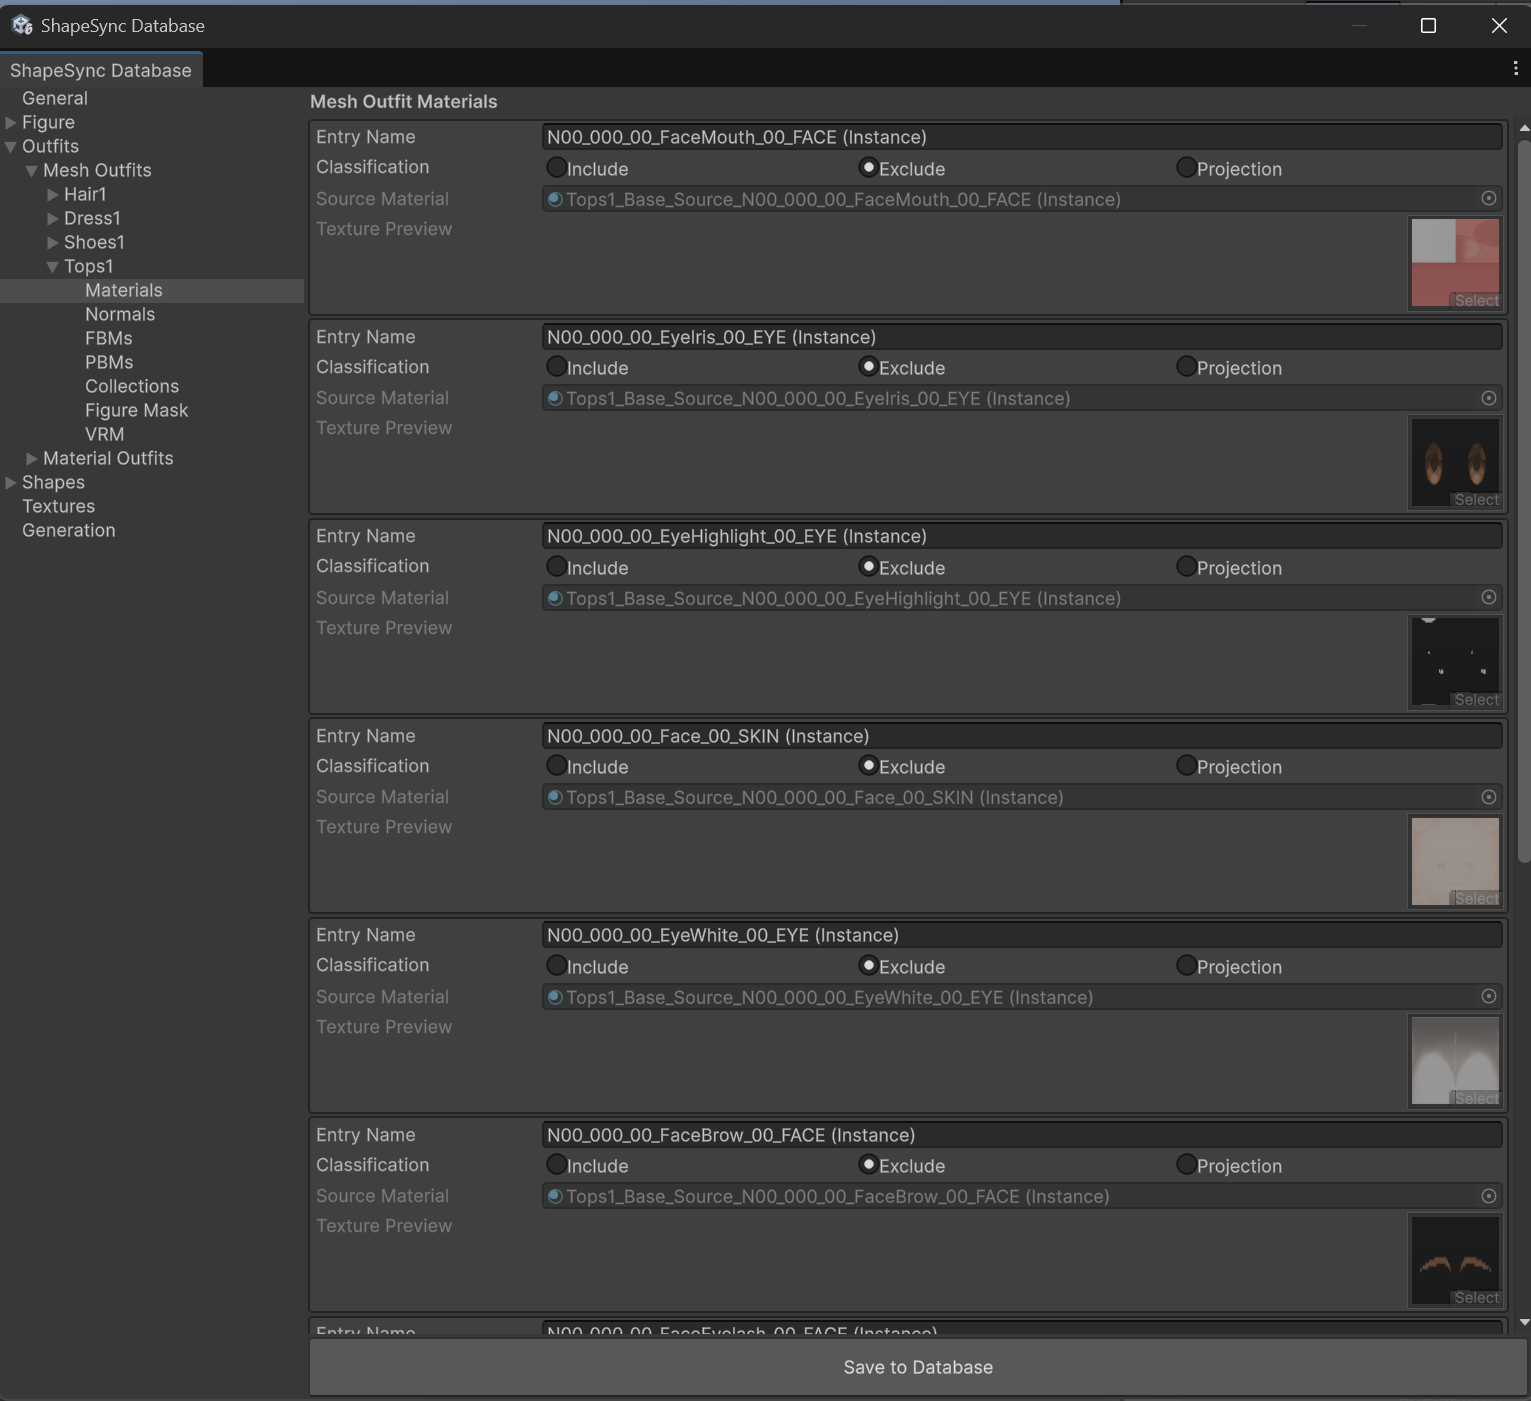 ▲Figure 10-9-2: Classifying base body materials as Exclude in Tops1 > Materials
- Set the bottom outfit material (
Tops_01_CLOTH) toEntry Name: Tops1andClassification: Include, then clickSave to Database.
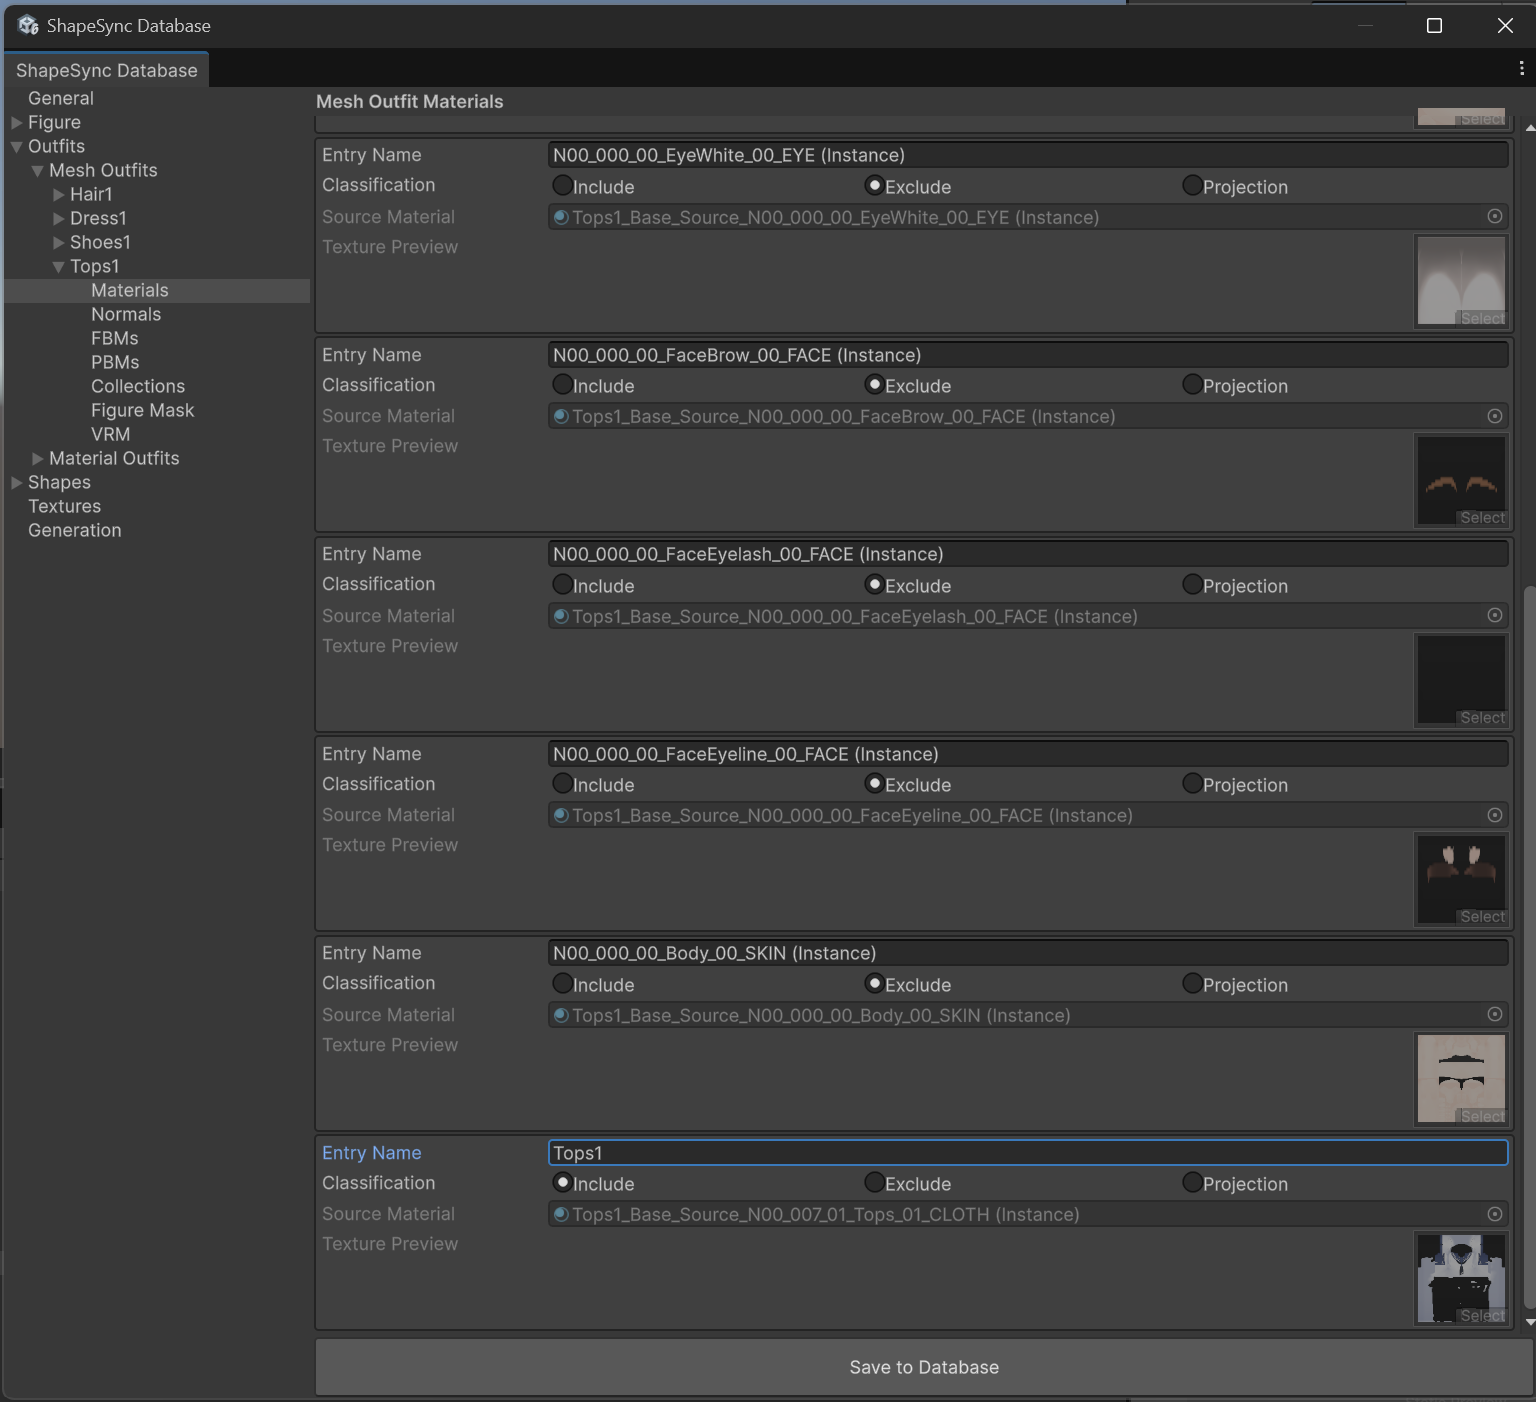 ▲Figure 10-9-3: Setting Tops1 material to Include and saving with Save to Database
- On the
FBMsscreen, assignTops1SampleItoFBM PrefabforSampleI.
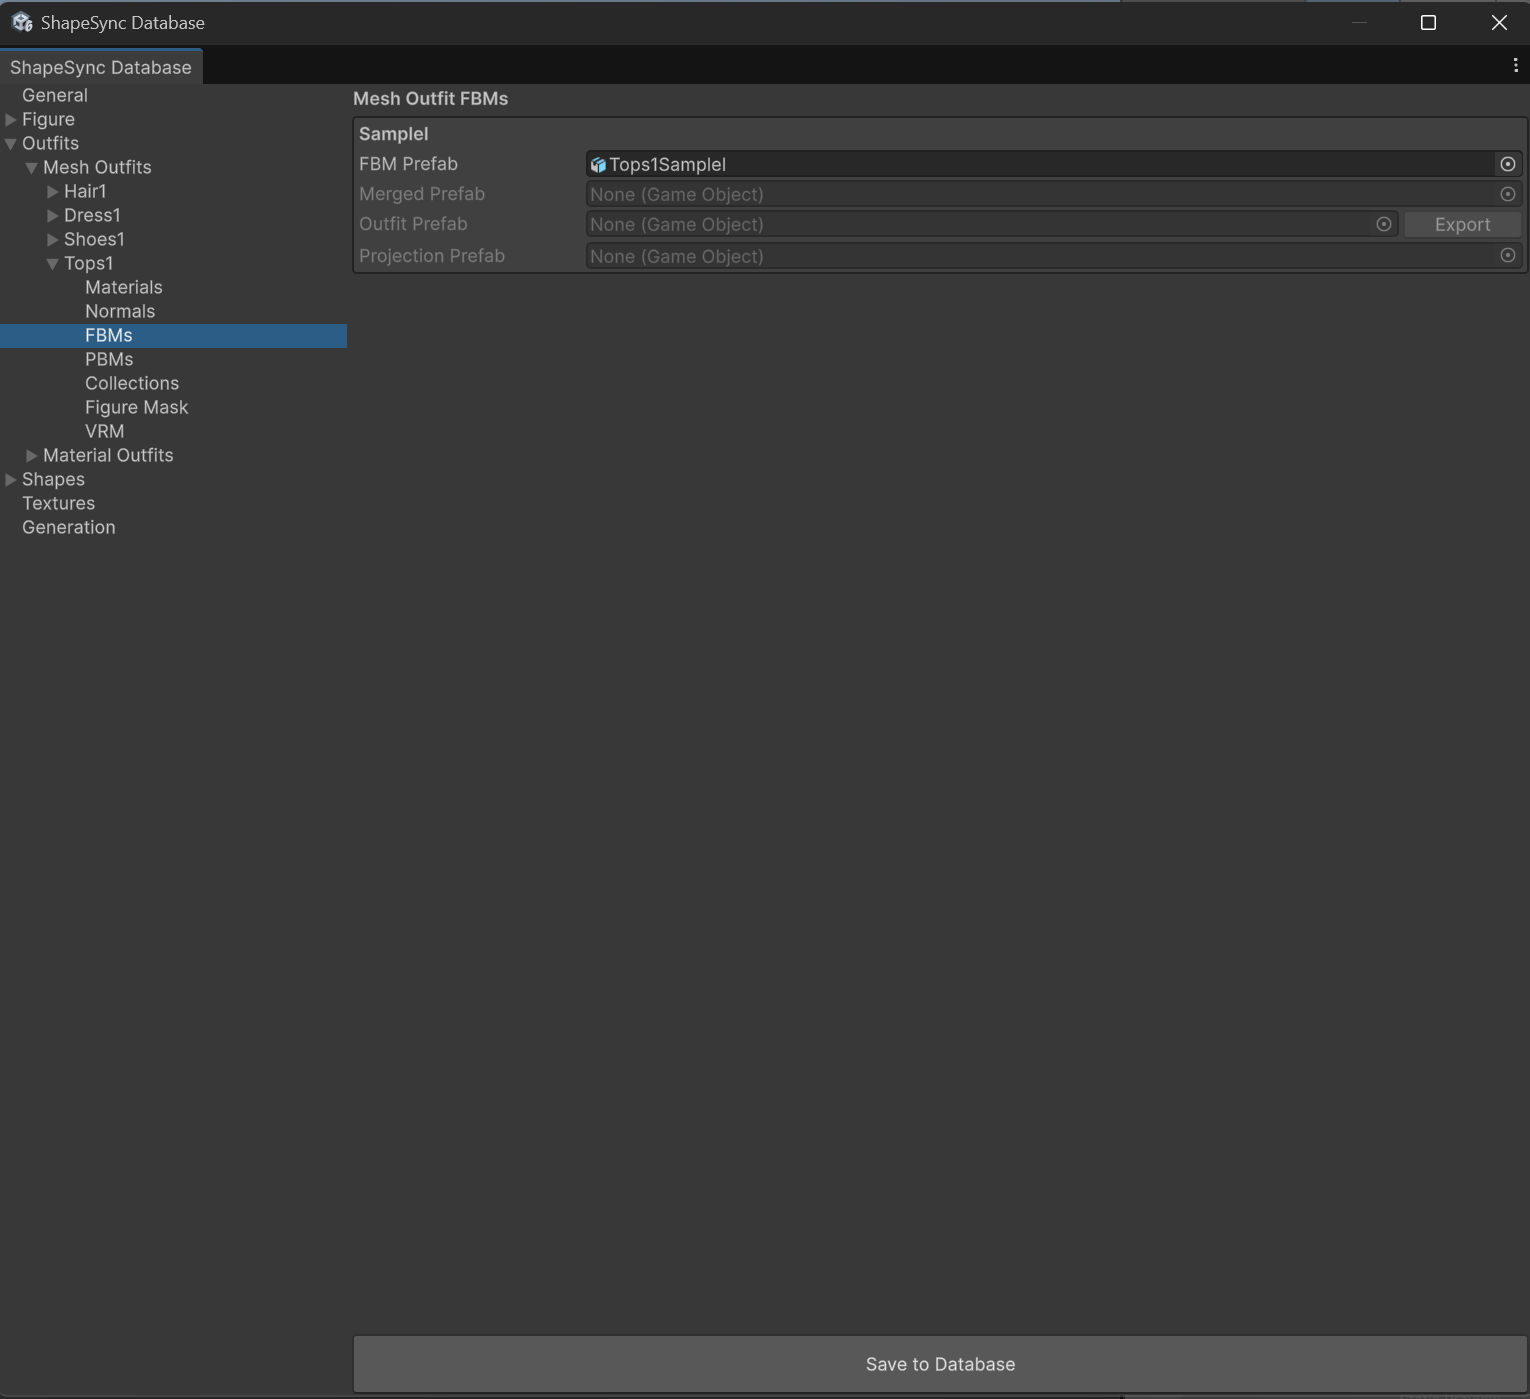 ▲Figure 10-9-4: Assigning Tops1SampleI to SampleI in Tops1 > FBMs
- On the
PBMsscreen, enableFollow BreastSize, specifyTops1BreastSizeBasicFemaleforBase PrefabandTops1BreastSizeSampleIforSampleI Prefab, then clickSave to Database.
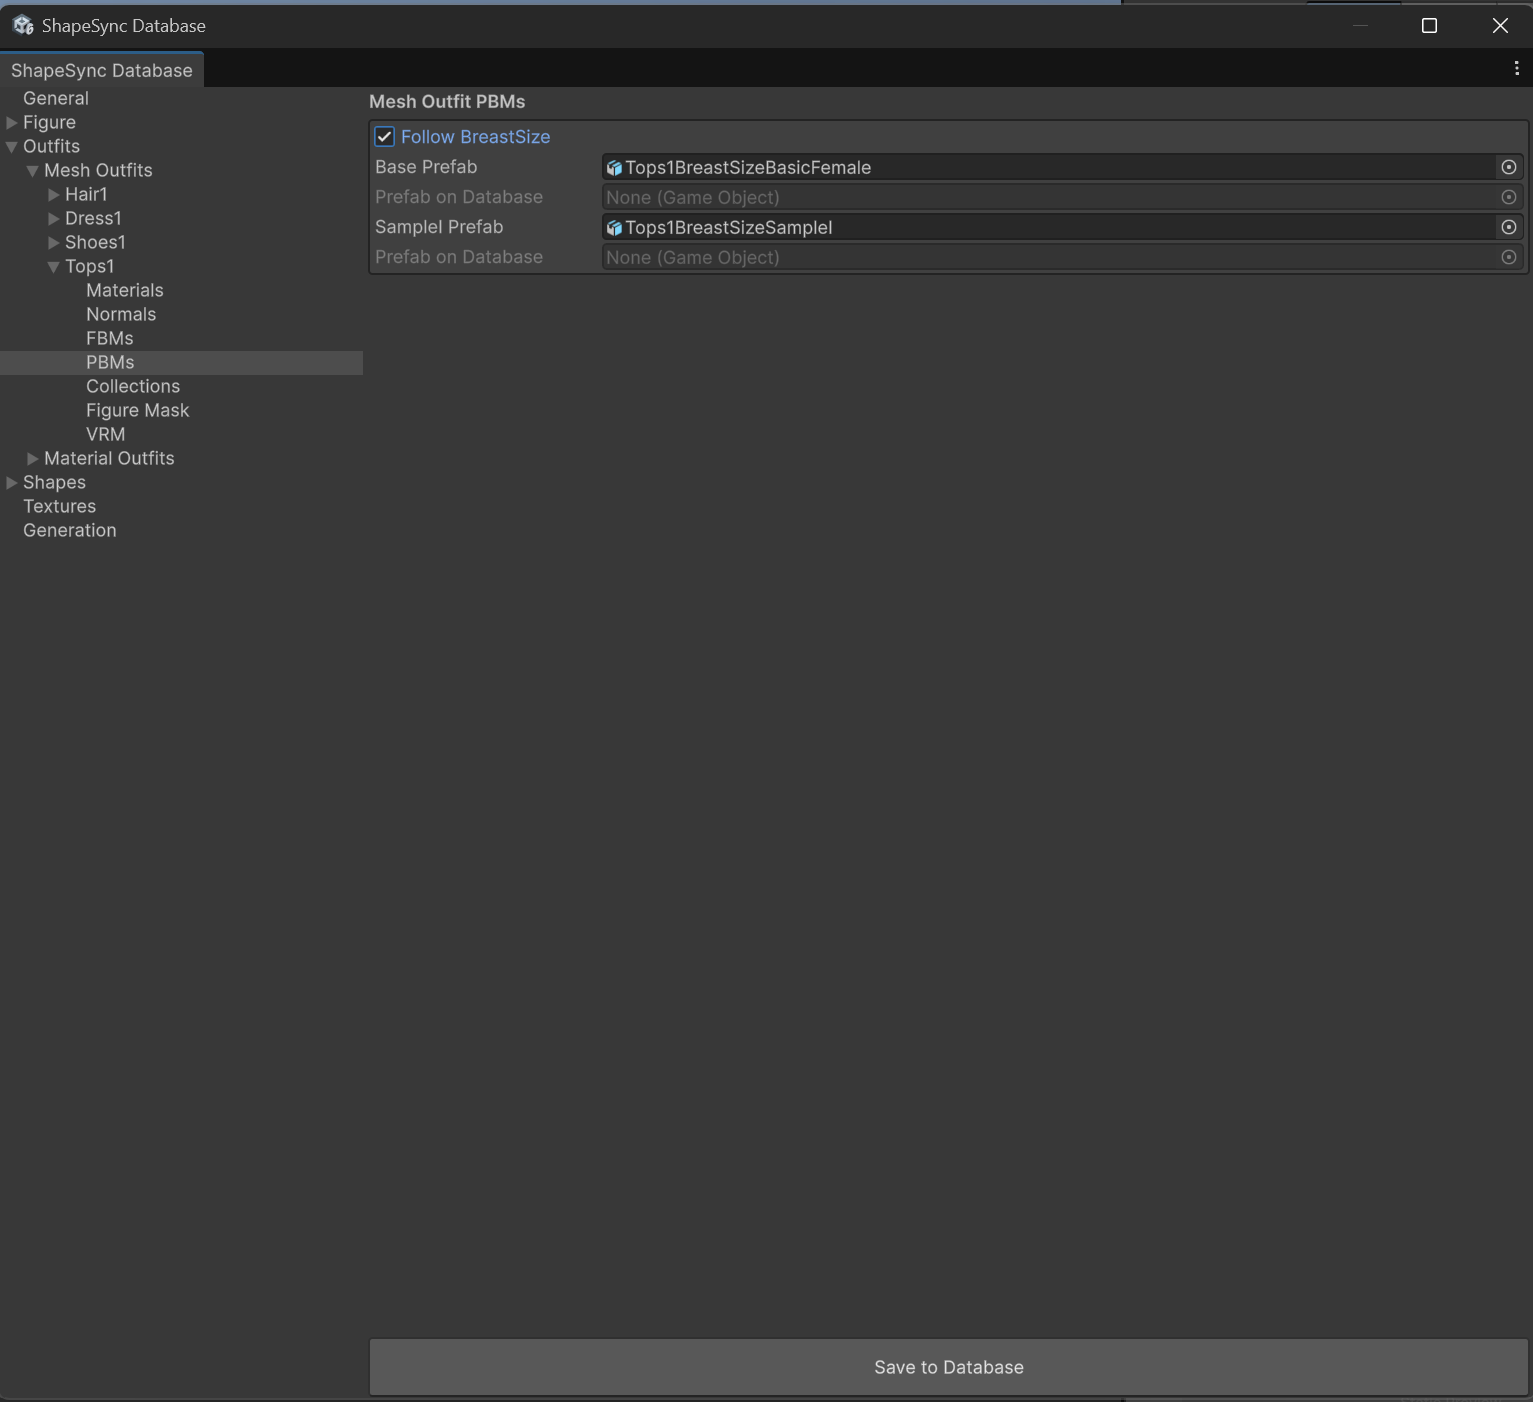 ▲Figure 10-9-5: Enabling Follow BreastSize in Tops1 > PBMs, specifying PBM Prefabs, and saving
2.3 Skirt1 Registration in ShapeSync Editor
- In
Outfits > Mesh Outfitson the left TreeView, createSkirt1, specifyingOutfit Id: Skirt1,Outfit Name: Skirt1, andOutfit Prefab: Skirt1BasicFemale.
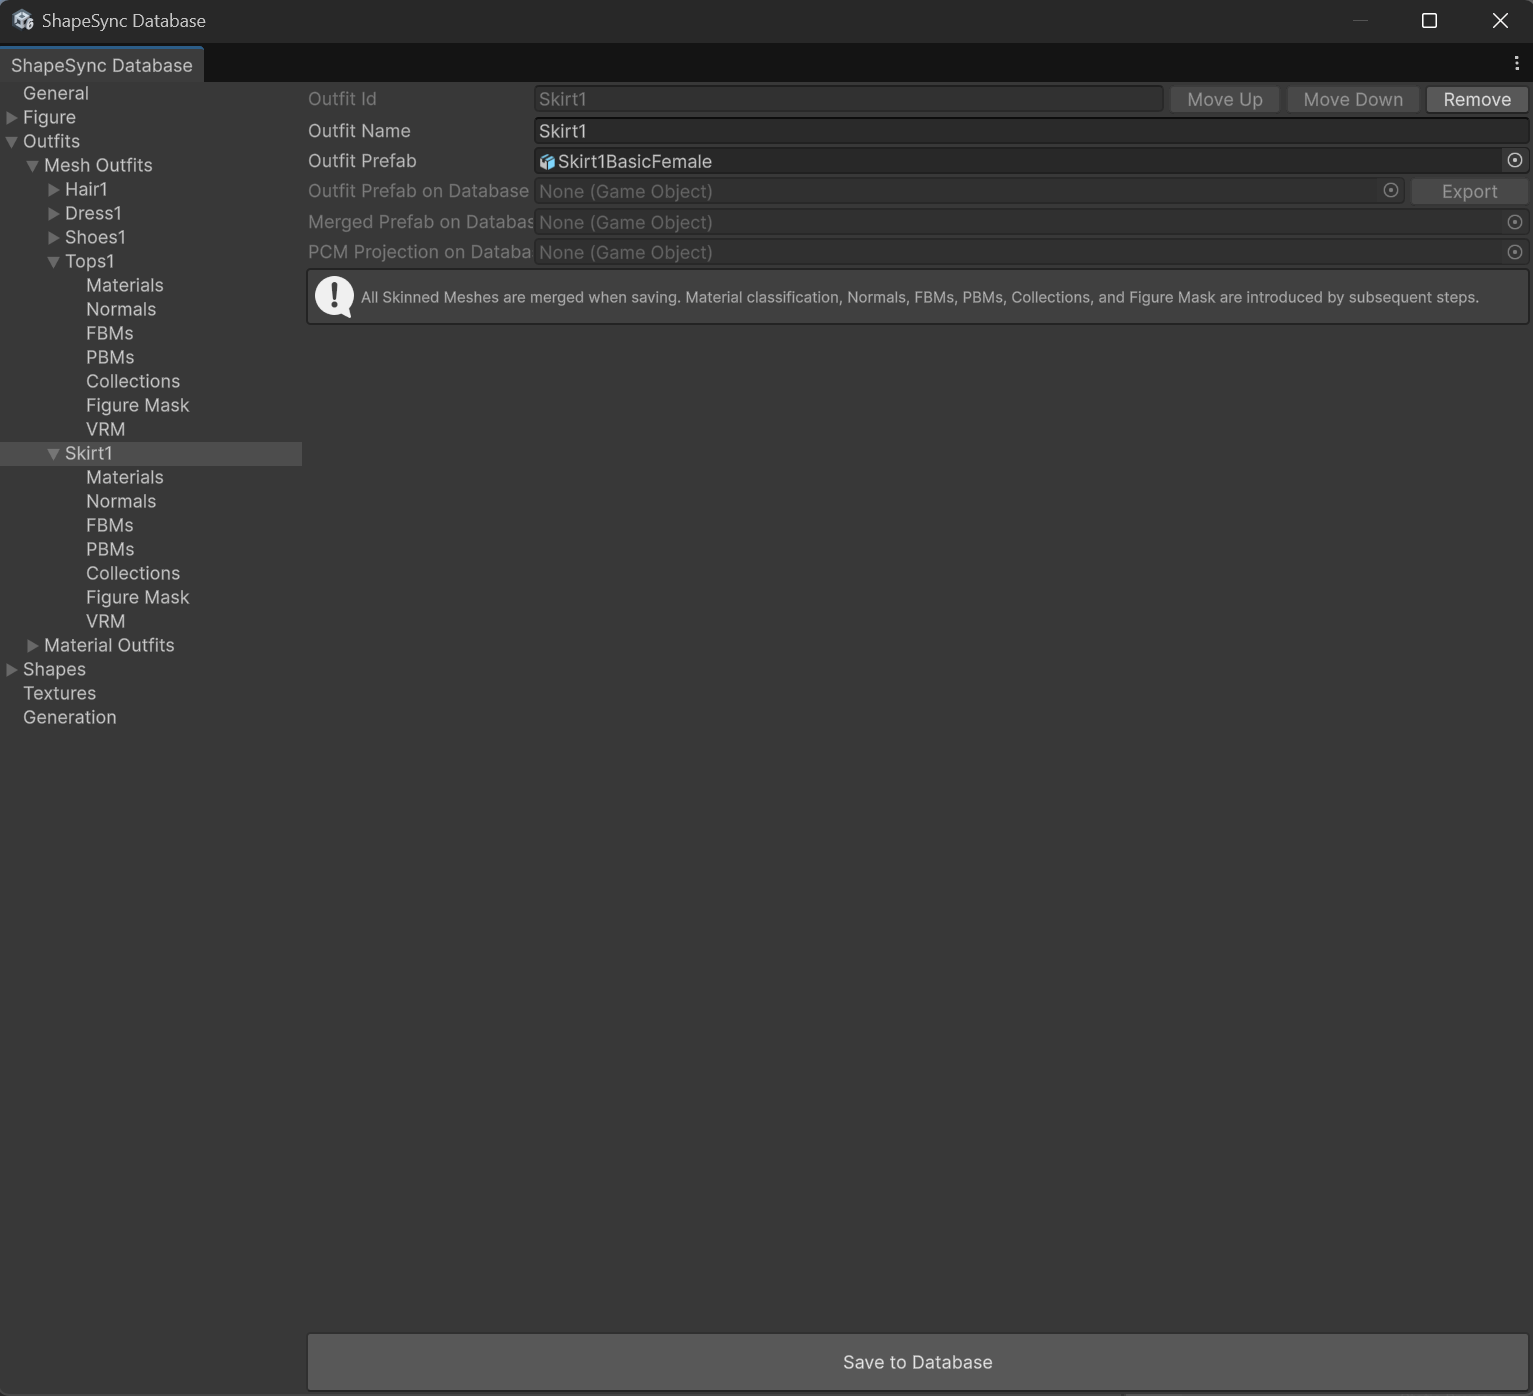 ▲Figure 10-10-1: Outfits > Mesh Outfits > Skirt1 basic info registration (Outfit Prefab: Skirt1BasicFemale)
- On the
Materialsscreen, classify base body materials asExclude.
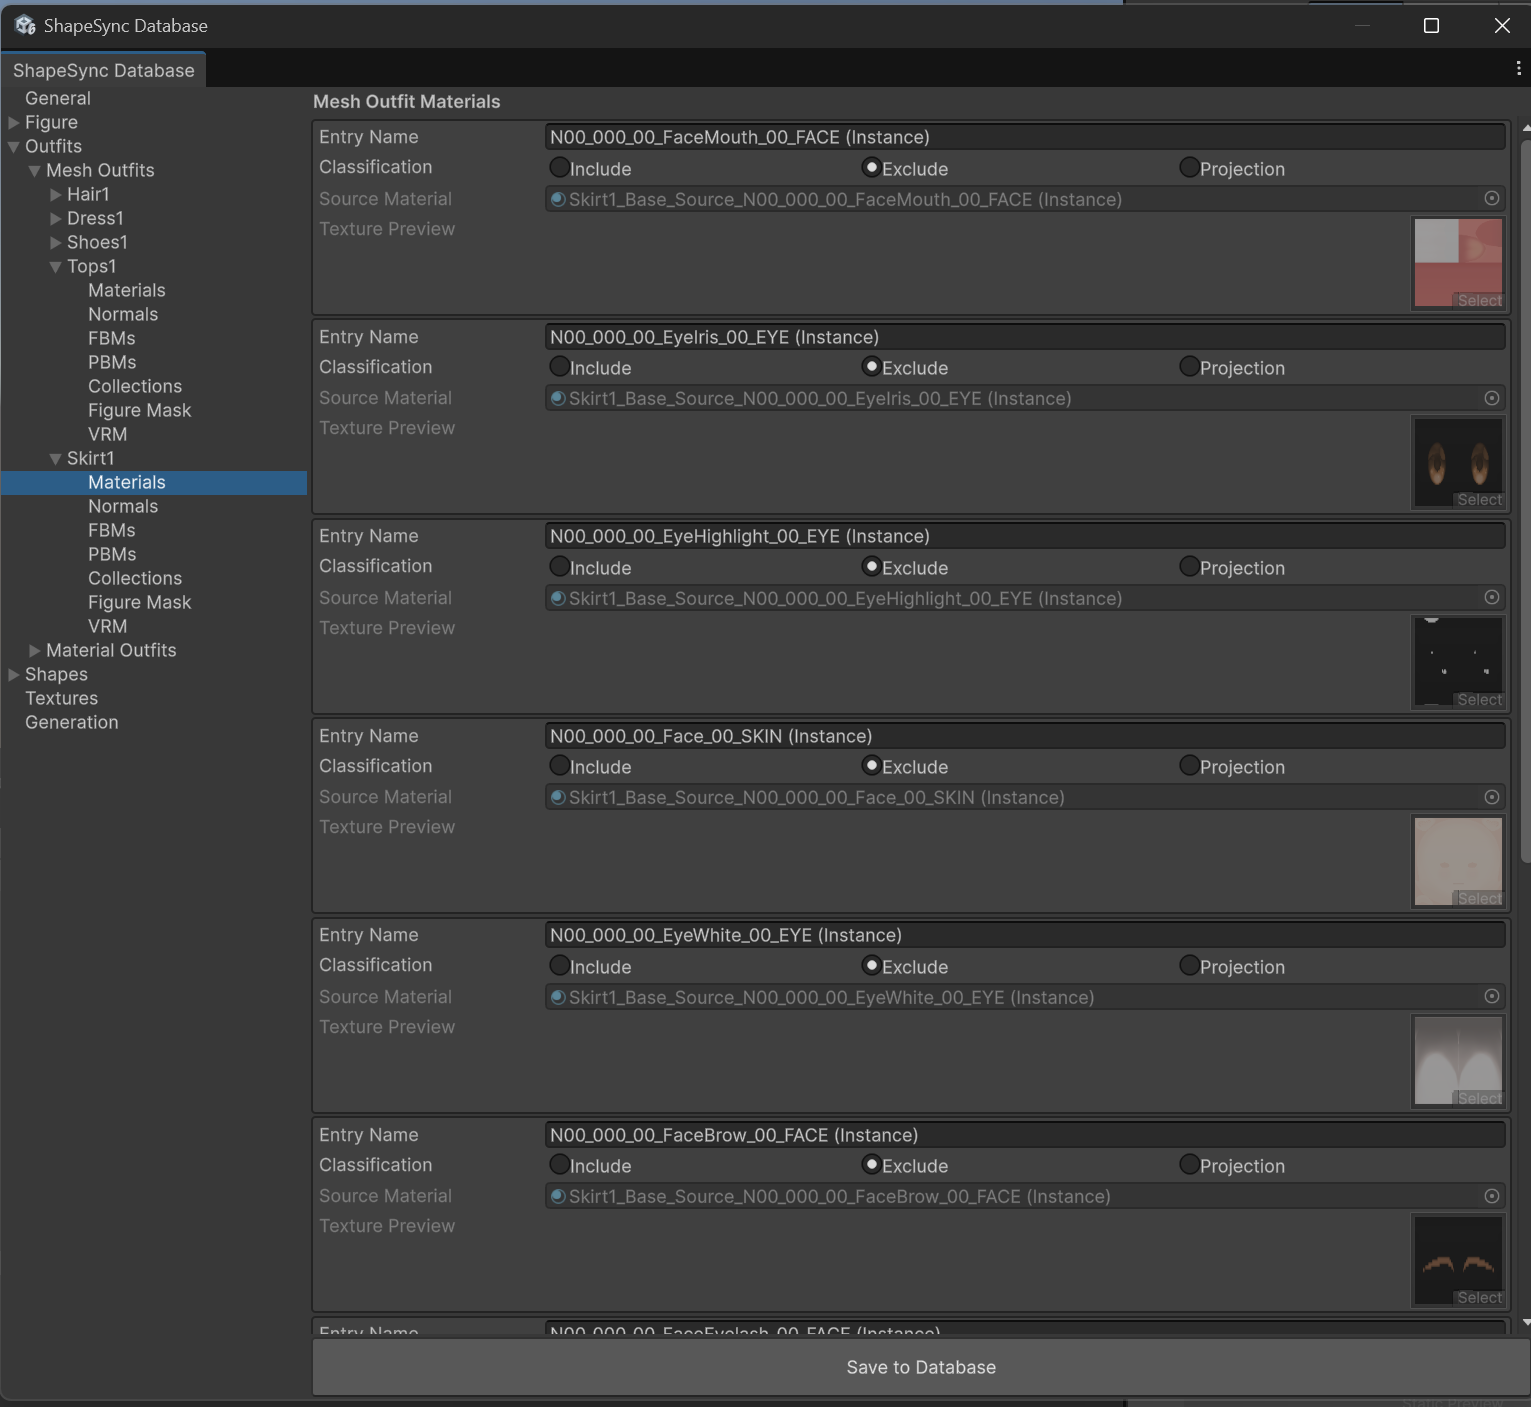 ▲Figure 10-10-2: Classifying base body materials as Exclude in Skirt1 > Materials
- Set the bottom outfit material (
Bottoms_01_CLOTH) toEntry Name: Skirt1andClassification: Include, then clickSave to Database.
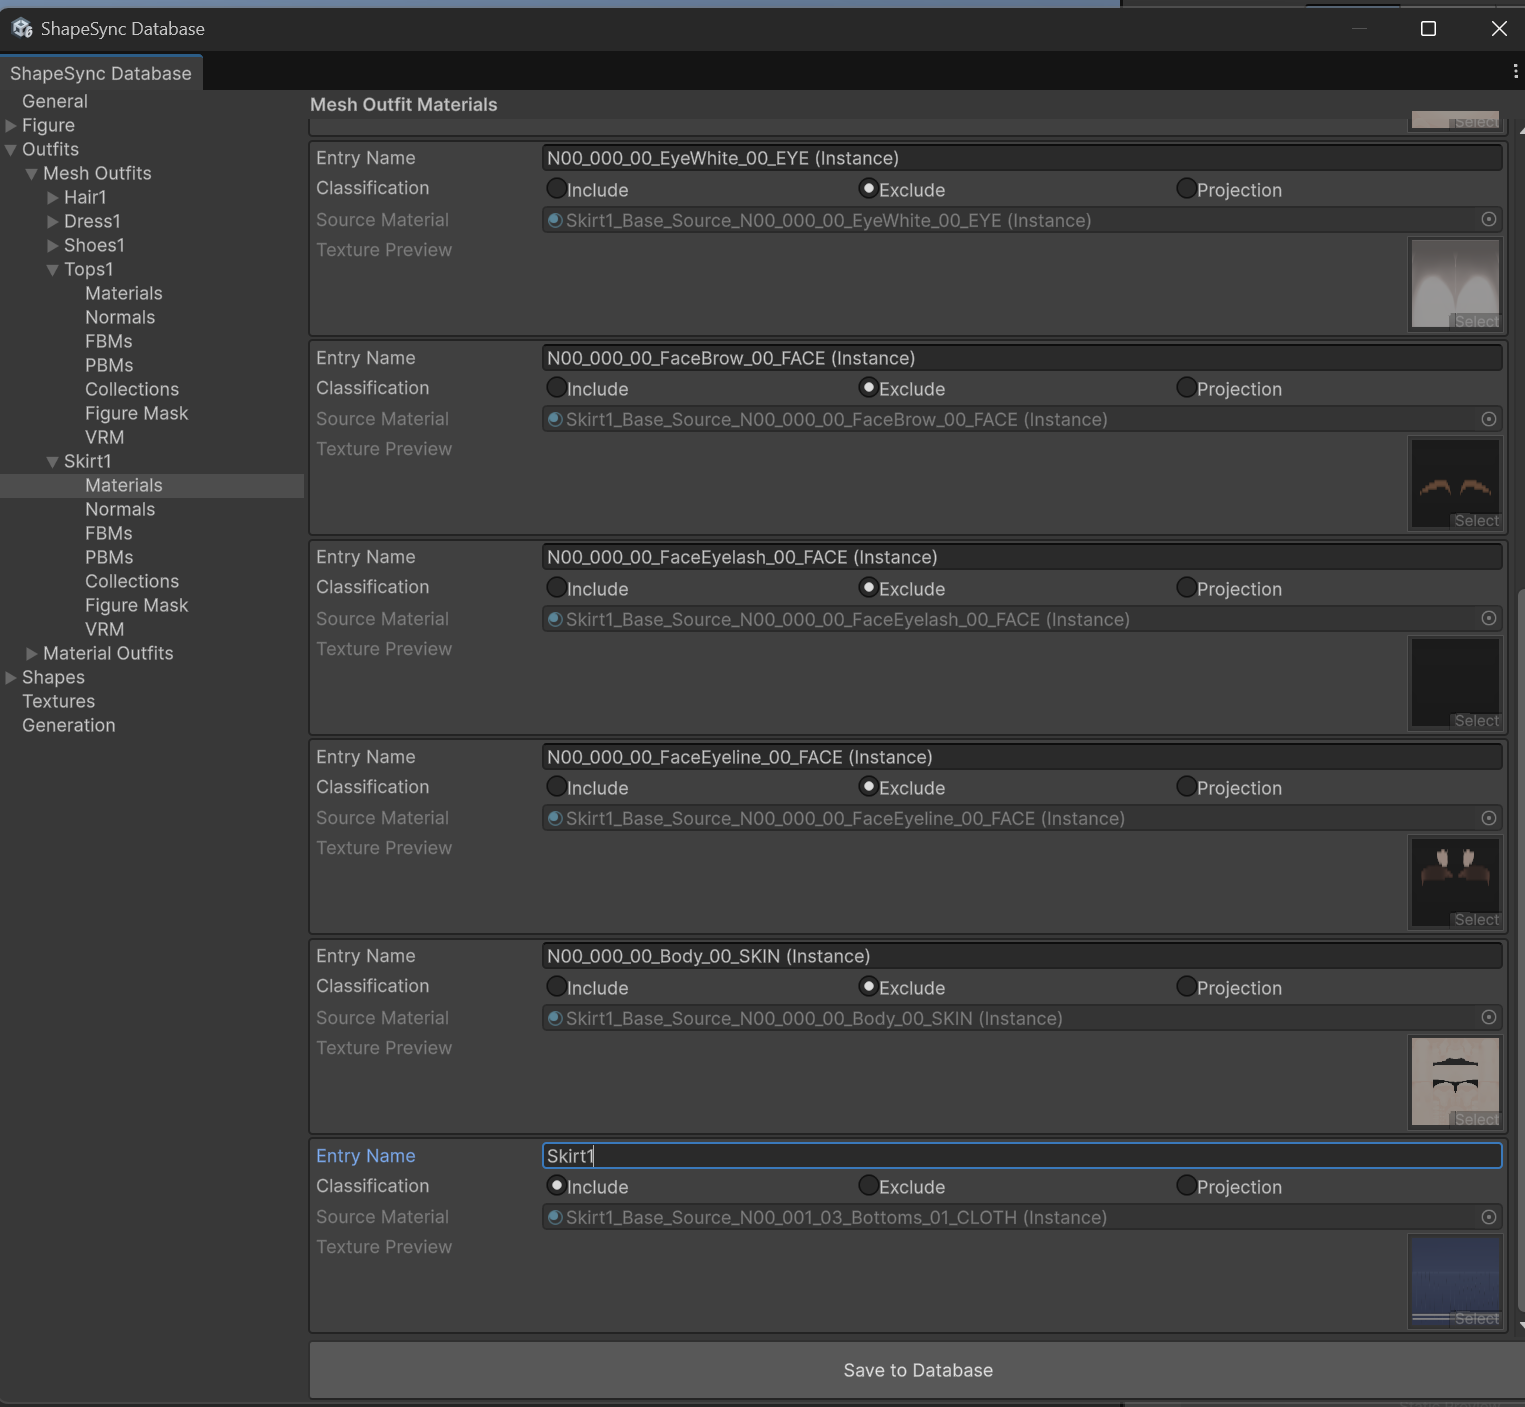 ▲Figure 10-10-3: Setting Skirt1 material to Include and saving with Save to Database
- On the
FBMsscreen, assignSkirt1SampleItoFBM PrefabforSampleI. (Note: Because Skirt1 is not affected byBreastSize, PBM Follow configuration is unnecessary).
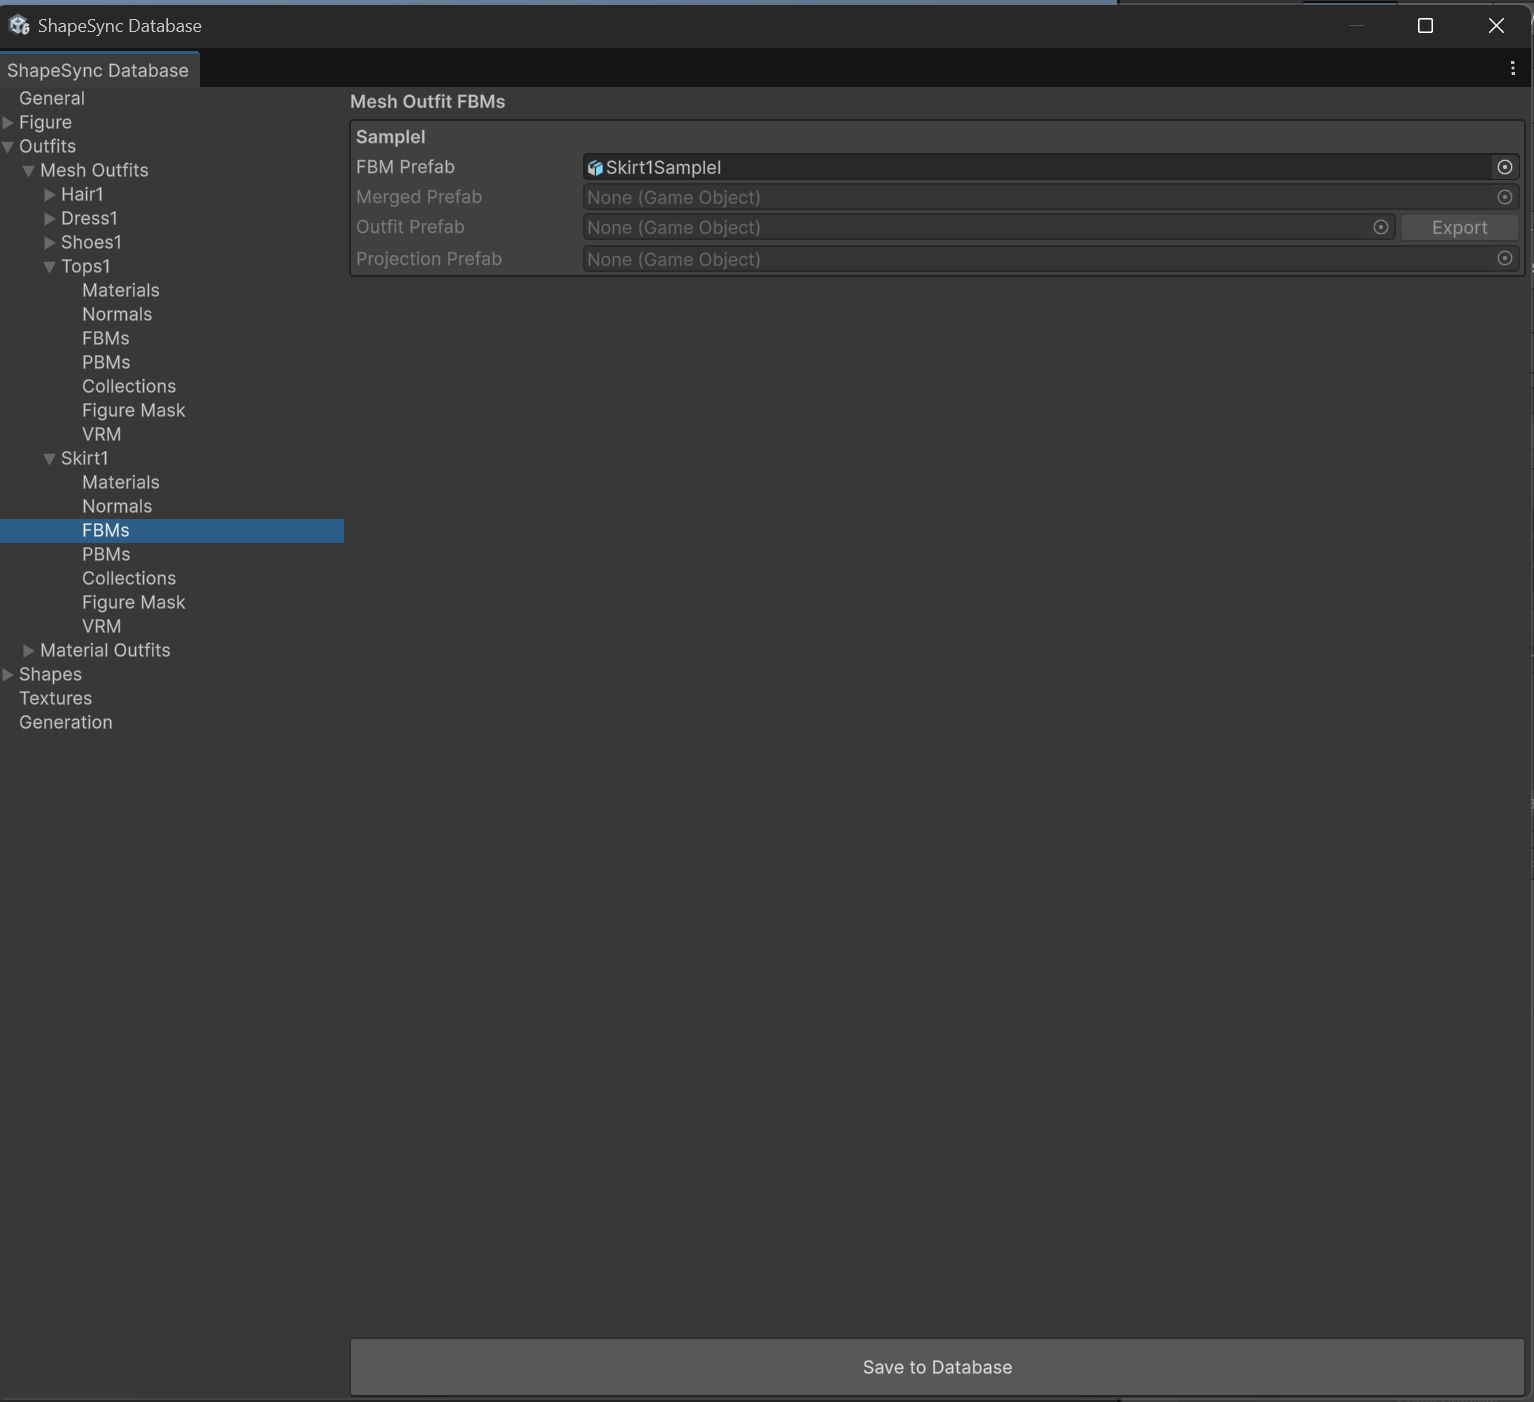 ▲Figure 10-10-4: Assigning Skirt1SampleI to SampleI in Skirt1 > FBMs
- On the
VRMscreen, specifySkirt1BasicFemaleforPhysics Reference VRM, then clickSave to Database.
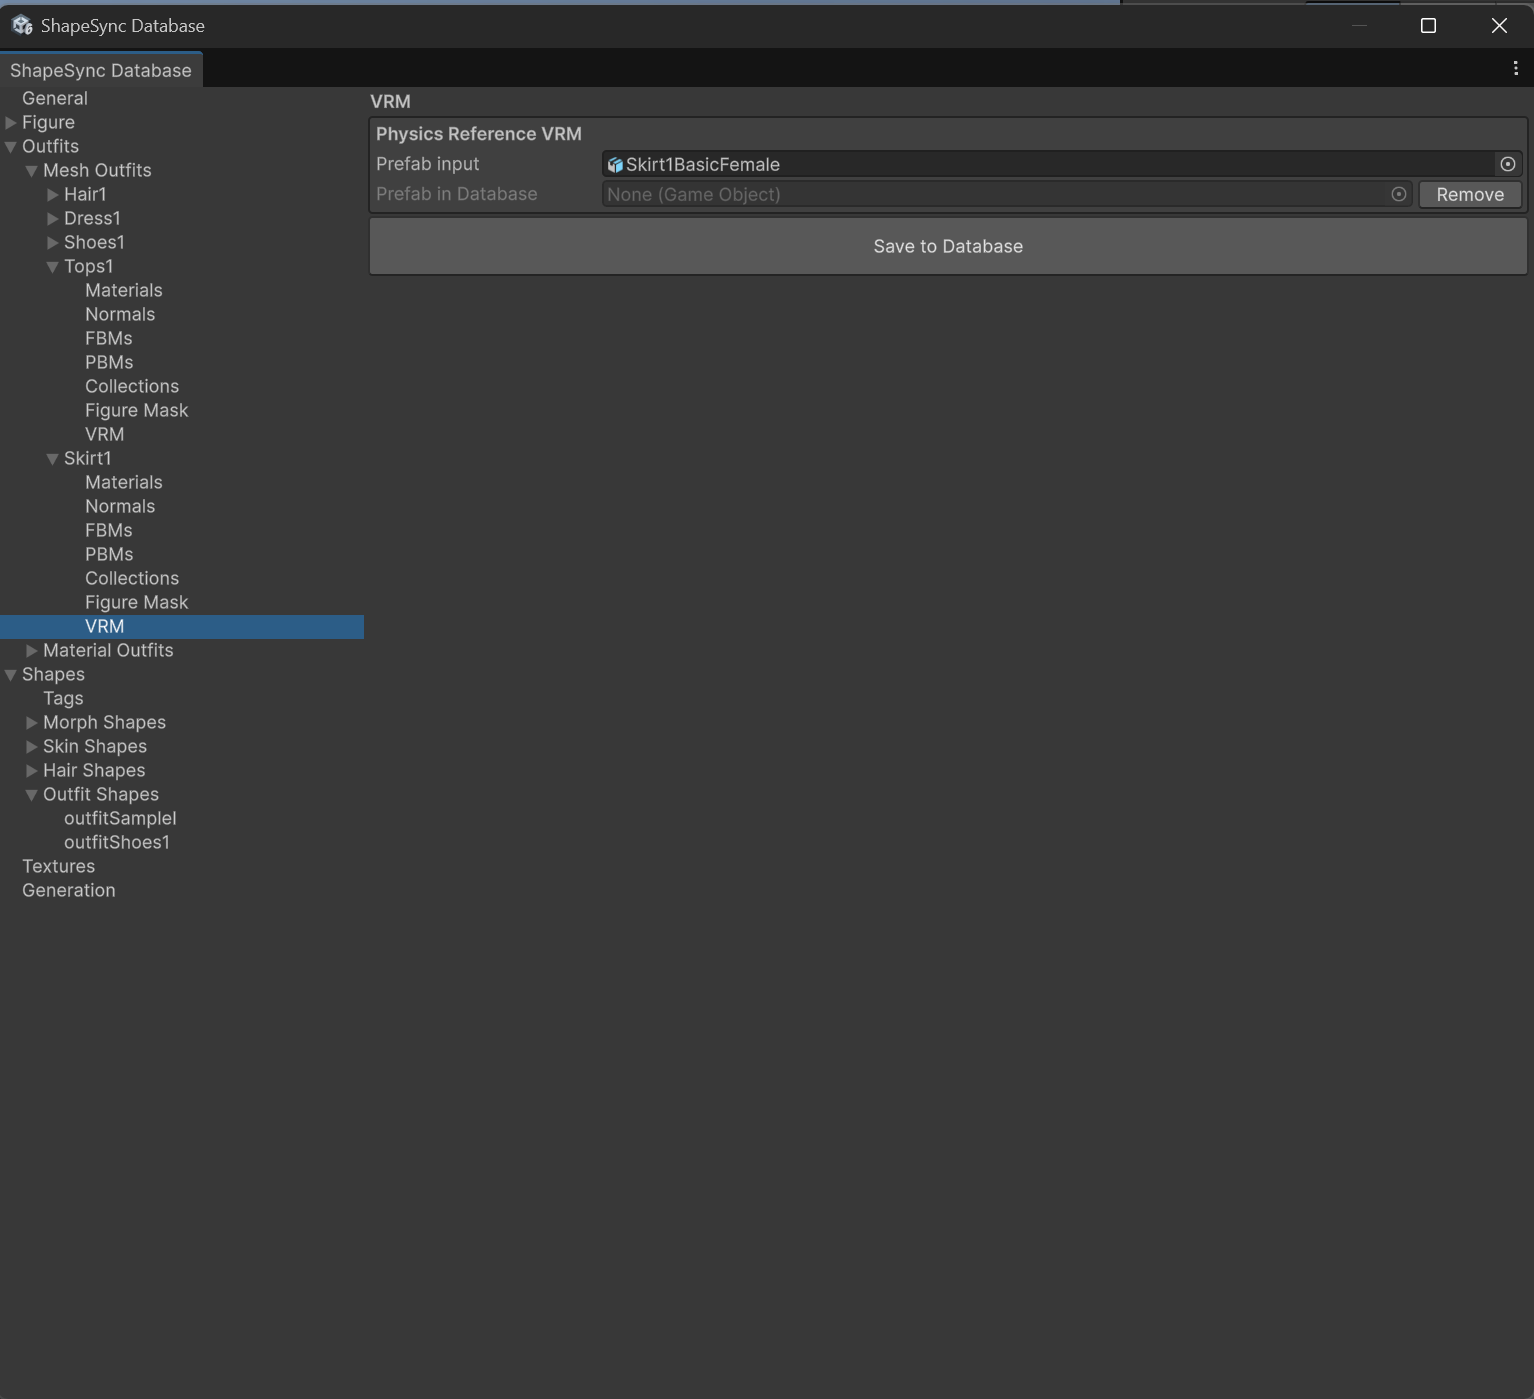 ▲Figure 10-11: Specifying Skirt1BasicFemale in Physics Reference VRM under Skirt1 > VRM and saving
3. Creating Outfit Tags and Configuring Priority / Tag on Outfit Shapes
3.1 Creating Outfit Tags
Register the tag vocabulary (region names) selectable by Shapes.
- Select
Shapes > Tagsfrom the left TreeView in ShapeSync Editor. - Click the
Add Tagbutton and enterupperchestin the input field. - Click the
Add Tagbutton again and enterlowerchestin the input field. - Click the
Save into Databasebutton at the bottom of the screen to save the tag vocabulary.
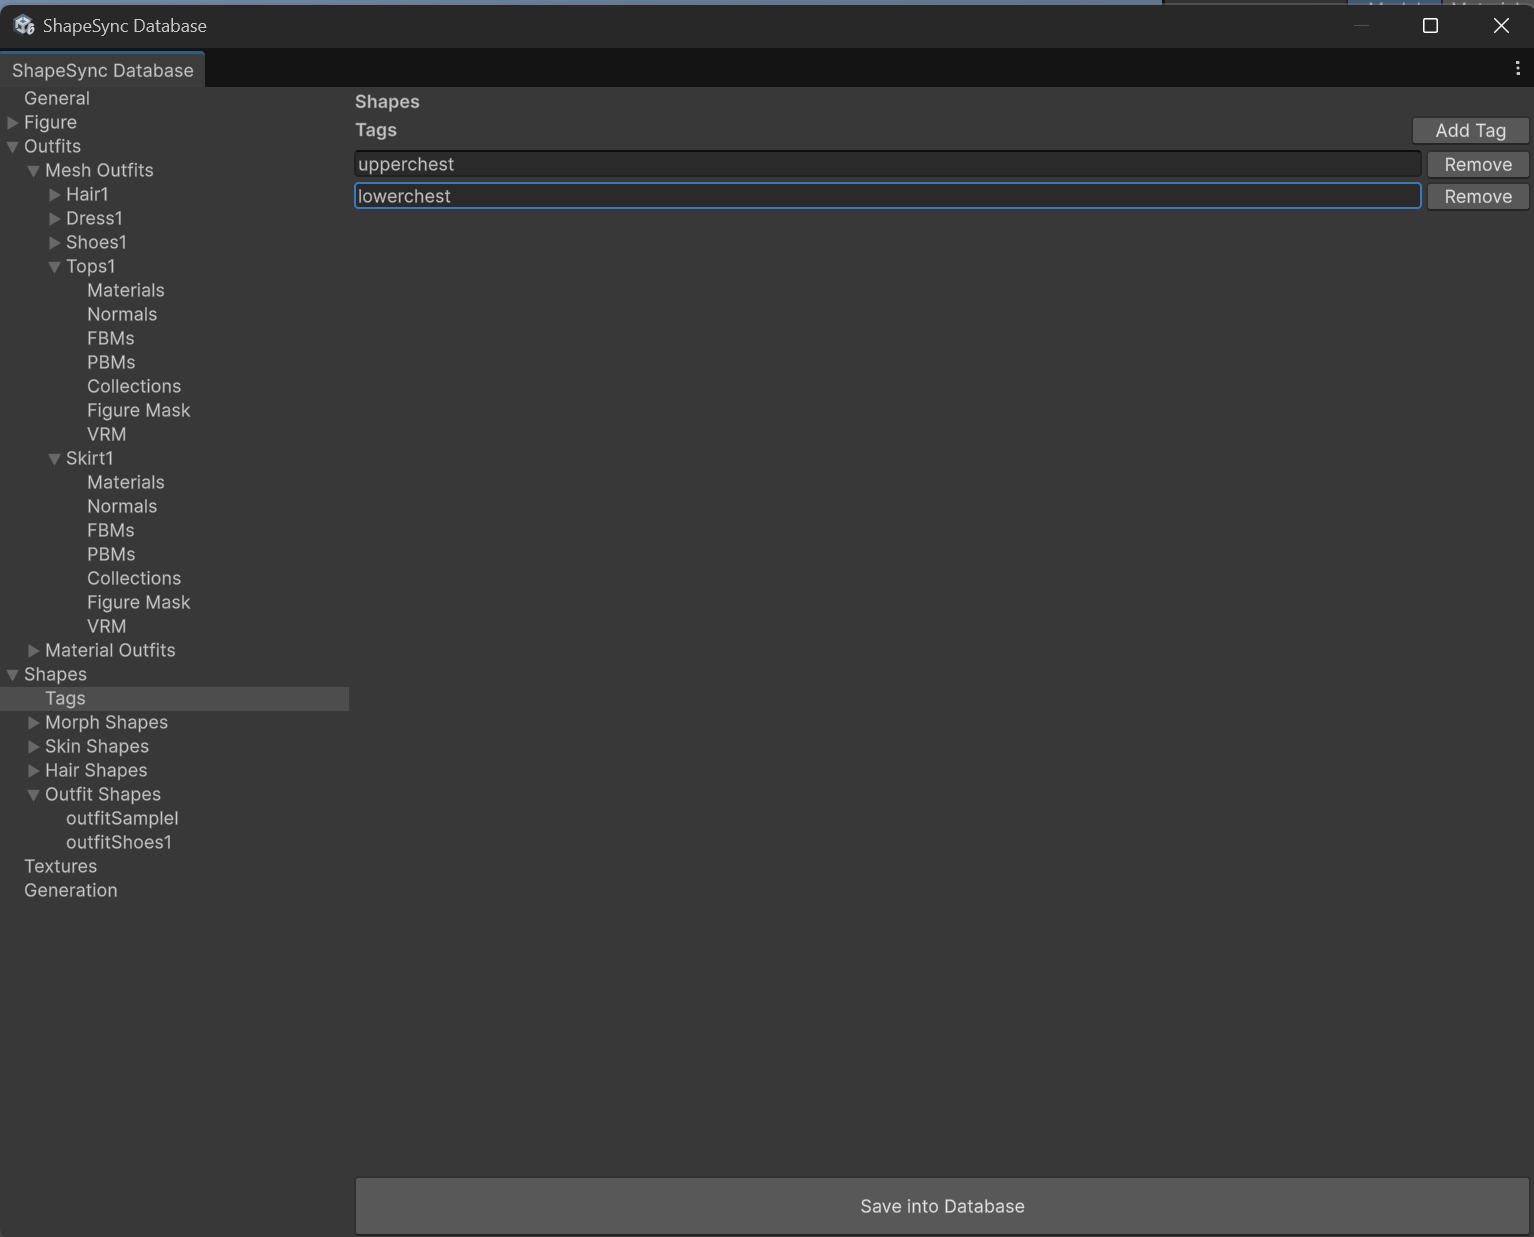 ▲Figure 10-12: Creating upperchest and lowerchest in Shapes > Tags and saving with Save into Database
3.2 Creating/Updating Outfit Shapes and Assigning Priority / Tags
Configure the created tags and Priority values for each Outfit Shape.
- New creation of
outfitTops1:- On the
Shapesroot screen, enterShape Id: outfitTops1andShape Name: outfitTops1, then clickCreate Outfit Shape Template. Priority: Enter10.Tags: Selectupperchestfrom the popup and clickAdd Tag.Parts: ClickAdd Meshand selectTops1from theOutfit Meshpopup.- Click
Save to Databaseat the bottom of the screen.
- On the
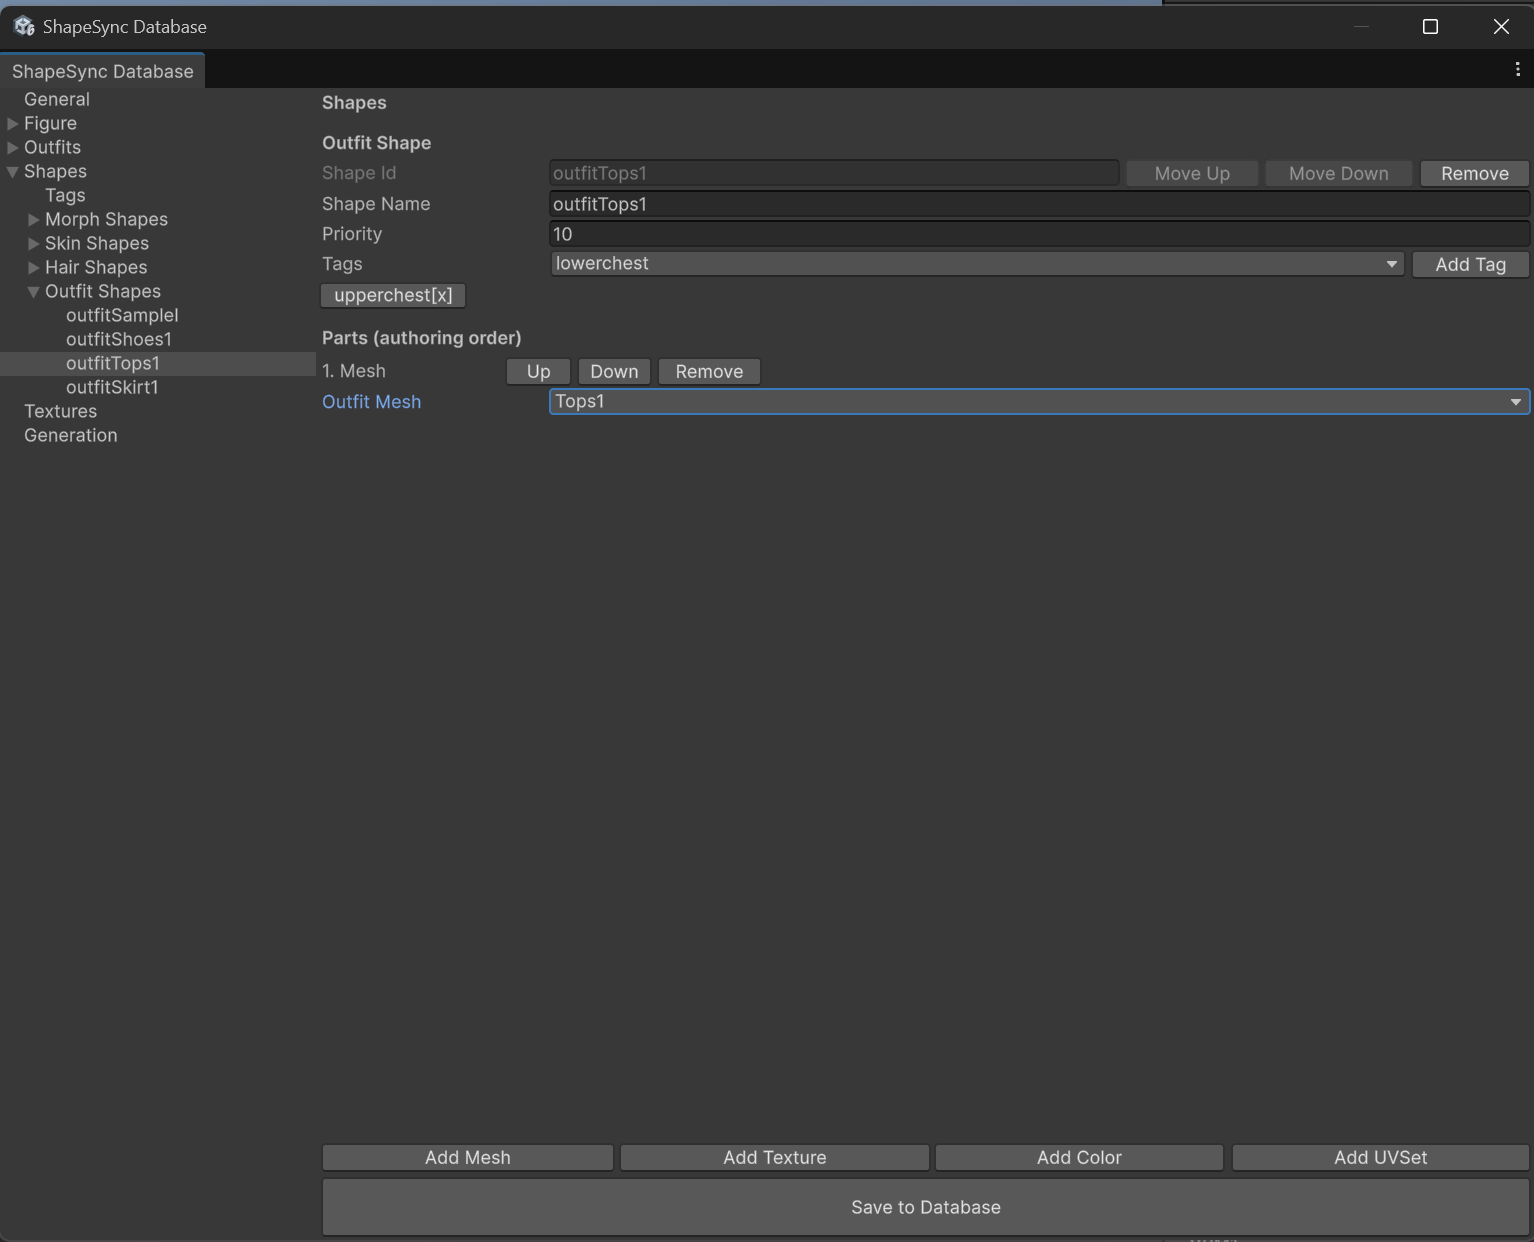 ▲Figure 10-13-1: Priority (10) and Tag (upperchest) configuration for Shapes > Outfit Shapes > outfitTops1
- New creation of
outfitSkirt1:- On the
Shapesroot screen, enterShape Id: outfitSkirt1andShape Name: outfitSkirt1, then clickCreate Outfit Shape Template. Priority: Enter15.Tags: Selectlowerchestfrom the popup and clickAdd Tag.Parts: ClickAdd Meshand selectSkirt1from theOutfit Meshpopup.- Click
Save to Databaseat the bottom of the screen.
- On the
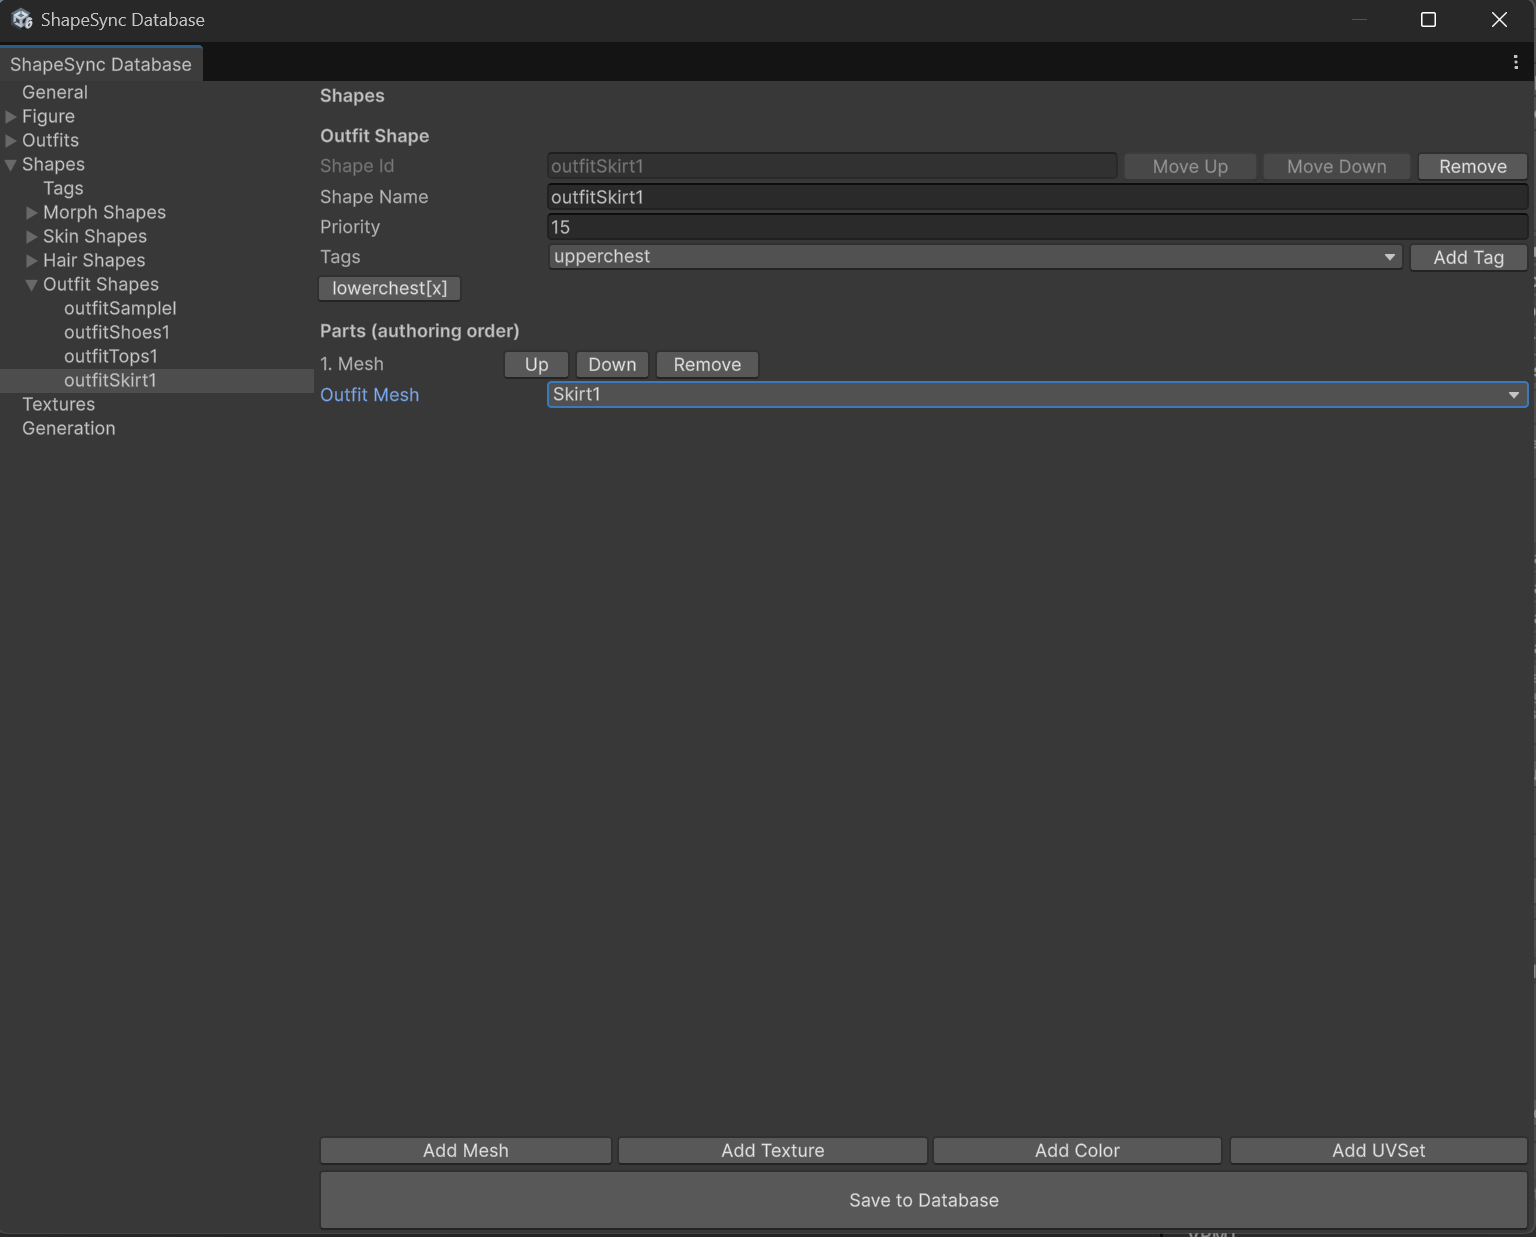 ▲Figure 10-13-2: Priority (15) and Tag (lowerchest) configuration for Shapes > Outfit Shapes > outfitSkirt1
- Overwrite update of
outfitSampleI(for existing Dress):- Select the existing
outfitSampleIfromOutfit Shapesin the left TreeView (Do not create a new one). Priority: Enter20.Tags: Add bothupperchestandlowerchestfrom the popup (covering both upper and lower body regions).- Click
Save to Databaseat the bottom of the screen.
- Select the existing
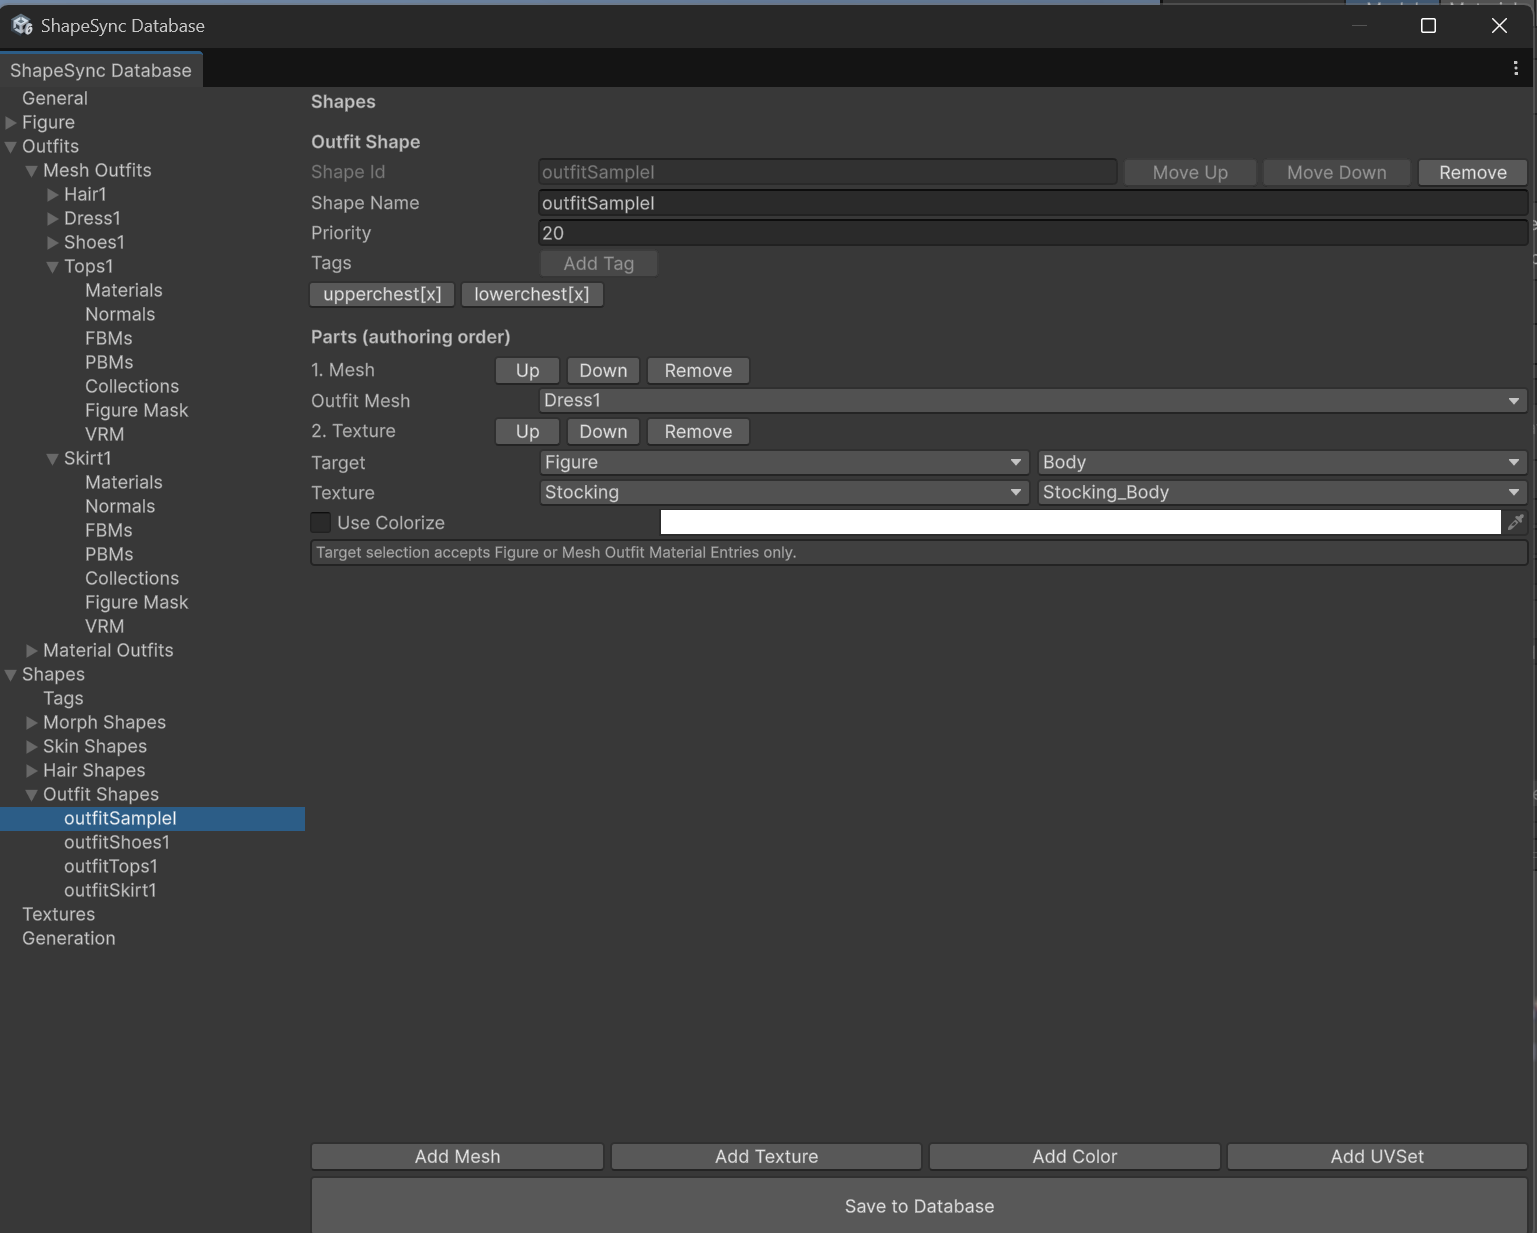 ▲Figure 10-13-3: Overwrite update of Priority (20) and both Tags (upperchest, lowerchest) for existing outfitSampleI
| Shape Id | Priority | Tags | Linked Mesh Outfit | Role |
|---|---|---|---|---|
outfitTops1 |
10 |
upperchest |
Tops1 |
Upper-body separate outfit |
outfitSkirt1 |
15 |
lowerchest |
Skirt1 |
Lower-body separate outfit |
outfitSampleI |
20 |
upperchest, lowerchest |
Dress1 |
Integrated one-piece dress (highest priority) |
3.3 Re-Executing Generate in Generation
- Select the
Generationsection from the left TreeView. - Click the
Generatebutton at the bottom of the screen, select the output root folder (Assets/ShapeSync/Generated), and execute regeneration.
4. Verifying Priority / Tag Exclusive Control in Play Mode
4.1 Exclusive Display with 3 Templates Registered Simultaneously (Dress1 Display)
- Select the Figure (
BasicFemale) placed in the Scene. - In the
Template Listof Figure’sShapeDirectorcomponent, register the following Templates:morphSampleIskinSampleIhairSampleIoutfitSkirt1outfitTops1outfitSampleI(Dress)
- Press Unity’s Play button to enter Play Mode.
- Checking exclusive display: Although 3 outfit templates (Tops1, Skirt1, Dress1) are logically registered in the
Template List, because Priority20Dress1(outfitSampleI) exclusively dominates bothupperchestandlowerchesttags, confirm that onlyDress1is displayed on screen.
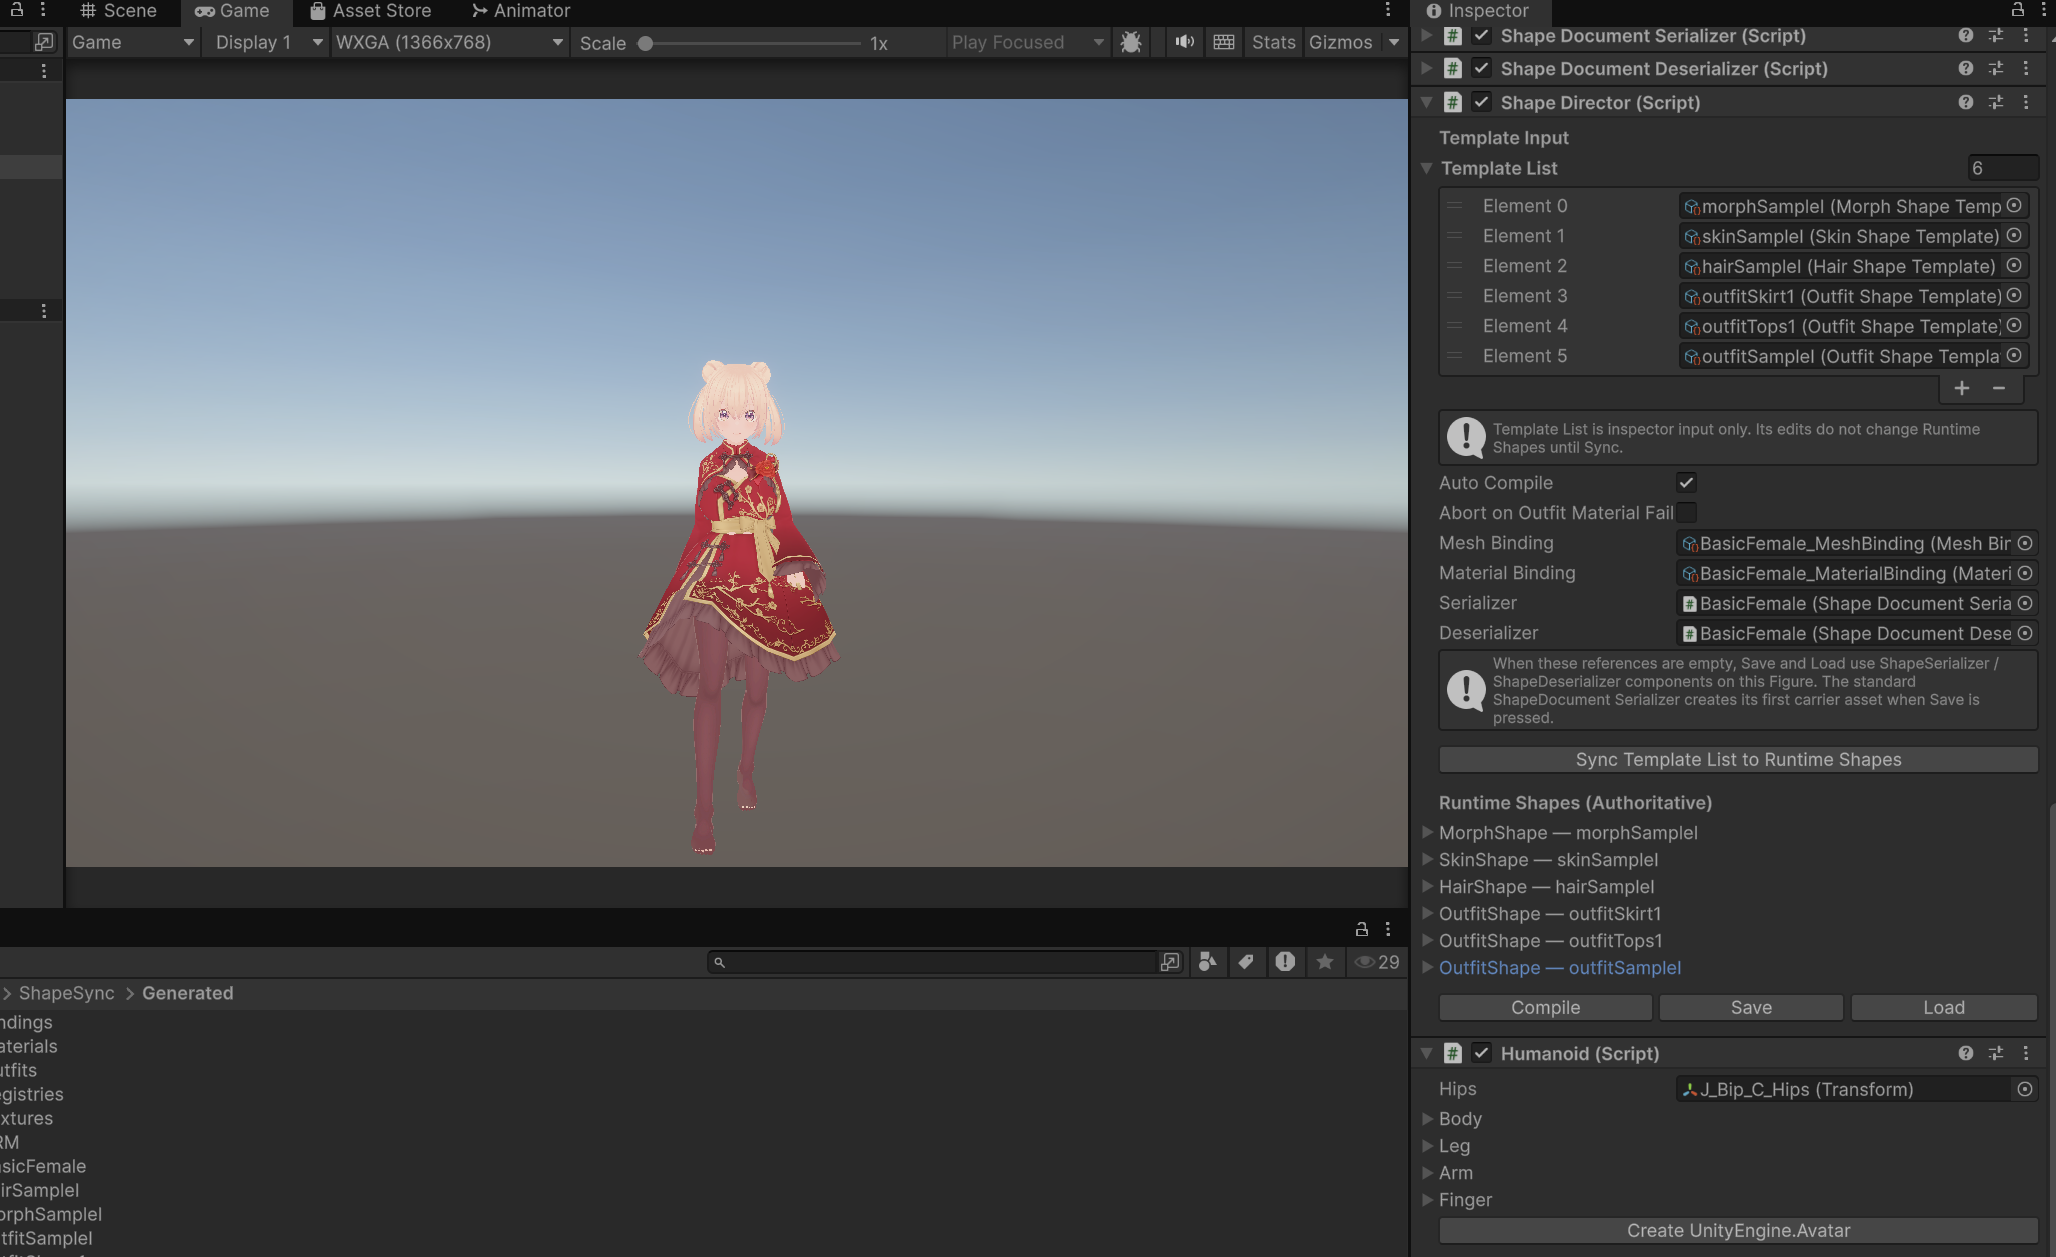 ▲Figure 10-14: Play Mode screen showing only Priority 20 Dress1 exclusively displayed when 3 outfit Templates are registered
4.2 Removing Dress to Display Separate Outfits (Tops1 + Skirt1 Display)
- During Play Mode, in
Runtime Shapes (Authoritative)of theShapeDirectorInspector, expandOutfitShape — outfitSampleIand click theRemove Shapebutton.
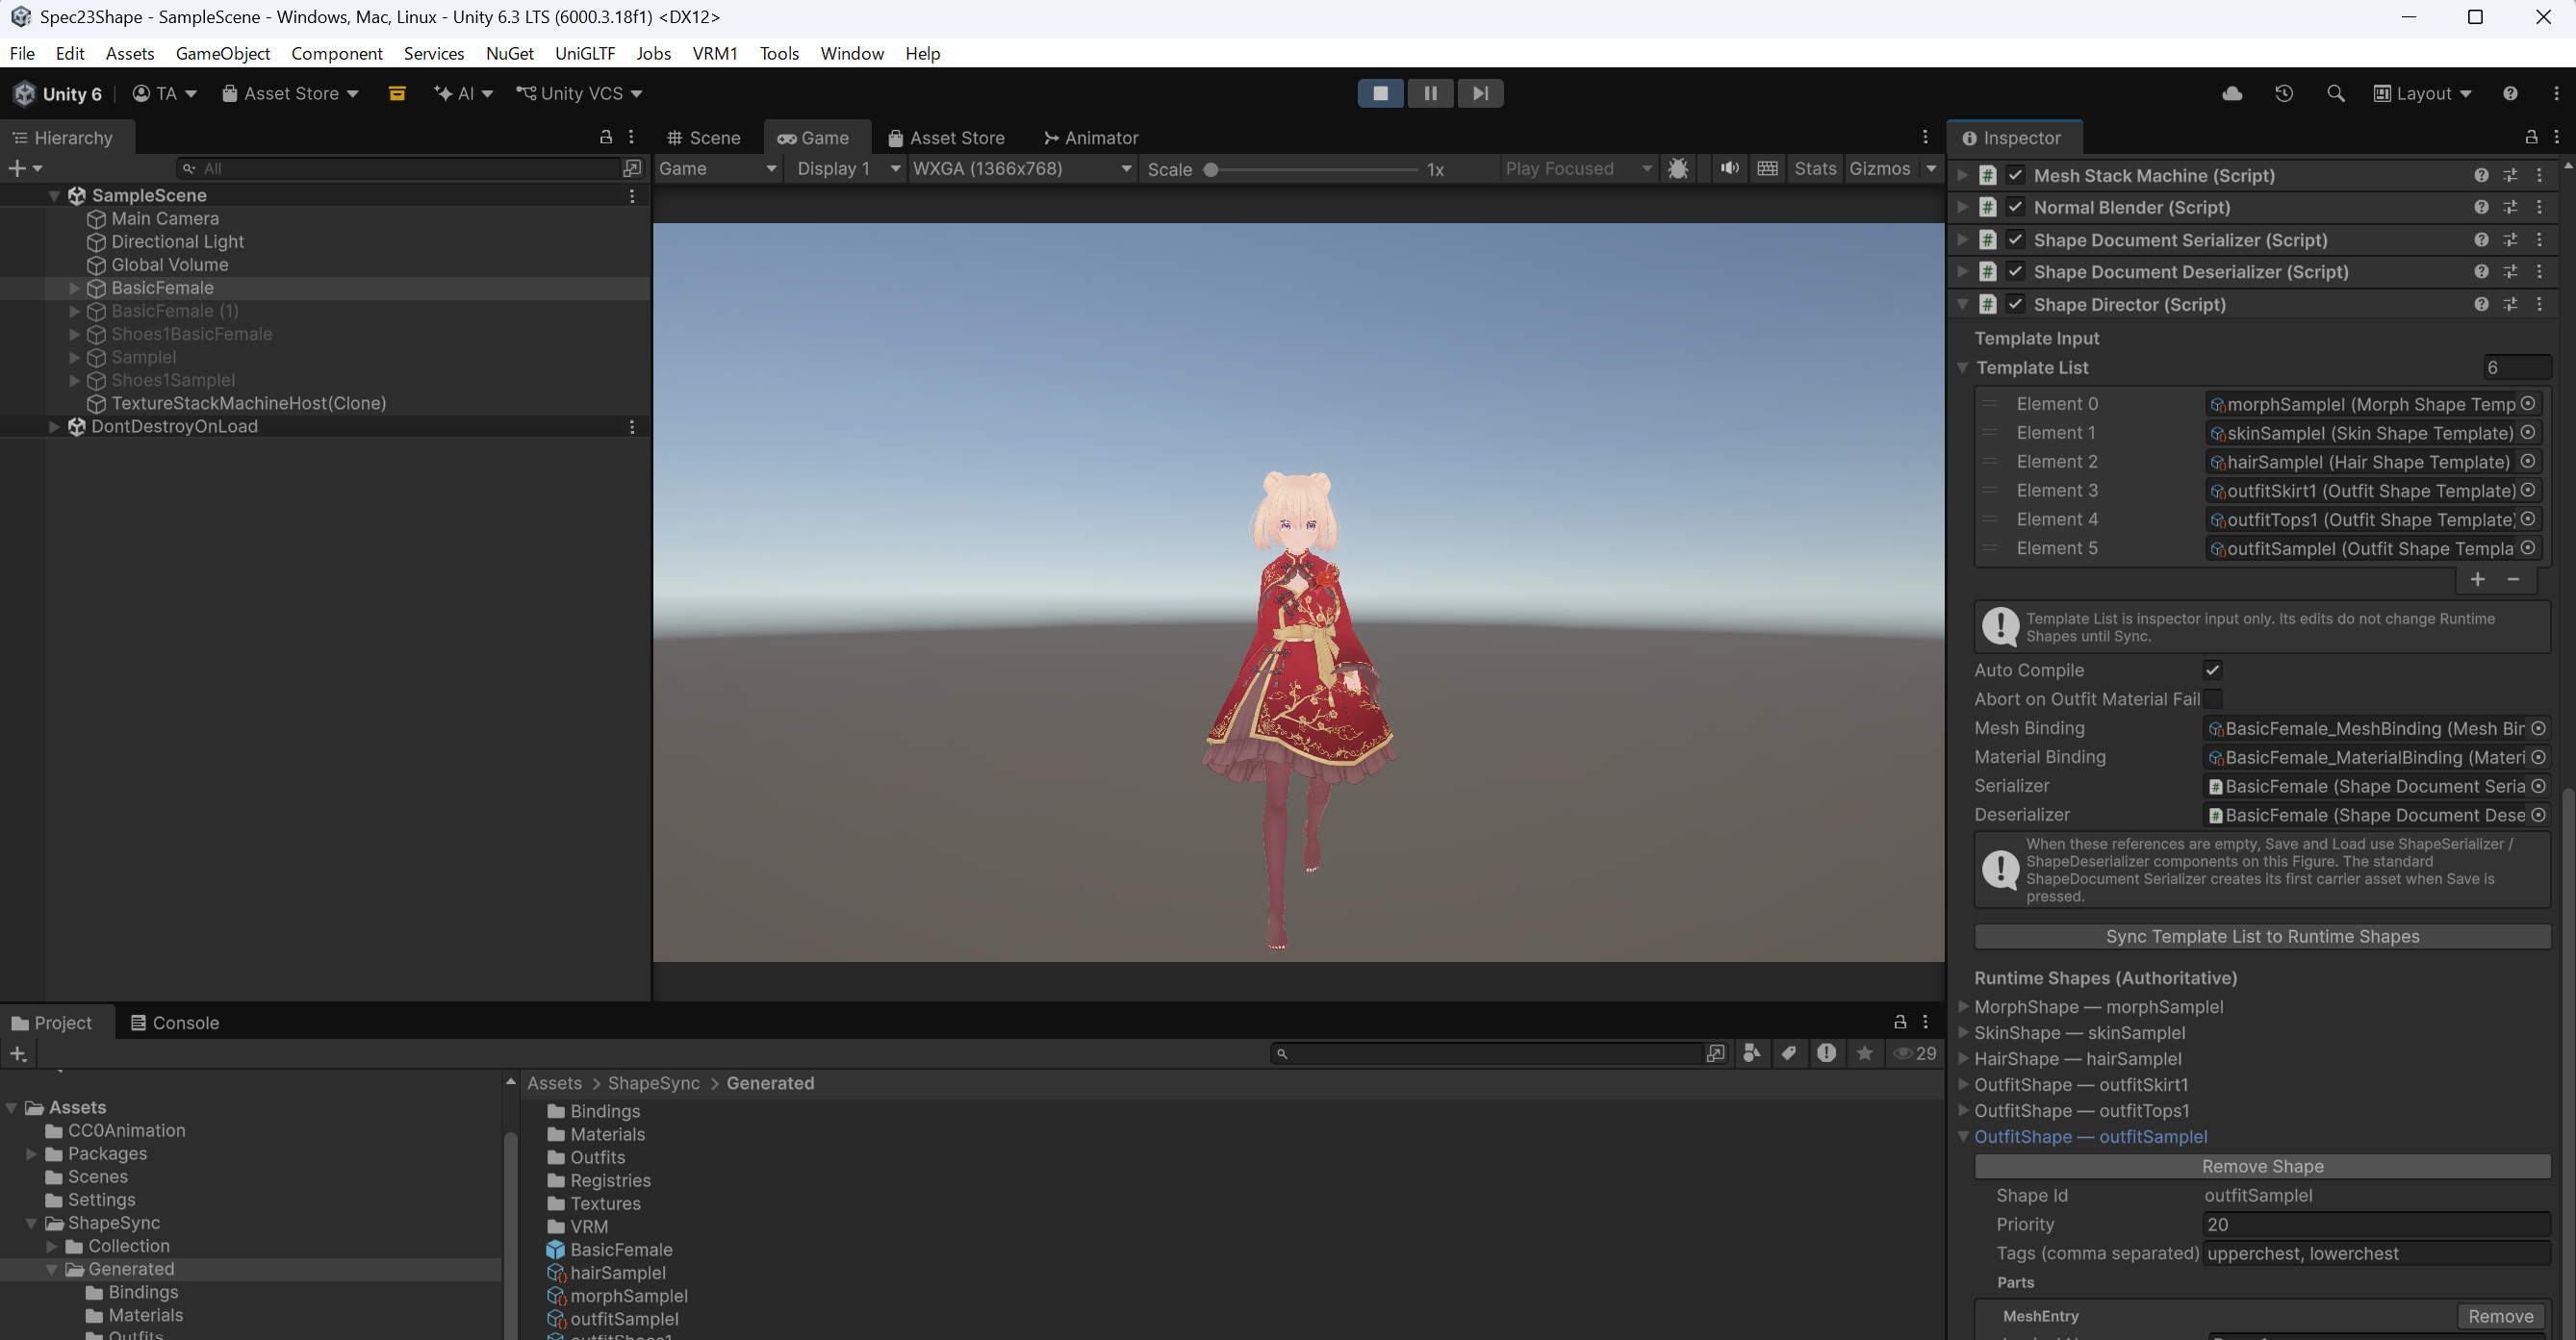 ▲Figure 10-15-1: Clicking Remove Shape from outfitSampleI in Runtime Shapes
- Checking separate outfit display: Dress exclusion is lifted, and second-priority
Tops1(Priority 10) andSkirt1(Priority 15) immediately appear on screen, confirming display as a combined separate outfit (sailor-suit style top + pleated skirt).
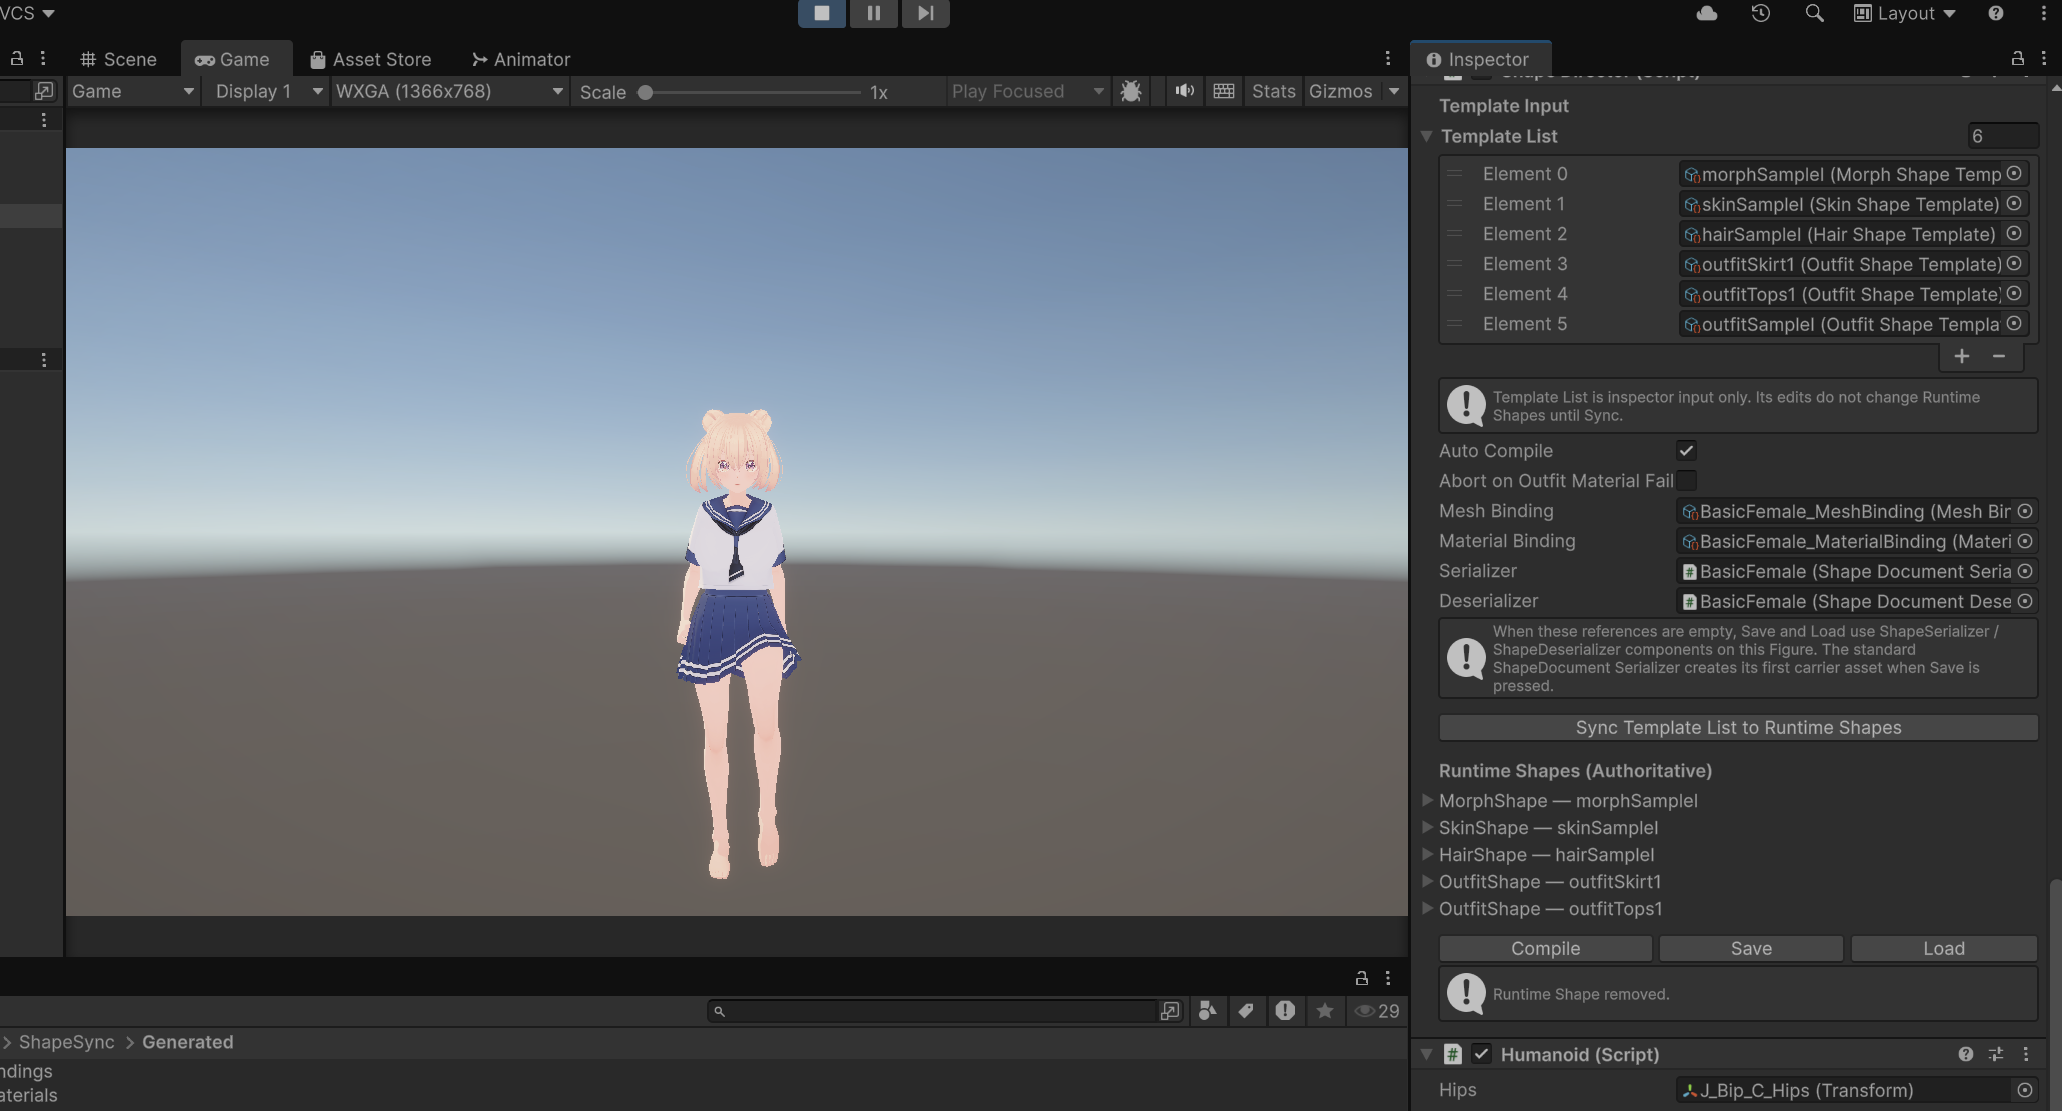 ▲Figure 10-15-2: Play Mode screen where Tops1 + Skirt1 are immediately displayed after removing Dress
5. Saving Documents (Document A / Document B)
5.1 Saving Document A (Tops + Skirt State)
- Confirm the
Tops1+Skirt1wearing state (Runtime Shapes). - Click the
Savebutton at the bottom of Figure’sShapeDirectorInspector. - When the
Save Shape Documentdialog appears, select the projectAssets/ShapeSyncfolder, enterShapeSyncDocumentAfor the file name, and clickSave.
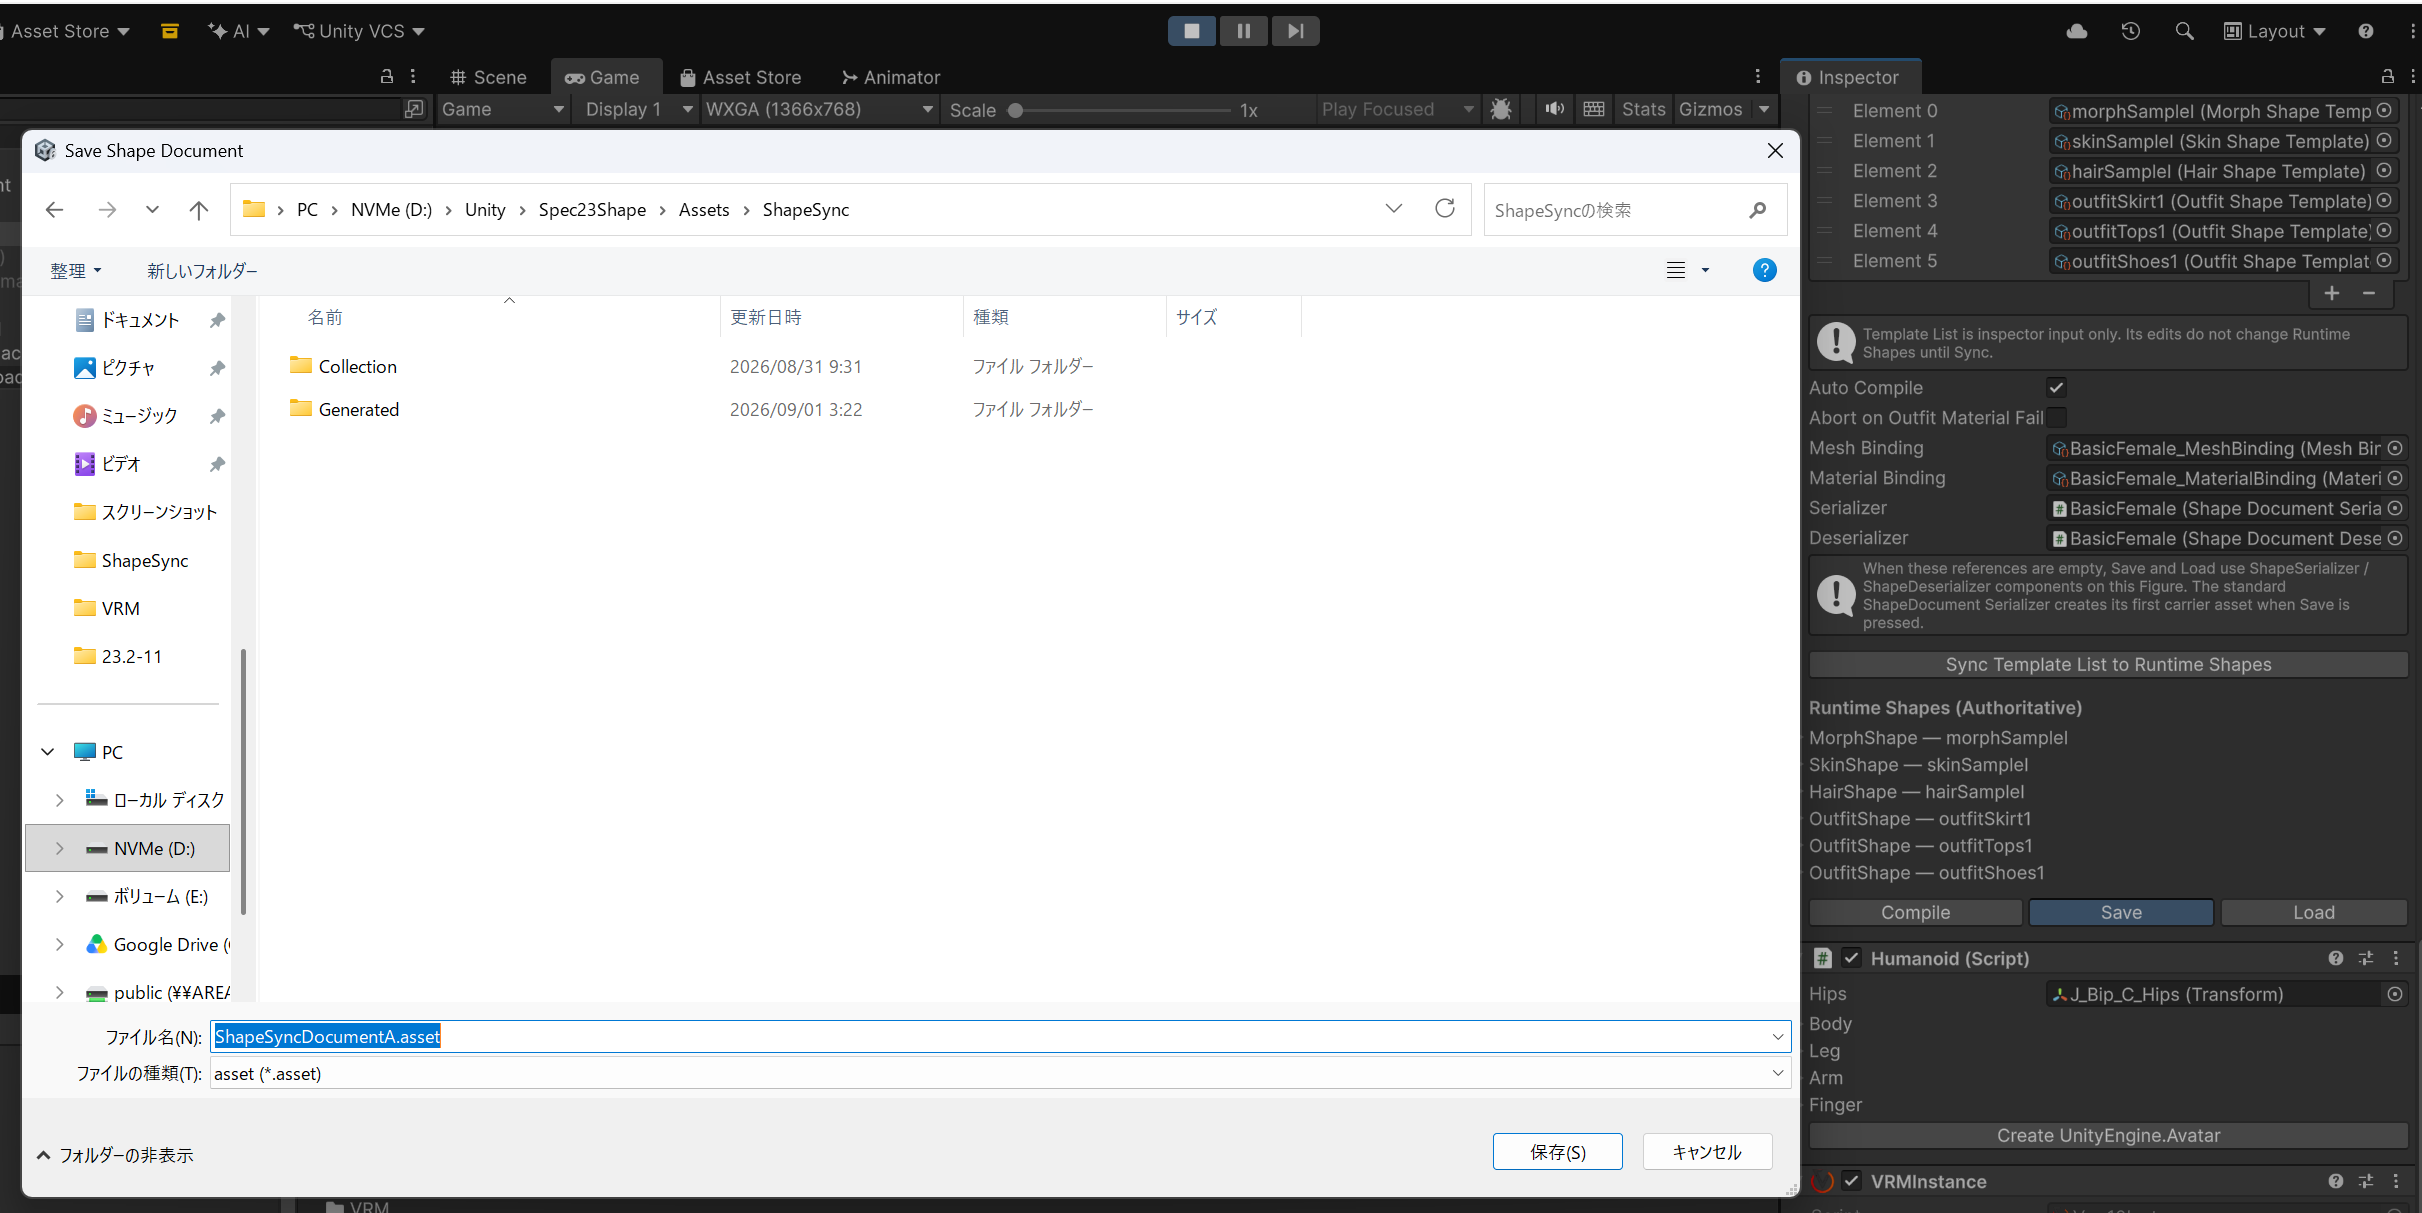 ▲Figure 10-16-1: Saving as ShapeSyncDocumentA in Assets/ShapeSync via Save Shape Document dialog
- In Unity’s Project view, confirm that
ShapeSyncDocumentA(.asset) is created directly underAssets > ShapeSync.
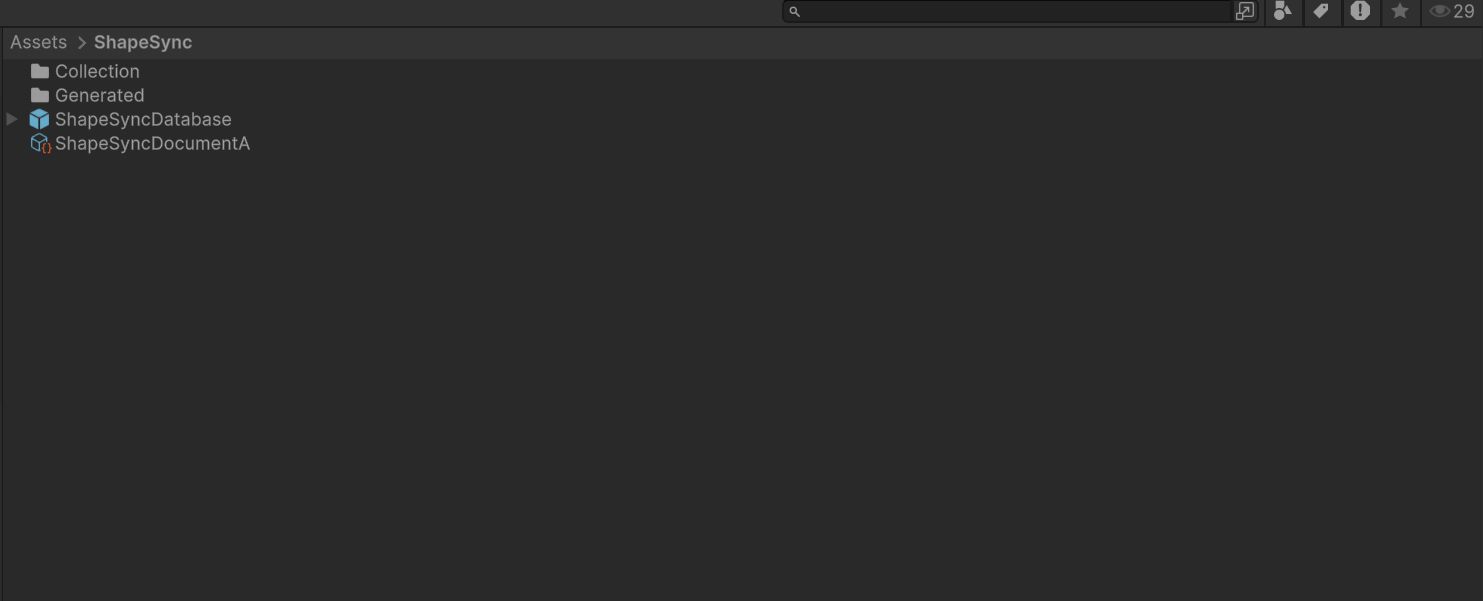 ▲Figure 10-16-2: Project view showing ShapeSyncDocumentA asset saved directly under Assets/ShapeSync
5.2 Saving Document B (Dress State)
- Re-apply
outfitSampleI(Dress) via Template List sync or equivalent to establish theDress1wearing state (Runtime Shapes). - Click the
Savebutton at the bottom of theShapeDirectorInspector. - Select the
Assets/ShapeSyncfolder, enterShapeSyncDocumentBfor the file name, and clickSave.
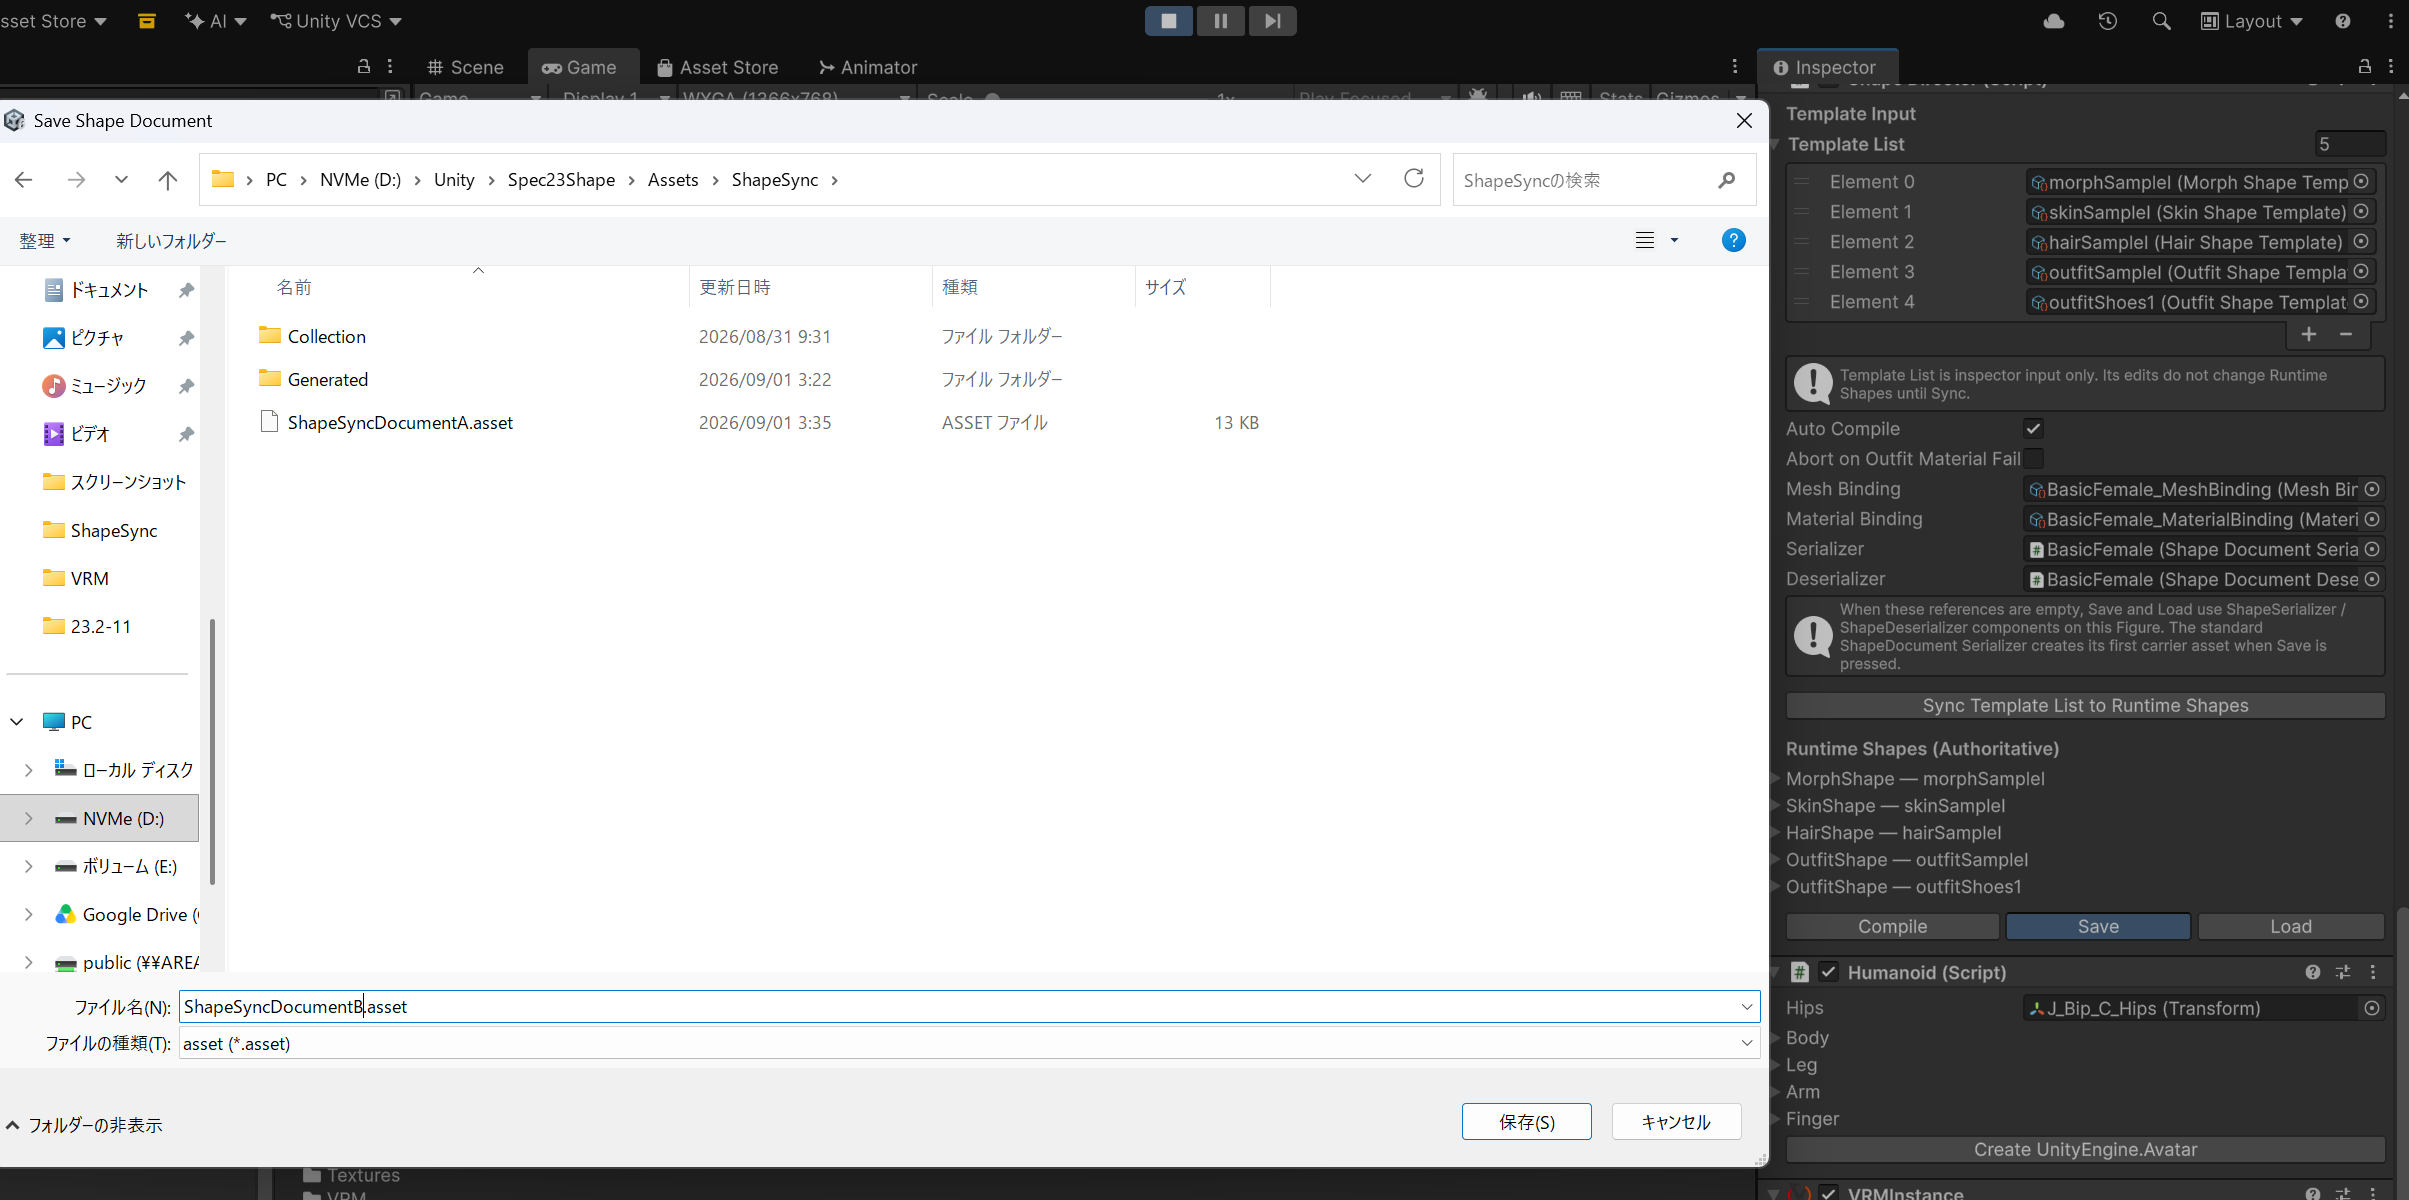 ▲Figure 10-17-1: Saving as ShapeSyncDocumentB in Assets/ShapeSync via Save Shape Document dialog
- In the Project view, confirm that
ShapeSyncDocumentBis additionally saved underAssets > ShapeSync.
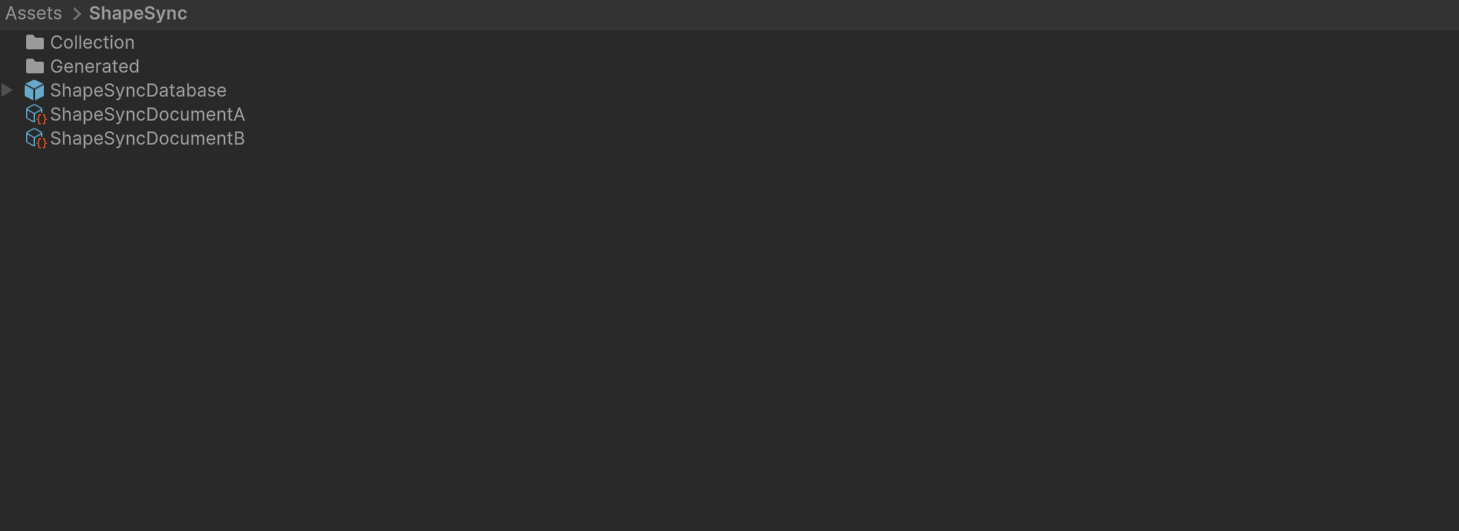 ▲Figure 10-17-2: Project view showing both Document A and Document B saved together under Assets/ShapeSync
6. Loading Document after Clearing All Templates (Load A / Load B)
Verify that the outfit state can be restored in one click using saved Documents.
6.1 Clearing All Templates from Template List
- Press Unity’s Play button to stop Play Mode (Because editing the Template List during Play Mode reverts upon stopping, perform deletion in Edit Mode).
- In Edit Mode, in the
Template Listof theShapeDirectorInspector, delete registered templates one by one to clear all (empty state). - Press Unity’s Play button again to start Play Mode.
6.2 Verifying Document A Loading
- Click the
Loadbutton at the bottom of theShapeDirectorInspector. - In the
Load Shape Documentdialog, selectAssets/ShapeSync/ShapeSyncDocumentA.assetand clickOpen.
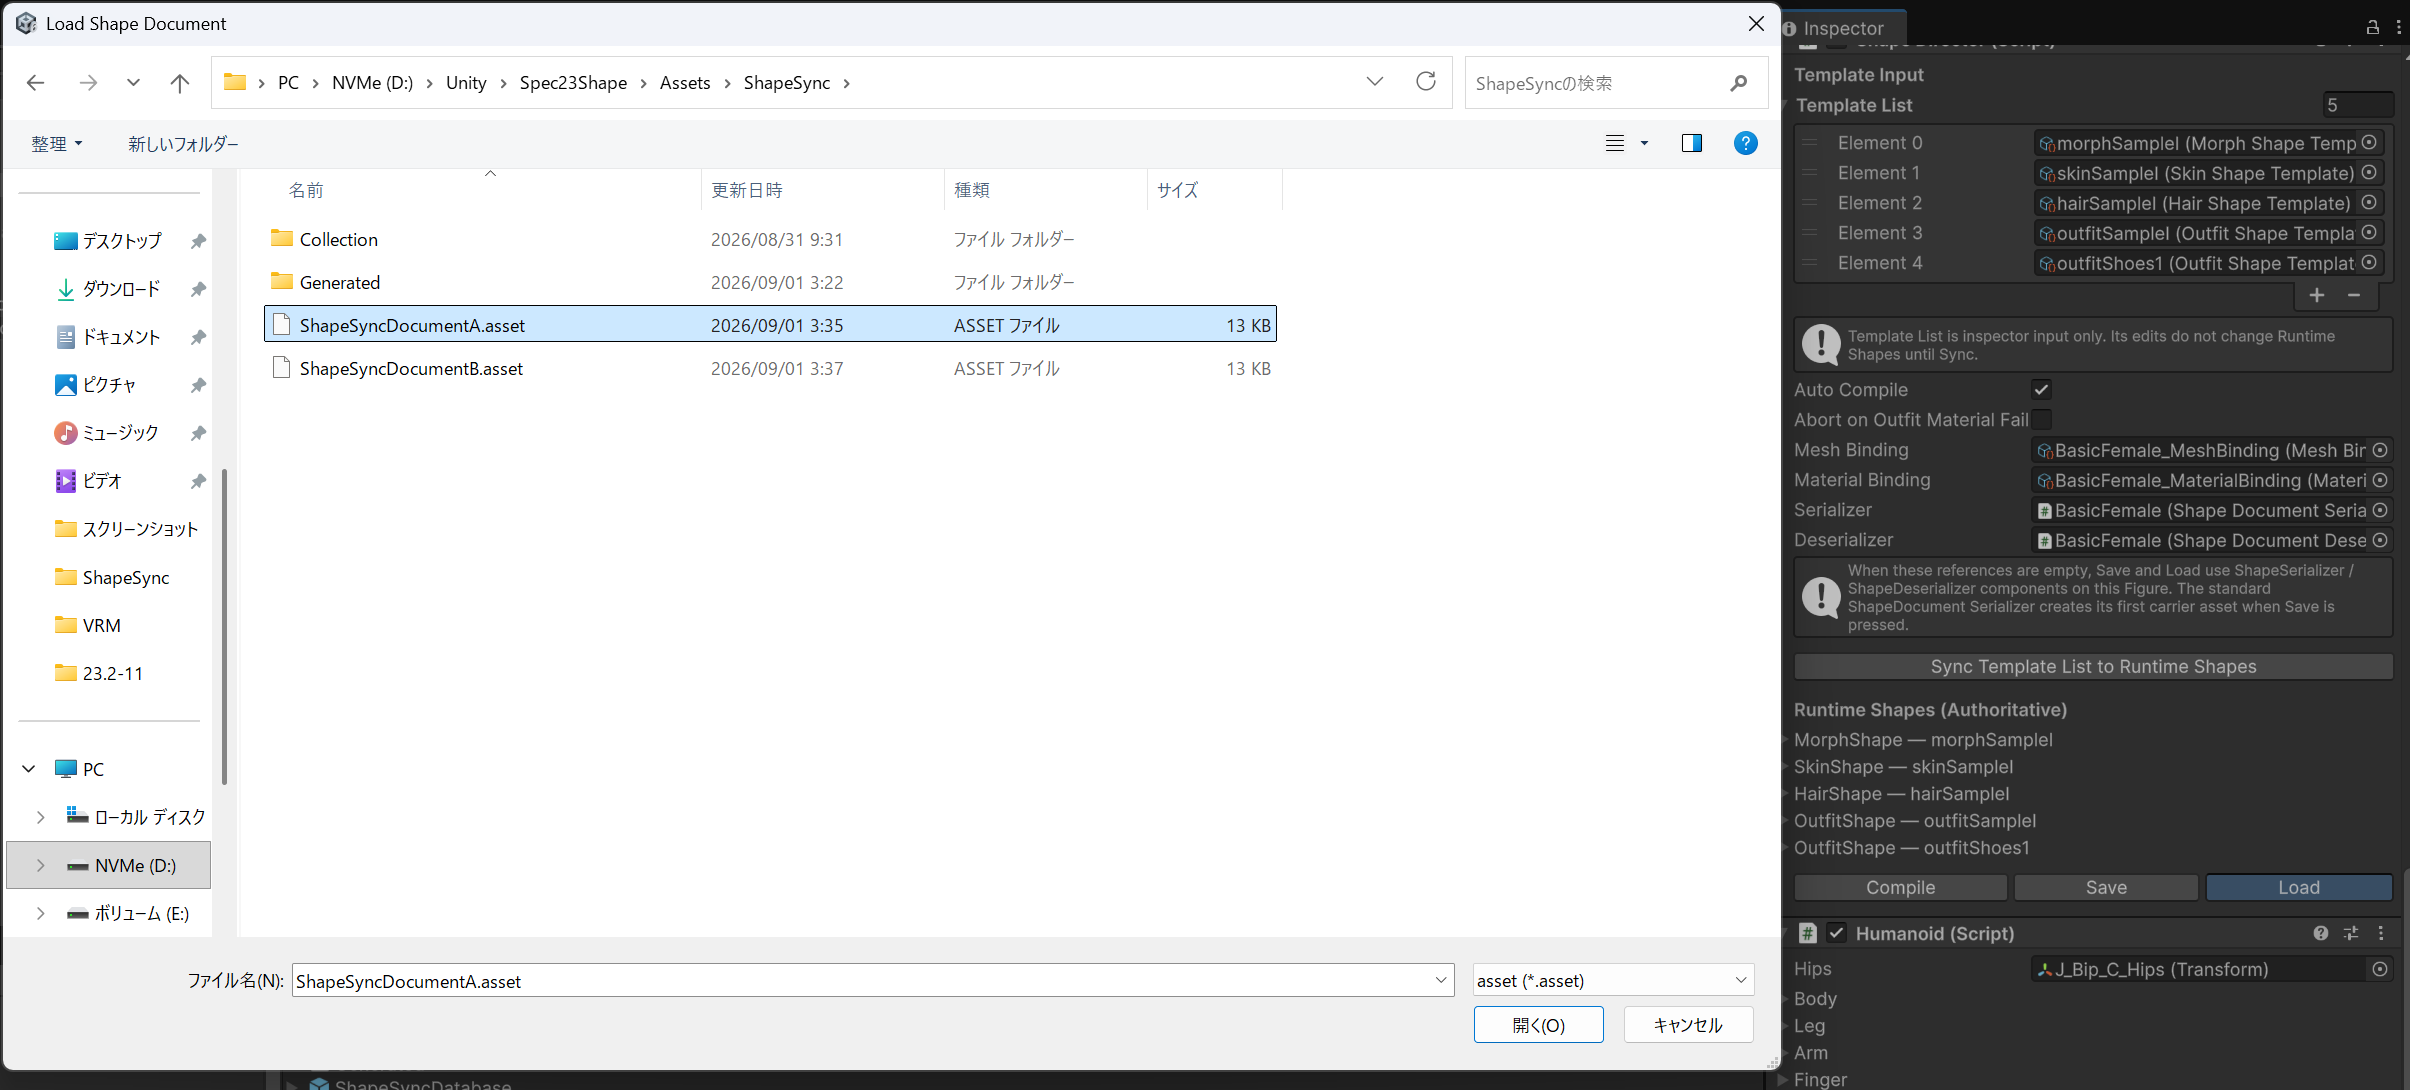 ▲Figure 10-18-1: Selecting ShapeSyncDocumentA.asset in Load Shape Document dialog
- Verifying restoration: Runtime Shapes are immediately updated, confirming that the character is restored to the
Tops1+Skirt1(separate outfit) state.
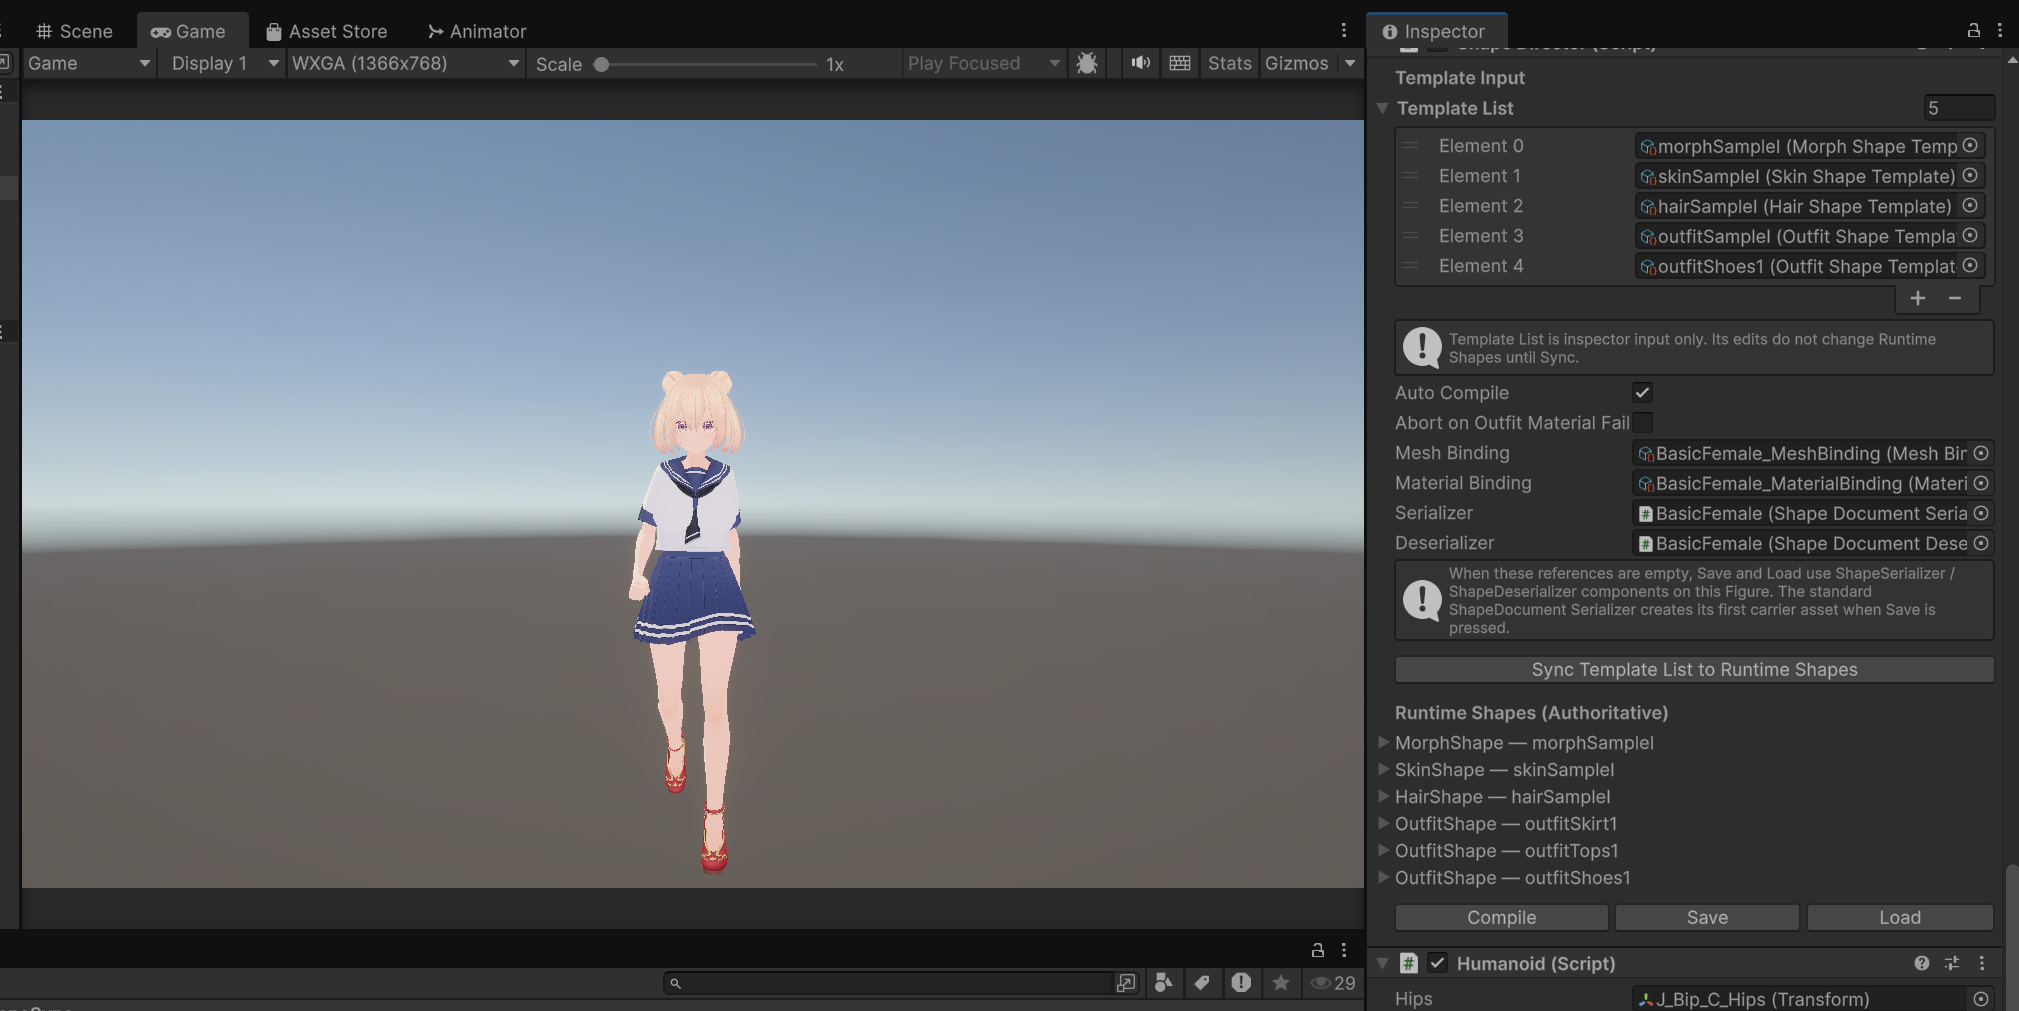 ▲Figure 10-18-2: Play Mode screen restored to Tops1 + Skirt1 state upon loading Document A
6.3 Verifying Document B Loading
- Next, click the
Loadbutton at the bottom of theShapeDirectorInspector. - In the
Load Shape Documentdialog, selectAssets/ShapeSync/ShapeSyncDocumentB.assetand clickOpen.
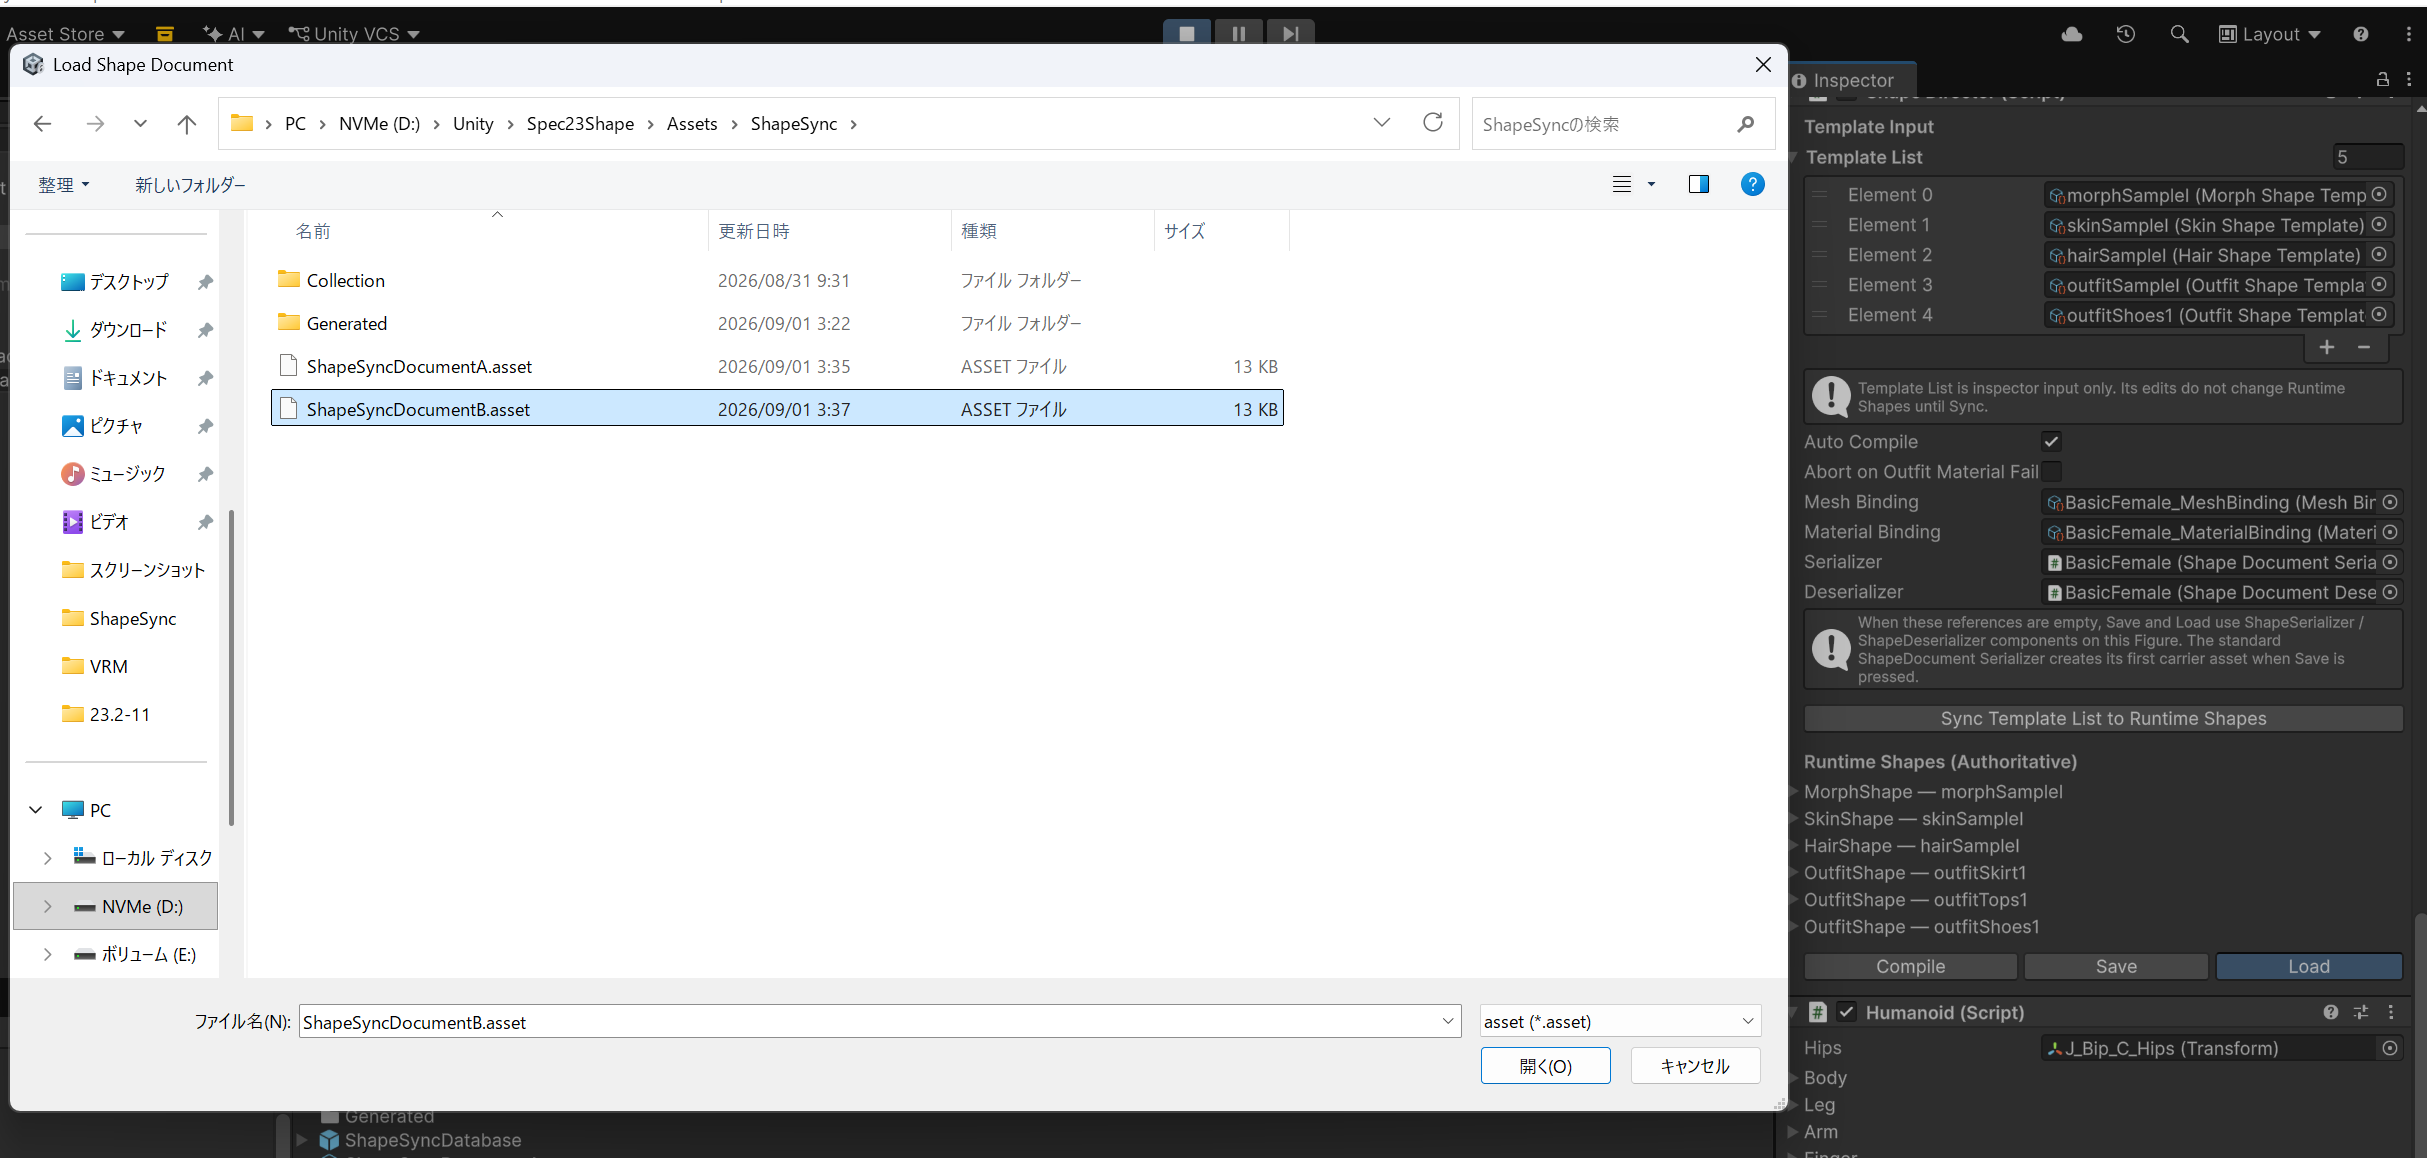 ▲Figure 10-19-1: Selecting ShapeSyncDocumentB.asset in Load Shape Document dialog
- Verifying restoration: Runtime Shapes immediately switch, confirming that the character is restored to the
Dress1(one-piece dress) state.
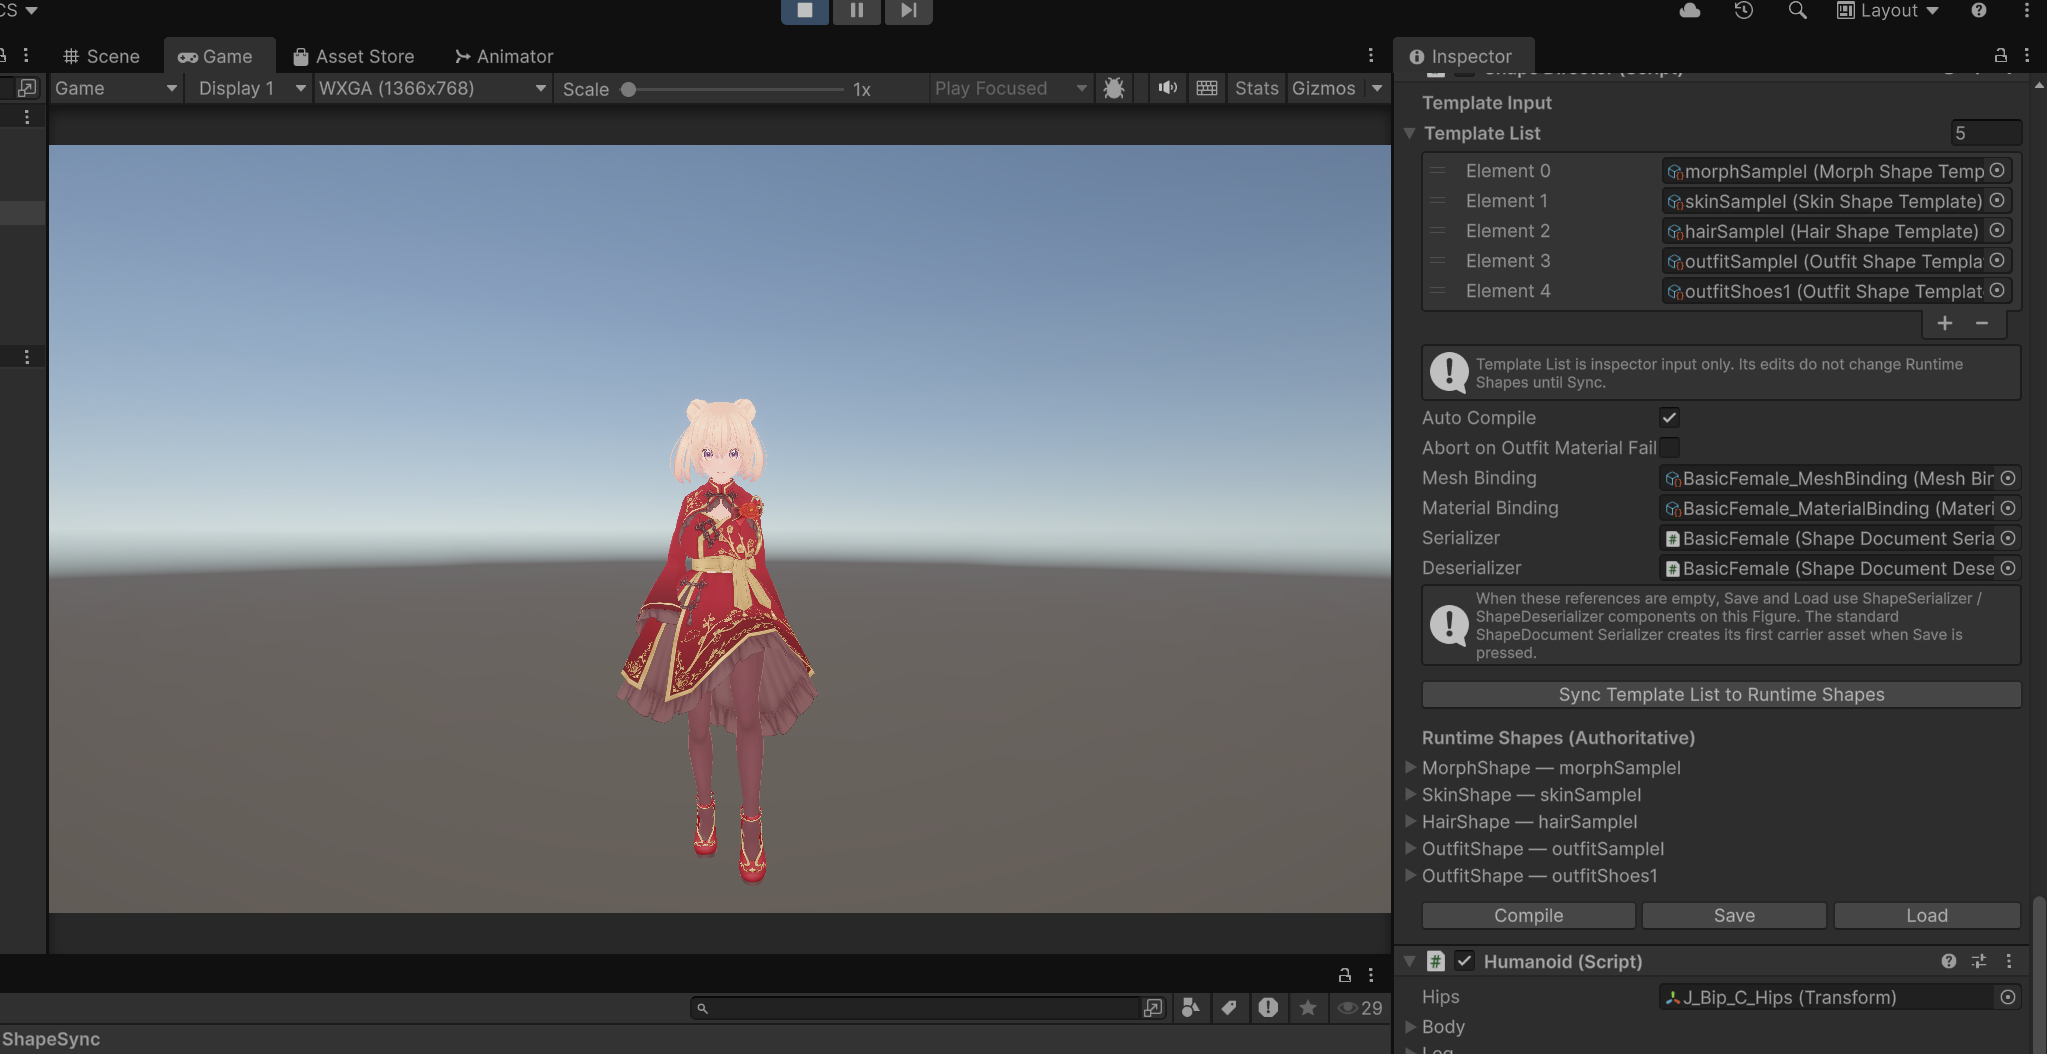 ▲Figure 10-19-2: Play Mode screen switched and restored to Dress1 state upon loading Document B
7. Common Issues and Solutions (Troubleshooting)
Q1. Only Dress is displayed even though both Tops and Skirt are registered
- Cause:
This is not a defect, but normal exclusive behavior via Tag and Priority. Because
outfitSampleI(Dress) has Priority20and bothupperchestandlowerchestTags,outfitTops1with Priority10andoutfitSkirt1with Priority15are automatically excluded (hidden). - Solution:
If you want to undress the character from the Dress, Remove
outfitSampleIin the Director.
Q2. Deleting Template List reverted after stopping Play Mode
- Cause: Due to Unity specifications, Inspector list modifications made during Play Mode reset to their original state upon stopping Play Mode.
- Solution: When clearing all templates from the Template List, be sure to stop Play Mode first and delete them after returning to Edit Mode.
Q3. Appearance does not change after Loading Document
- Cause:
- When saving the Document, the intended wearing state (Runtime Shapes) may not have been active.
ShapeDirectorsettings or Mesh Binding asset references may have become disconnected.
- Solution:
Visually confirm that the desired Outfit is correctly displayed during Play Mode before pressing the
Savebutton to overwrite-save the Document, then tryLoadagain.
← Back to Tutorial Index | ← Chapter 9: Advanced VRM Integration (Expression and Physics Configuration and Verification)